Display an Are You Sure? Warning Message
In some cases, you may want to prompt the user to confirm that he or she really wants to continue before performing an action. For example, say the application includes a button to change the status of the document or to send an email. This routine illustrates how to prompt the user with a message such as "Are you sure?" before continuing with the transaction.
How It Works
The @Prompt function can be used to return a trUE or FALSE value. When combined with the @IF statement, you can determine what action (if any) should be taken based on the user's response to the question.
Implementation
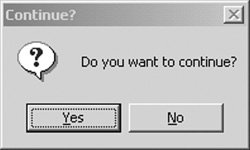
To implement this solution, create an action button on a form, view, or page. Insert the following code. Replace the @Prompt statements with commands to be issued based on the Yes or No response (see Figure 14.19). For example, if the user selects Yes, issue the @MailSend command.
result := @Prompt([YesNo]; "Continue?"; "Do you want to continue?");
@If (result = @True;
 @Prompt([Ok]; "Result"; "You selected YES.");
 @Prompt([Ok]; "Result"; "You selected NO."));
Figure 14.19. Example "Do you want to continue?" prompt
Note
A similar implementation can also be achieved using LotusScript. Refer to Chapter 13 for additional information pertaining to this subject.
An Introduction to the Lotus Domino Tool Suite
Getting Started with Designer
- Getting Started with Designer
- Installing the Designer Client
- Launching the Designer Client
- Creating My First Notes Database
- Links to developerWorks
Navigating the Domino Designer Workspace
- Navigating the Domino Designer Workspace
- An Introduction to Designer
- The Design Pane
- The Work Pane
- The Object Pane
- The Programmers Pane
- The Action Pane
- Design Tabs
- Language Selector
- Client and Browser Selector
- Status Bar
- Links to developerWorks
Domino Design Elements
- Domino Design Elements
- Building Blocks of a Notes Database
- Naming Design Elements
- Working with Forms
- Working with Fields
- Working with Layout Regions
- Working with Sections
- Working with Buttons
- Working with Views
- Working with Application Menus
- Working with Folders
- Working with Framesets
- Working with Pages
- Working with Shared Code
- Working with Shared Resources
- Links to developerWorks
An Introduction to Formula Language
- An Introduction to Formula Language
- What Is Formula Language?
- What Is a Formula?
- Working with Variables
- Formula Language Keywords
- Working with Operators
- General Syntax Rules
- What Are Functions and Commands?
- What Are Commands?
- Working with Text Strings
- Working with Conditional Branching
- Working with Iterative Loops
- Working with Lookup Functions
- Working with Dates
- Working with Lists
- Working with User Prompts
- Links to developerWorks
An Introduction to LotusScript
- An Introduction to LotusScript
- Introduction to Object-Oriented Programming
- LotusScript Classes
- Keywords
- Variables
- Constants
- Operators
- Comments
- Defining Variables and Constants
- Defining Object Reference Variables
- Working with Conditional Branching
- Working with Iterative Loops
- Communicating with Users
- Working with Arrays
- Using Formula Language in LotusScript Code
- Compiling LotusScript Code
- Links to developerWorks
Fundamentals of a Notes Application
- Fundamentals of a Notes Application
- The Five Primary Application Types
- The Application Development Life Cycle
- Elements of a Project Plan
- Elements of a Project Schedule
- Questions to Ask When Designing a Database
- Designing a Notes Application
- Links to developerWorks
Calendar Applications
- Calendar Applications
- Application Architecture
- Managing Recurring Events Using Single Documents
- Managing Recurring Events Using Multiple Documents
- Project A: Build an Event Calendar
- Project B: Build a Conference Room Reservation System
- Links to developerWorks
Collaborative Applications
- Collaborative Applications
- Project A: Build a Discussion Forum
- Project B: Build a Project Control Notebook
- Links to developerWorks
Reference Library Applications
- Reference Library Applications
- Project A: Build a Connection Document Database
- Project B: Build a Spreadsheet Generator
Workflow Applications
- Workflow Applications
- Defining a Workflow Application
- Project: Building a Workflow Database
- Links to developerWorks
Web Applications
- Web Applications
- Defining a Web Application
- Project: Building a Domino Web Site
- Security
- Troubleshooting
- Links to developerWorks
Design Enhancements Using LotusScript
- Design Enhancements Using LotusScript
- Custom LotusScript Functions and Routines
- Compare Two Dates
- Check for an Element in an Array
- Replace an Element in an Array
- Remove a Character from a String
- Remove an Element from an Array
- Compare Two Arrays
- Working with Dynamic Arrays
- Create a Custom Popup Dialog Box
- Refresh a Document from the User Interface
- Search for a Document
- Working with Dates and Times
- Compute the Day of the Week
- How to Reference $ Fields
- How to Set the ReturnReceipt for LotusScript-Generated Email
- Add Field Validation to a Form
- Display an Are You Sure? Message
- Format a Users Name
- Automatically Update a History Field When a Document Changes
- Prompt the User to Describe Document Changes and Update the History Log
- Create a Unique Document Record Number
- Limit the Ability to Create Documents on a Local Database
- How to Zero Pad a Text Number
- How to Add Text to a Rich Text Object
- How to Attach a File to a Rich Text Object
- How to Format Text in a Rich Text Object
- Change Document to Edit Mode
- Obtain the Current Roles Assigned to a User
- Generate a Document in Another Database
- Generate a New Document by Duplicating an Existing Document
- Prompt in LotusScript
- Sending Email to Multiple Recipients Using LotusScript
- Add a View Icon and Mood Stamp to an Email
- Retrieve and Update NOTES.INI Environment Values
- Assign One Rich Text Object to Another Rich Text Object
- Add a Document, View, or Database Link to a Rich Text Field
- Create a Button to Add a Calendar Event
- Links to developerWorks
Design Enhancements Using Formula Language
- Design Enhancements Using Formula Language
- Formula Language Enhancements
- Compare Two Lists
- Expand and Collapse All Document Sections
- Expand and Collapse All View Categories
- Get the Current Day of the Week
- Get the Current Month of the Year
- Create a Formatted Date String
- Create an Attach File Button
- Display the Windows File Finder Dialog
- Create a New Document
- Create a Last Updated By Field
- Create a Last Modified On Date Stamp
- Format a Users Name
- Hide Text and Design Elements Based on a Users Role
- Working with @DBColumn
- Working with @DBLookup
- Parse a Text String
- How to Format Field Values Using Input Translation
- How to Add Field Validation
- Display an Are You Sure? Warning Message
- Generate Email Using Formula Language
- How to Sort a List of Values
View Enhancements
- View Enhancements
- Create a New Document by Double-Clicking on a Calendar Date
- Display Documents in a View by Year and Month
- Display an Icon in a View
- Retrieve All Views in a Database
- Retrieve All Columns in a View
- Retrieve All Columns for Each View in a Database
- How to Manage Conflict Documents
- Display All Documents by Form Name
- Disable the Ability to Paste Documents into a View
- Links to developerWorks
Sample Agents
- Sample Agents
- Agent Enhancements
- Simple Action Agent to Modify All Documents
- LotusScript Agent to Modify All Documents Containing a Specific Field Value
- Agent to Manually Generate an Email Report
- Schedule Agent to Send a Daily, Weekly, or Monthly Email Report
- Links to developerWorks
Miscellaneous Enhancements and Tips for Domino Databases
- Miscellaneous Enhancements
- Disable the Ability to Print, Copy, Cut, and Forward Documents
- Using Field Hints on a Form
- Using Static Popups to Display Help Messages
- How to Inherit Fields Between Forms
- Add an Icon to an Action Button
- Create a Custom Application Interface
- How to Set the Field Tab Order on a Form
- Domino Shortcut Keys
Data Management
- Data Management
- Importing Data
- Exporting Data
- Migrating Data
- Creating Tables
- Modifying Data Using a LotusScript Agent
- Archiving Data Using an Agent
- Refreshing All Documents
Security
- Security
- Access Control List Fundamentals
- Managing Database Access
- How to Enforce Consistent ACL Settings Across Replicas
- Encrypt the Database
- Managing Access to Views
- Managing Access to Forms and Documents
- Managing Access to Fields
- Managing Access to Source Code
- Hiding a Database Design
- Hiding a LotusScript Library
- How to Sign a Database
- How to Cross Certify Domino Servers
- Links to developerWorks
Application Deployment and Maintenance
- Application Deployment and Maintenance
- What Are Templates?
- Establishing a Development Environment
- Migrating a Database Design
- Preserve a Copy of the Database Design
- Deploying the Production Database
- The Importance of Database Backups
- Process Synopsis
- Links to developerWorks
Troubleshooting
- Troubleshooting
- Troubleshooting LotusScript
- Troubleshooting Agents
- Common Database Problems
- Where to Find Additional Assistance
- Links to developerWorks
Appendix A. Online Project Files and Sample Applications
- Appendix A. Online Project Files and Sample Applications
- About the Online Materials
- About the Companion Web Site
- About the Development Tools and Files Folder
- Installing a Notes Database
Appendix B. IBM® Lotus® Notes® and Domino®Whats Next?
EAN: 2147483647
Pages: 293
