| FileMaker now includes a set of three screens within the New Layout/Report dialog box that walks you through the process. For Windows users, this Wizard-style guide will be old hat. To create a new layout 1. | Switch to Layout mode ( in Windows, in Windows,  on the Mac). Choose Layouts > New Layout/Report ( on the Mac). Choose Layouts > New Layout/Report ( in Windows, in Windows,  on the Mac). on the Mac).
| 2. | When the Create a Layout/Report portion of the New Layout/Report dialog box appears, type a name into the Layout Name text box (Figure 11.16). By default, FileMaker assigns each new layout a generic name (e.g., Layout #2), but it's best to give it an easy-to-recognize name. Choose one of the seven layouts in the left-side Select a layout type text box (a preview appears to the right), and click Next.
Figure 11.16. In the Create a Layout/Report portion of the New Layout/Report dialog box, give your layout a name, choose one of seven types, and click Next. 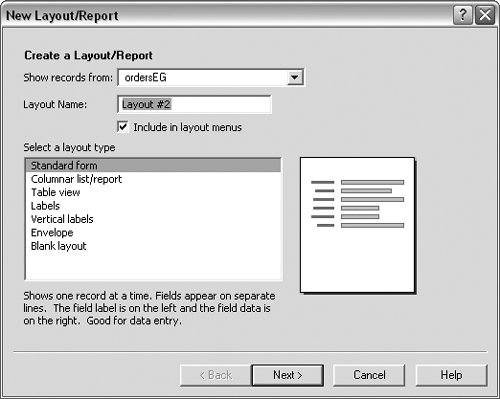
| 3. | When the Specify Fields screen appears (Figure 11.17), highlight the fields in the left-hand list that you want to appear in the layout and use the Move or Move All button to place them in the right-hand list. Or double-click on fields in the left list and they will automatically appear to the right. When you're done, click Next.
Figure 11.17. Highlight the fields in the left-hand list that you want to appear in the layout and use the Move or Move All button to place them in the right-hand list. 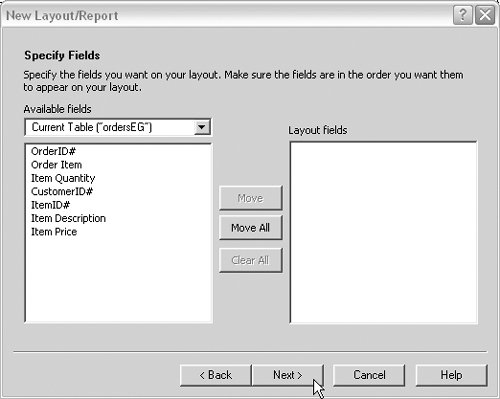
| | | 4. | When the Select a Theme screen appears, make a choice in the left-side Layout themes list and a preview appears to the right (Figure 11.18). When you're done, click Finish.
Figure 11.18. Pick a theme on the left and a preview appears on the right. 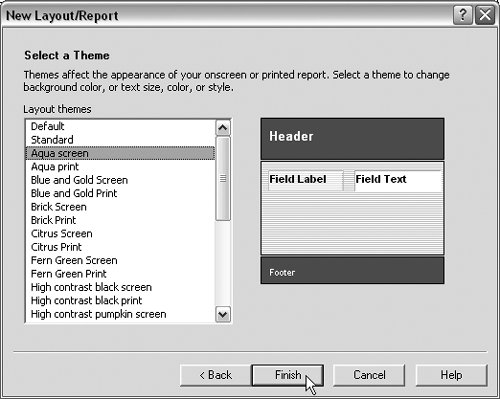
The new layout appears on your screen (Figure 11.19). If you're happy with the layout, switch to Browse ( in Windows, in Windows,  on the Mac) and begin entering data. More likely, however, you'll want to further format the layout. For more information, see Formatting Fields or Objects on page 203. on the Mac) and begin entering data. More likely, however, you'll want to further format the layout. For more information, see Formatting Fields or Objects on page 203.
Figure 11.19. Once you make your choices in a series of dialog boxes, the new layout appears on your screen. 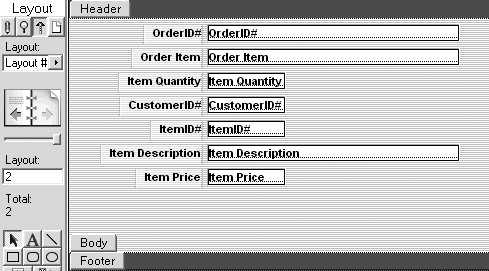
|
 Tips Tips
By default, FileMaker activates the Include in layout pop-up menu checkbox in the New Layout/Report dialog box (Figure 11.16). It's best to leave it checked to ensure that this layout appears in your layout's pop-down menu. As you create more layouts, click on the pop-down menu above the book icon to quickly switch to the layout you need to use.
To rename a layout 1. | Make sure you're in Layout mode ( in Windows, on the Mac), then select the layout you want to rename by clicking it in the pop-down menu just above the book icon (Figure 11.20).
Figure 11.20. Select the layout you want to rename by clicking it in the Layout pop-down menu. 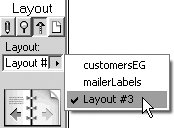
| 2. | Choose Layouts > Layout Setup.
| 3. | When the Layout Setup dialog box appears, make sure the General tab is selected, type in the new name, and click OK (Figure 11.21). The layout pop-down menu now displays the renamed layout (Figure 11.22.)
Figure 11.21. Type the new layout name inside the Layout Name text box and click OK. 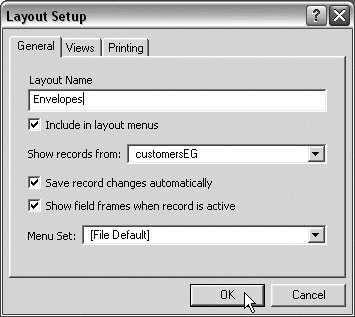
Figure 11.22. The new name appears in the pop-down menu of available layouts. 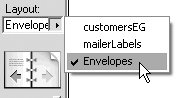
|
To delete a layout 1. | Make sure you're in Layout mode ( in Windows, on the Mac), then select the layout you want to rename by clicking it in the pop-down menu just above the book icon (Figure 11.20).
| 2. | Once the layout appears onscreen, choose Layouts > Delete Layout ( in Windows, in Windows,  on the Mac). on the Mac).
| 3. | A warning dialog box appears. If you're sure, click Delete (Figure 11.23). The layout disappears onscreen, replaced by the next layout listed in the pop-down menu.
Figure 11.23. Still sure you want to get rid of the layout? Then click Delete. 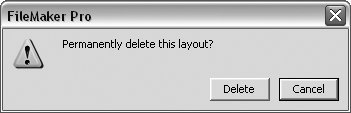
|
|