21.3. SharePoint and Access Now that you've seen the whole SharePoint product, you're ready to hone in on its list of features. In a nutshell , SharePoint lists are designed to help you track any kind of miscellaneous information that you need to share with your team. Some of SharePoint's key featureslike links, announcements tasks , contacts, and even the calendarare actually premade lists.
Tip: To see all the lists on a team site, look for the Lists section in the navigation panel on the right. Click the Lists heading in the navigation panel to see a more detailed list of lists (Figure 21-10).
21.3.1. Building a List Creating a list using SharePoint's Web page interface is just as easy as building a table in Access. Here's how to do it: -
Choose Site Actions  Create . Create . The site management page appears. -
In the Custom Lists section, click the Custom List link . The list creation page appears. -
Supply a name and a description for your list . 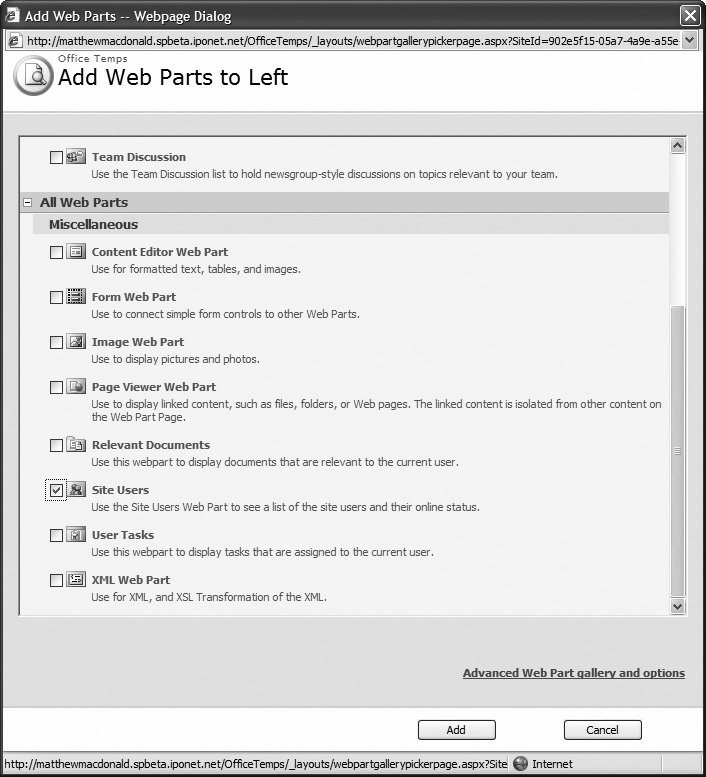 | Figure 21-9. Here, a Web Part is being added to the section named Left. Some of the Web Parts that ordinarily aren't included on the home page for a team site include Site Users (which lists the team members and shows who is currently online), User Tasks (which shows only the tasks that are assigned to the current user ), and Team Discussion (which provides a message-board-style forum for conversation). | | For example, you could create a list named CafeteriaMenuIdeas that lists the items people would like to see for sale in the company canteen. Or, use DodgeballTeamAssignment to find out who's going to square off against the boss. -
Choose whether the list should appear in the navigation panel . If you choose to place it in the panel, the list will be visible on every page. Otherwise, you'll need to head to the lists section (click Lists) to find it. -
Click Create . SharePoint creates the list and whisks you off to the list entry page, where you can start filling it with information (Figure 21-11) or change its structure. -
Create the columns you need for your list . Every list begins with three columns: Type (which SharePoint uses to distinguish between different types of objects), Attachments (which lets you tack on any files that are related to an item), and Title (a descriptive line of text). The first two are mandatory, but you can remove the Title column (as you'll learn in step 7). 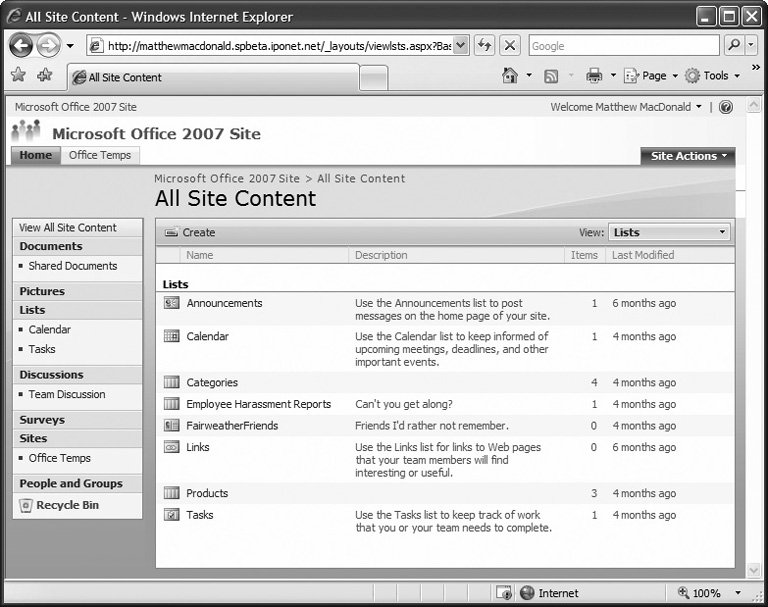 | Figure 21-10. This page shows all the lists on the site, the number of items in each one, and the last time a change was made. | | 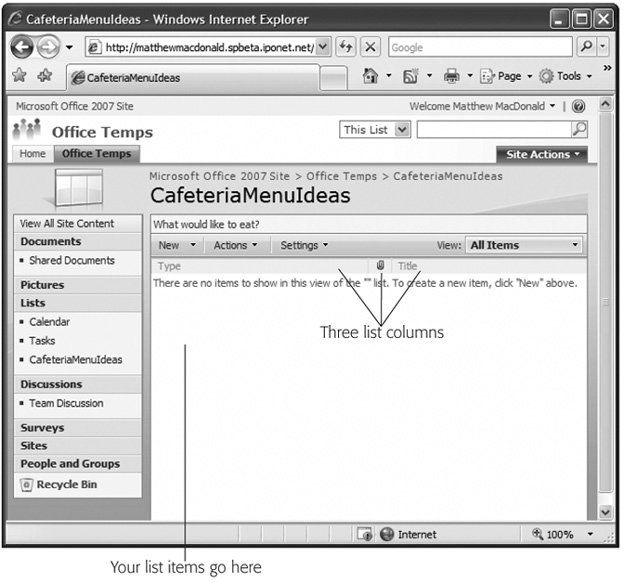 | Figure 21-11. Every time you want to add information to your list or change the structure of the list (by adding or modifying columns), you use this page. | |
Note: Every SharePoint list actually has several more columns that Access maintains behind the scenes. For example, each list item has a unique, hidden ID, and columns that track who inserted an item and the last time a change was made to it.
To add a column, choose Settings Create Column. Fill out all the information for the new column, including its name, a description, and the type of data (Figure 21-12). You can also set a maximum length, supply a default value, and indicate if the field is required (and cant be left blank). 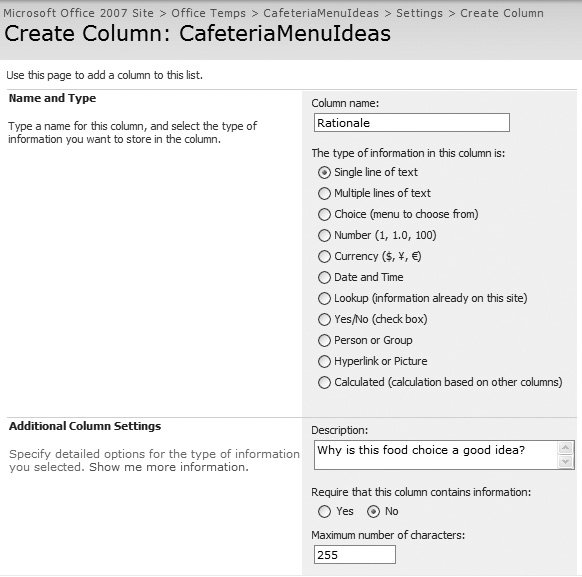 | Figure 21-12. The data types for SharePoint lists correspond to the Access data types for tables (although you don't have quite as many choices as you get with Access). If you want to draw the values from another table, then create a lookup column and indicate the list that you want to link to. | |
Note: SharePoint isn't as strict with relational integrity (Section 5.2.3) as Access. For example, if you create a lookup column that links to another list and you delete that list, then Access simply clears all your linked values.
-
Optionally , you can modify your list settings by clicking Settings List Settings . This step opens the list settings page (Figure 21-13), where you can perform a variety of useful tune-ups. 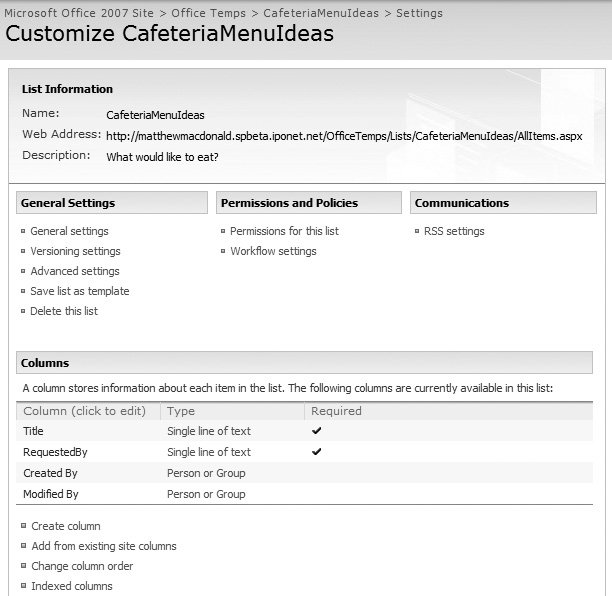 | Figure 21-13. The first section of the list settings page has links that let you configure various options. Beneath that is a section that lets you review the current columns, delete those you don't want, and add new ones. Finally, at the bottom of the page (not shown here) is a section that lets you review the current views and create your own. | | GEM IN THE ROUGH
SharePoint Views = Access Queries | | In SharePoint lingo, a view is a customizable way to look at the data in a list. Views can show a subset of the full range of columns, and they can use filters to cut down the list to just those rows that interest you. You can also use sorting, grouping, and totals. In essence, a SharePoint view plays the same role as the versatile Access select query that you mastered in Chapter 6. You can create new views for your list by choosing Settings List Settings while youre viewing down the list. This shows a page chock-full of list options. Scroll to the bottom to see the current lists and add new ones. Newly created lists have only a single view, called the default view . When you create a new column, you also see an "Add to default view" checkbox. The default view is the view you start in when you first open the list. If you don't add your column to the default view, you won't see it at all (unless you create a new view that includes the column). | The most useful links on the list settings page are: -
General settings lets you modify the list information you supplied in steps 3 and 4. -
Advanced settings lets you control whether list users are restricted to reading and modifying their own entries. You can also turn off the attachment feature (which lets users tack on their own files with an item) and the folder feature (which lets users create subfolders to better organize list items). -
Delete this list does the obvious. -
Permissions for this list lets you control who's allowed to edit the list and what they're allowed to do. Ordinarily, team site owners have full control permission (meaning they can do anything, including changing the list settings), normal members have contribute permission (meaning they can add, edit, and delete items), and visitors have read permission (meaning they can look only at the existing information). -
Once you have the columns you want, it's time to enter your data . To add a new record, click New New Item. SharePoint shows a page where you can enter values for all your columns (Figure 21-14). You can also select an item to edit or delete it.
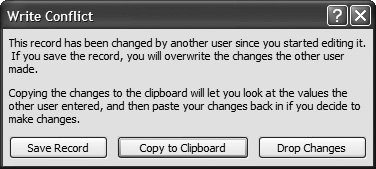
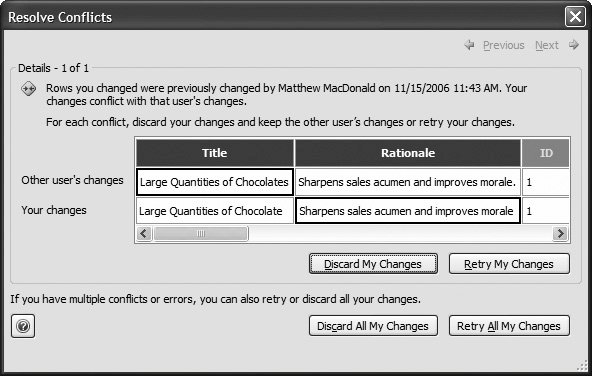
Refresh Data.SharePoints concurrency features are relatively weak. If two people edit the same list item at once, the one who tries to save the change last gets an error message rejecting the edit. (The situation is better if you're using Access to make your edit, as described in Section 21.3.6.)
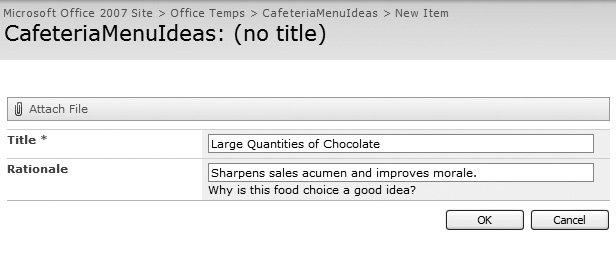 | Figure 21-14. Here's a new item for the CafeteriaMenuIdeas list. | | GEM IN THE ROUGH
The Access Web Datasheet | | If you want to see several list items at a time and edit them all at once in an Access-style grid, you can use the Access Web Datasheet, a specialized browser plug-in that enhances SharePoint. The Access Web Datasheet is available only if you have Office 2007 installed on the current computer, unlike the other SharePoint pages. To try it you, choose Actions Edit in Datasheet from the list view. The Access Web Datasheet looks like an ordinary Access datasheet, embedded inside your browser. You can move from row to row or column to column, making changes anywhere , drag columns from place to place, and apply sorting using the drop-down arrows next to the column headers. You can also quickly add or remove columns (again, by-right clicking the column headers). If you like SharePoint but you miss the comforts of Access, the Access Web Datasheet will make you feel right at home. |
21.3.2. Exporting a Table to SharePoint There's another way to build a SharePoint list. You can start with an Access table and export it to SharePoint. The disadvantage of this approach is that a bit of conversion is involved to turn the Access data types into SharePoint data types. Some of the finer points (like validation rules and input masks) will be lost, so it's not worth customizing any of these details in Access. However, exporting a table from Access is a great technique if you have some existing data that you need to transfer to a team site so more people can use it. The SharePoint export process is basically the same as the export process you learned about in Chapter 19 for other data types. Here's how it works: -
Open your Access database file . -
Select the table you want to export in the navigation pane . If you export a child table, Access will also export all the linked parent tables automatically. For example, if you export Products, ProductCategories comes along for the ride. -
Choose External Data Export SharePoint List from the ribbon . The Export wizard starts (Figure 21-15). -
Enter the URL for the SharePoint team site, the title you want to use for the list, and (optionally) a description . These list settings are the basic ones you learned about in Section 21.3. -
If you want to see the list in SharePoint when the process is finished, choose "Open the list when finished ." It's always a good idea to review your list after a transfer operation to make sure it worked as you expected. 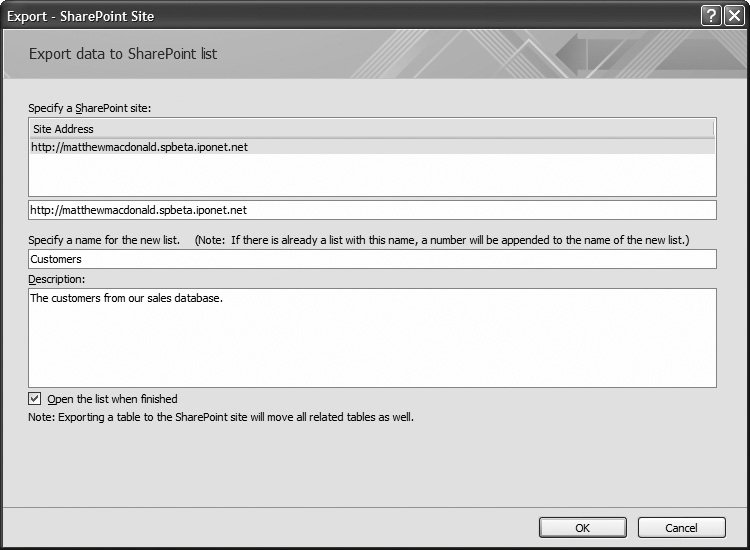 | Figure 21-15. In this example, Access is poised to copy the contents of the Customers table to SharePoint. | | -
Click OK . If you need a password to access your SharePoint site, you need to supply it now. Then, Access creates the new SharePoint list and fills it with data. Your Access database is not modified in any way. If you chose "Open the list when finished" in step 4, Access launches a browser window to show you the new list when the process is complete (Figure 21-16). When the export is finished, Access asks if you want to save your export steps. If you do, you can repeat the same export operation later on (presumably, to move the latest copy of your data to the server). You learned about this feature in Section 19.3.7.
Note: When you export your data to SharePoint, you create a copy of that data. That means if someone edits the SharePoint list, your database won't get the change. Similarly, if you change the database, it won't appear in SharePoint unless you export it all over again. If this isn't what you want, consider storing the data in SharePoint and managing it in Access through linked tables (Section 19.3.2). The next section has more about this approach.
21.3.3. Importing Data in Access To import information into Access, you have two options. You can use the import process that you learned about in Chapter 19. This lets you save the import steps so you can repeat them later on. However, there's another option that's more convenient , because it doesn't require you to supply the SharePoint list URL. You can perform the export straight from the SharePoint team site.  | Figure 21-16. Here's the exported Access Customers table, as a SharePoint list. When Access opens the list for you to review, Access automatically uses the Access Web DataSheet view (Section 21.3.2), which makes it look more like the Access datasheet interface. | |
Note: This option is available only if you have Access installed on the current computer. If you surf to the SharePoint Web pages on someone else's computer and it doesn't have Access, you can't perform the export.
Here's how to do it: -
Using the SharePoint team site, browse to the list you want to export . -
Choose Actions Open with Microsoft Access . A pop-up window appears that lets you choose the database and whether you're copying or linking the information (Figure 21-17). -
Enter the name of the database you want to use . If you specify a database file that doesn't exist, Access creates it. (This is the usual approach.) If you specify a database that does exist, Access adds the table to it. -
Choose whether you want to import a copy of the list or create a linked table . With a linked table, the data is always stored in SharePoint. You simply use Access to modify it. That way, only one copy of the information exists, and everyone's changes are made in the same place. 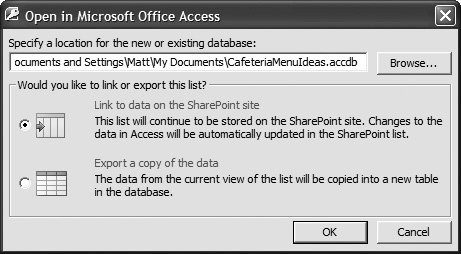 | Figure 21-17. In this example, the CafeteriaMenuIdeas table is being exported from the SharePoint site. Access isn't even open yet. | | With a copy, you have two separate sets of data that can be changed independently (the SharePoint list, and the table in your database). You can't synchronize these two pieces. The advantage of this option is that you don't need to keep connecting to the SharePoint server to apply your changes. -
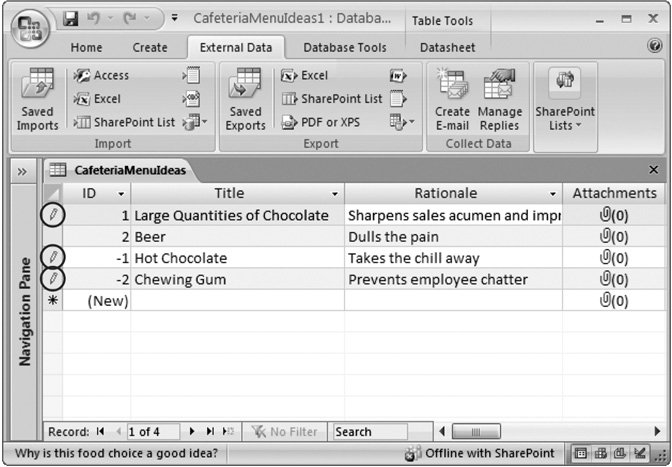
When you're finished, click OK . Access opens on your computer, with the database you picked in step 3. You may be prompted to log in to SharePoint again. Then, the linked or copied table is created and appears in your database (Figure 21-18). 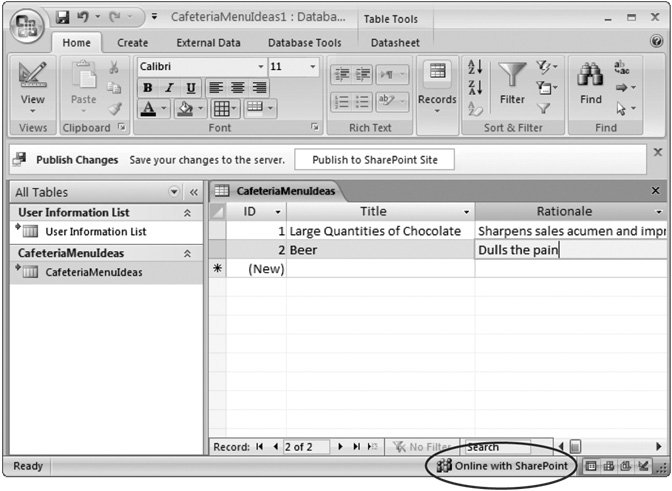 | Figure 21-18. Now you can edit the Cafeteria Menu Ideas table right in Access. The "Online with SharePoint" message in the bottom-right corner of the status bar indicates that all is wellyou can make changes, and they'll be saved on the server immediately. | |
Along with the table you picked (in step 1), SharePoint also exports a table named User Information List, which appears in your database. This table lists the members of your SharePoint site. That's important because every SharePoint list has two hidden fields (Created By and Modified By) that indicate who created and last modified an item. You don't need to worry about these details, because Access maintains them automatically (although you can see them in the datasheet using the Home Records More Unhide Columns command). When you start using your database, you notice a "Publish to SharePoint Site" button in a message bar at the top of your window (Figure 21-18). Click this button to save a copy of your Access database file in the Document Library in the SharePoint site, where other people can download it.
Note: SharePoint doesn't support Access forms and reports. You can add these objects to your data-base, but people who use the SharePoint Web pages won't have any way to use them. If you want to share your forms and reports , you need to hand out copies of your linked database to other people who have Access, or use the Publish to SharePoint Site button. If you don't want to share your database's front end, there's no reason to use this feature.
21.3.4. Move a Whole Database to SharePoint Why stop at a single table? Using Access, you can convert an entire database to a set of SharePoint lists. This is a great way to upsize your database. For example, if you have a successful database that's being used in your company but you want to make sure it can handle more people (including those who don't have Access), it makes good sense to hand it off to SharePoint. You first saw how to upsize a database in Chapter 20, when you used this technique to move Access tables to SQL Server. You can upsize to SQL Server in much the same way using the Move to SharePoint wizard, which does the following jobs: -
Creates a backup of your database (just in case you want to get back to the original, non-SharePoint version). -
Creates a SharePoint list for every table in the database. -
Removes your tables and replaces them with linked tables that get their information from SharePoint. That way, all the data is in the capable hands of the SharePoint server. -
Optionally uploads a copy of this converted database to the SharePoint site. Other Access users may want to use this database if they need your queries, forms, reports, or code routines. The following sequence of steps walks you through the whole process: -
In Access, open the database you want to convert . -
Choose External Data SharePoint Lists Move to SharePoint . The wizard starts (Figure 21-19). 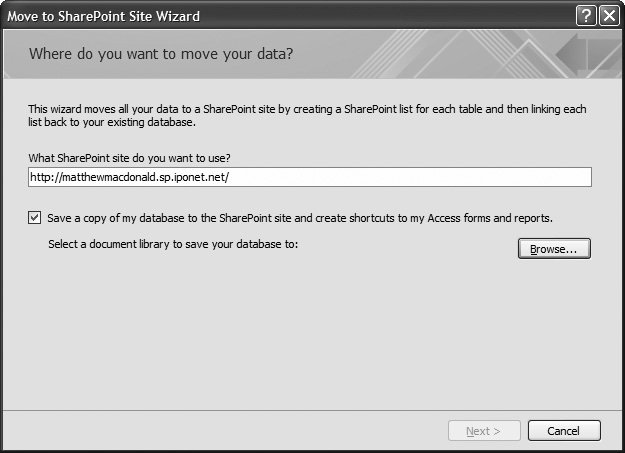 | Figure 21-19. This one-step wizard makes it easy to transfer a whole database worth of information to SharePoint. | | -
Enter the URL for your SharePoint team site . -
If you want to give Access users the option to use your forms and reports, select the "Save a copy of my database to the SharePoint site" option . That way, other people can download your database and use the other objects it contains. You have no synchronization problems here, because the uploaded database uses linked tables. That means all the data is always stored on the SharePoint server, regardless of whether you're modifying it in Access or through the SharePoint Web pages. If you don't want to bother with this step (perhaps your database has only tables, or no one else in your company uses Access anyway), clear the checkbox, and skip to step 6. -
Click Browse, and then pick where the uploaded copy of your database should be stored . If you haven't created any new document libraries just for this purpose, then you need to select the communal Shared Documents section. Until you make a selection, the Next button will be disabled. -
Click Next . If you need a password to access your SharePoint site, you need to supply it now. Then, Access begins the transfer process, which can take some time for a large database. A progress indicator will keep you up to date on how much of the job remains. When Access finishes, you see a final confirmation window. -
Click Show Details to see exactly what Access did (Figure 21-20) . If any problems occur during the conversion process, Access creates a table named Move to SharePoint Site Issues. Each record in that table describes a problem and the reason why it occurred.
Note: SharePoint doesn't support strict referential integrity (Section 5.2.3). If you publish a database that uses this feature, you end up with a few warning messages in the "Move to SharePoint Site Issues" table.
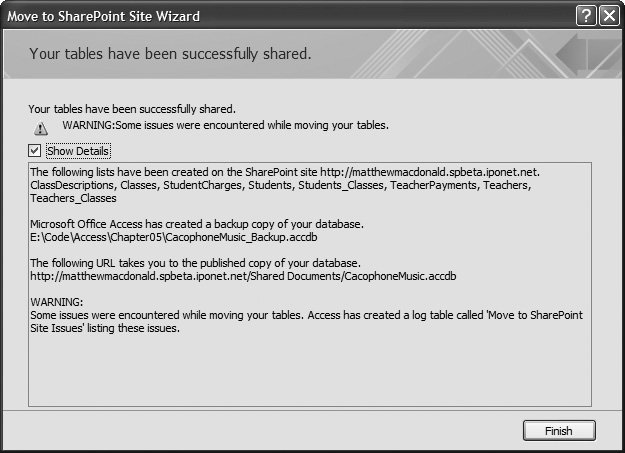 | Figure 21-20. In this example, Access generated eight lists, created a backup copy of the database, and published the database to the Shared Documents location. Access also noted a few problems in the "Move to SharePoint Site Issues" table. (These are simply warnings about SharePoint's lack of support for referential integrity; see Section 5.2.3 for details.) | | -
Click Finish . You'll notice that your database has been changed. All the tables have been changed to linked tables that connect to the corresponding SharePoint lists. (The telltale sign is the yellow table-with-an-arrow icon that appears next to each table in the Access navigation pane.) GEM IN THE ROUGH
SharePoint List Options | | Access gives you easy access to a few common SharePoint settings. To see them, right-click a linked table, and choose the SharePoint List Options submenu. You see commands that let you modify the table, tweak its permissions, or set up alerts that notify you when certain data is changed. When you choose one of these options, Access launches your Web browser, and points it to the appropriate SharePoint page. |
21.3.5. Editing Your SharePoint Data in Access Whenever you commit a change in a linked table (for example, by making an edit and moving to another row), Access sends the new values to the SharePoint server. The only thing you aren't allowed to do is modify the design of the table. To do that, you need to use SharePoint. (One quick way to jump to the right Web page is to right-click the table in Access, and then choose SharePoint List Options Modify Columns and Settings.)
Tip: You can use the Home Records Refresh All command to show the latest information in your datasheet at any time.
|