| Creating a Cross Fade is one of the most common audio adjustments you can make in video editing. It's the audio equivalent of a Dissolve, and it allows the volume to rise gradually so that it does not sound harsh. For example, cutting from a quiet room to a crowd scene creates a large jump in volume if you don't use a Cross Fade. You can create a Cross Fade in a number of ways, including using the slider bar as detailed earlier. But Liquid Edition has two shortcut methods for achieving this much used audio effect: using the one-click fade and the Cross Fade button. A one-click fade is quick and easy because it automatically adjusts the volume so that it fades gracefully in and out. If that's all you need, then this is the quickest way to do it. The Cross Fade is the audio companion to the Dissolve, which creates a gradual visual change from one scene to the other (see Chapter 8 for details). The Cross Fade complements this by doing the same job but with audio. To use a one-click Cross Fade 1. | Open the Audio Editor by clicking F4.
| 2. | Place the mouse cursor over the volume line so that a pointing finger appears (Figure 7.28).
Figure 7.28. The pointing finger, only seen when the Audio Editor is open. 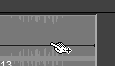
| 3. | Hold down the Ctrl key and the mouse pointer changes into an arrow with a plus sign (+) next to it.
Near the mark-in point of a clip, the arrow points to the left (Figure 7.29). Near the mark-out point of a clip, the arrow points to the right (Figure 7.30). This tells you in which direction the Cross Fade will be applied.
Figure 7.29. When you press the Ctrl key, this turns into the one-click fade arrowhere to the mark-in point… 
Figure 7.30. …and here to the mark-out point. 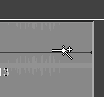
| 4. | Click once where you want the fade to end or begin.
A keyframe is placed at the start of the audio volume line at zero dB (null volume), and a second one is placed where you clicked, thus creating a fade-in.
By clicking the mark-out point, you can create a fade-out with the first keyframe at normal volume levels and the second one at the end of the clip at zero dB (Figure 7.31).
Figure 7.31. Click once in each place to create the one-click fade. 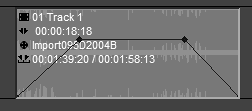
|
 Tip Tip
To add a Cross Fade 1. | Make sure the timeline cursor is over the cut or edit decision point.
| 2. | Click the Add Dissolve/Cross Fade button  , and choose your duration and alignment in the dialog box (Figure 7.32). , and choose your duration and alignment in the dialog box (Figure 7.32).
Figure 7.32. The Add Dissolve is also used to add a Cross Fade. 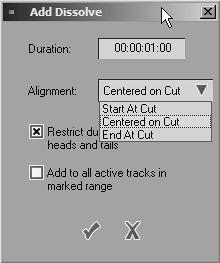
The default alignment is Centered on Cut, but you can also either end or start the Cross Fade at the cut.
| 3. | Click the check mark to insert the Cross Fade into the Timeline (Figure 7.33).
Figure 7.33. The Cross Fade added at center cut. 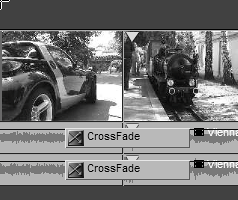
|
Tips Cross Fade does not work with an embedded audio clip. Cross Fades Not Appearing There are two reasons a Cross Fade does not appear. The audio track is not active. (More details on active and deactivated tracks can be found in Chapter 6.) You don't have enough overlapping material to legally call a Cross Fade. (In this case, see Chapter 8 for details on trimming overlapping clips.)
|
If the audio track is attached to a video track, then a Dissolve is automatically added to it. If you don't want this to happen, toggle the video track off while you apply the Cross Fade by clicking it once.
|