Adding a Transition


Once you understand the basic concept of using transitions on a single-track edit system, you'll find that actually applying them is very easy. You can achieve this by either dragging and dropping or by right-clicking and sending.

To apply a transition to the Timeline

1.

Click the Open Project Browser in Timeline button if the Project Browser is not yet open in the Timeline.

If you are using a dual-screen setup, the Project Browser will already be open in one of you monitors. The Lib tab referred to in this chapter will read Library.

2.

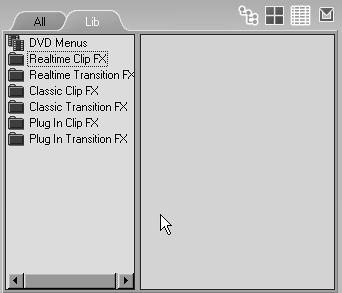
Click once on the Lib tab to show the effects Liquid Edition has to offer (Figure 8.9).

Figure 8.9. The full range of effects in Liquid Edition 6.


3.

Do one of the following:

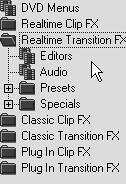
  • Open the Realtime Transition FX folder if you intend to add a Realtime transition (Figure 8.10).

    Figure 8.10. The Realtime Transition FX folder.


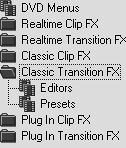
  • Open the Classic Transition FX folder if you intend to use a non-Realtime transition (Figure 8.11).

    Figure 8.11. The Classic Transition FX folder.


4.

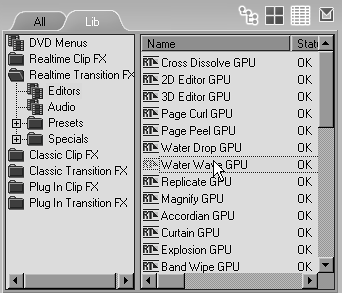
Once you've selected the type of transition you want, click once on the Rack to display its contents (Figure 8.12).

Figure 8.12. A selection of real-time editors.


5.

Highlight the actual transition you want by clicking it once.

6.

Apply the transition to the Timeline by doing one of the following:

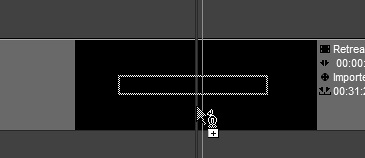
  • Left-click and hold the mouse button over the transition, then drag it into the Timeline. Release the mouse button when the transition is over the point where the two clips meet (Figure 8.13).

    Figure 8.13. Dragging a transition over to the edit point of two clips.


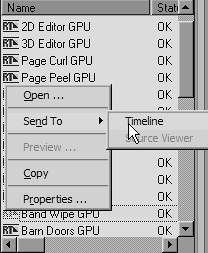
  • Place the timeline cursor roughly at the point where the two clips meet, then right-click the transition and select Send To > Timeline (Figure 8.14).

    Figure 8.14. Sending the transition to the edit point by right-clicking.


Tips

  • If you're dragging a clip to the Timeline and you see the message "not enough media available to place transition," or you send to the Timeline and nothing happens, then refer to the earlier task "To turn off 'Restrict dragged Transitions to available handles.'"

  • Transitions obey the same magnetic rules that I outlined in Chapter 6. By holding down the Shift key, you can toggle the magnets on and off. Press the Alt key to shift the polarity of the magnet from center to mark-out point, to mark-in point, and back to center.

  • You can't stack transitions. If you try adding another transition on top of an existing transition, you'll discover that it replaces the original.

  • Both the Realtime and Classic transitions offer a choice between Editors and Presets. The Realtime folder also has a Specials subfolder that contains a large collection of Hollywood FX presets. I deal with this folder in the "Adding a Preset Hollywood FX Transition" later in this chapter.


Realtime vs. Classic Transitions

The world of Liquid Edition is divided into two classes: Realtime effects that require no rendering in order to be previewed, and non-Realtime or Classic effects that must be rendered before you can see the results.

Realtime effects are further subdivided into CPU effects, which use the power of your computer's processor to display a Realtime transition; and GPU effects, which use the processor fitted to your graphics card.

The advantage of using Realtime effects is that they clearly increase the speed of your workflow so that you don't have to wait for a render to complete. But Classic effects also have a unique place in Liquid Edition because of the extended options they offer, a few of which are detailed here.

The following is a list of extended parameters that are only available to Classic effects:

  • Pan and Scan: Realtime effects can only function within the boundaries of the TV standard you're working with. This means all images are cropped to that standard and anything outside the standard area appears black if you try to pan and scan it.

  • Full Screen: Classic editors can display the effect using the entire PC monitor.

  • Keyframe Interpolation: This parameter allows you to accelerate the rate at which an effect occurs between two keyframes. Again, this is only available in Classic mode. See "Keyframe Interpolation" later in this chapter for more information.

  • Priority: Known in Photoshop and various composting programs as blending, this feature allows you to choose the transfer mode the transition uses, which allows you to utilize any of the recognized industry standard modes such as Multiply and Color Dodge.

  • More Gradient Wipes: Although gradient wipes (formally known as the Spice Rack) are available in a real-time format, presets of a more organic variety are available in the Classic version.


Pinnacle Liquid Edition 6 for Windows
ISBN: 0321269160
EAN: 2147483647
Year: 2003
Pages: 245
Authors: Paul Ekert

flylib.com © 2008-2017.
If you may any questions please contact us: flylib@qtcs.net