Editing the Title into a Sequence
| [ LiB ] |
Editing the Title into a Sequence
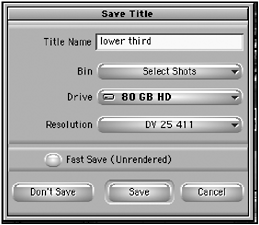
Once you've created a title you're happy with, it's time to edit it into your sequence. Avid Xpress Pro automatically creates an alpha channel for your title to make it easy to include into the sequence. Alpha channels are discussed more when nesting is covered, which is the next chapter. First you need to save the title. While the Title tool is open , choose Save Title from the File menu. A dialog box will appear (see Figure 10.30). The Save Title dialog box wants you to give the title a name. For this dialog box, you choose in which bin you want to store the title, on which drive you want to save it, and in which type of resolution the title will be created. If you save a rolling graphic or a crawling graphic, it will be saved as a pict sequence. Once you made all your decisions and gave the title a new name , click the Save button.
Figure 10.30. The Save Title dialog box allows you to give your title a name.
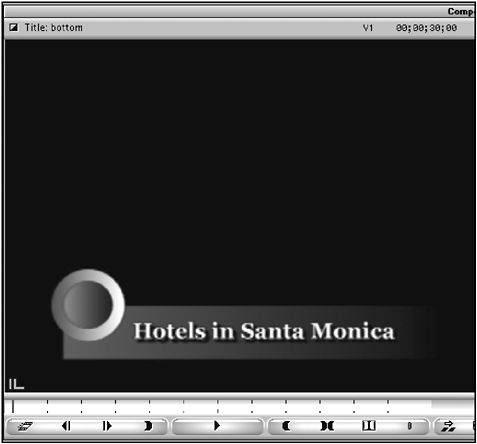
Once the title is saved, a new clip will appear in the bin that you saved it to. This clip will be your title. The title also appears in the source monitor; you'll notice that it contains black as its background color and its length is two minutes. This black will be keyed out when the title is placed in your sequence (see Figure 10.31).
Figure 10.31. Titles display black as their background. This black will be keyed out once the title is edited in the sequence.
To place the title into your sequence, follow these steps:
-
Move your Position Indicator in the Timeline to the point you want the title to start and mark an IN point.
-
Move to the point you want the title to end and mark an OUT point. If you need the title to appear for more than two minutes, you'll need to perform several edits.
-
With the title already loaded in the source monitor, patch the title's source V1 to V2 in the Timeline (see Figure 10.32). If you were to edit the title on V1, the title would not act as an overlay.
Figure 10.32. To edit the title, you'll need to patch V1 to V2 in the Timeline.

-
Perform either an Overwrite or Splice edit. Because you marked the IN and OUT points in the Timeline, no IN point was needed on the title media.
-
The title will now be displayed in the Timeline. If your Toggle Realtime button is green, you can play the title immediately.
If your title is a roll or crawl, you'll need to mark an IN and OUT point on both the source monitor and in the Timeline. If you play the graphic in the source screen, you'll see it move very slowly. This is not the speed the graphic will move once it's edited into the Timeline. The duration between the IN and OUT points in the Timeline determines how slow or fast the roll or crawl will move. For example, if I marked an IN and OUT point to create a two-second duration, a five-page roll would move rather quickly. If I placed that same rolling graphic into a 15-second edit, the rolling text would move much slower.
Trimming and Moving a Title
Once a title has been edited in the Timeline, you can trim the title to create a new duration and you can move it with the Segment Mode keys. To trim the title, step into the Trim mode by drawing a lasso around the front of the clip. Once in the Trim mode, you can trim the title the same way you would a clip. If you trim too far on either side, you could run out of material.
NOTE
 TIP
TIP
When you edit a title into a sequence, always move the Position Indicator into the title media. Never leave it at the beginning of the clip. This will prevent you from performing any trimming on the title.
To reposition a title, follow these steps:
-
Place your Position Indicator in the Timeline to the new position where you want the title to be.
-
Click on either of the Segment Mode buttons .
-
Click on the title and move it to the Position Indicator. Notice how it " snaps " to the new position.
-
Depending on which Segment Mode button you used, the title is either overwritten in the new position or it's spliced in.
The Fade Effect Button
Avid Xpress Pro allows you to fade titles in and out very easily. In fact, they created a button just for that command. It's called the Fade Effect button (see Figure 10.33). To access the button, click on the Fast Menu between the Splice and Overwrite buttons on the Composer window.
Figure 10.33. The Fade Effect button allows you to type in a value of how many frames the title will fade up and out on.
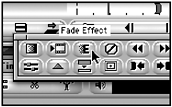
Once this button is selected, you simply type the amount of frames you want to fade up and down. If your title is too short, you'll see a warning box displayed. This tool actually adds keyframes according to the amount of time you type in for the fade up and fade down. To see the keyframes, click on the Effect Mode button to step into the Effect mode (see Figure 10.34). Now that you know a title can have keyframes, you can add keyframes and have them move across the screen.
Figure 10.34. Keyframes are added when you use the Fade Effect button.

Revising a Title
Occasionally, editors make mistakes when creating their titles (this only happens once in a while because we're all such good spellers, right?). Although Avid Xpress does not allow you to spell check your titles, it does allow you to revise a title. To revise a title, follow these steps:
-
Place your Position Indicator on the title in the Timeline you want to change and select the track your title is on.
-
Click on the Effects Mode button to open the title in the Effect Editor.
-
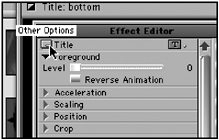
In the far top-left corner of the Effect Editor is the Other Options button (see Figure 10.35). Clicking this button will open your text into the Title Tool window.
Figure 10.35. The Other Options button in the Effect Editor.
-
Make your changes to the title and click the Close button. Avid Xpress Pro will ask if you want to save the updated title. Click Save.
-
The title in the Timeline is saved and updated. You'll notice that there will be a new clip in the bin where the original title was saved and that the new title is also in the source monitor. Avid Xpress Pro keeps the old title and makes a new clip for the new title.
NOTE
 TIP
TIP
To change a title prior to editing it in the Timeline, hold down the Control key and double-click the title icon in the bin. The title will open in the Title tool, allowing you to make changes. Revising a title is also a quick way to change a title's resolution if it does not match the resolution of the clips in the Timeline. If the Title tool is open, you can drag and drop titles from the bin into the Title tool to open them.
Building a Bullet Page
Using Avid Xpress Pro's capability to make revisions to a title, it's very easy to build a bullet page or a page where a list of items appears.
-
In the Title tool, build the entire list. This example created a list with three points (see Figure 10.36).
Figure 10.36. To build a bullet page, first create the entire page.

-
Edit the title page in the areas you want the text to appear. For this example, you'll edit the title four times. Once for the heading and three times for each point. Because you want each title to fade in, make sure the IN point is not at the beginning of the title (see Figure 10.37).
Figure 10.37. To create a build you'll need to edit the title into the sequence the same amount of times you want to see a change. This example edits the title four different times.

-
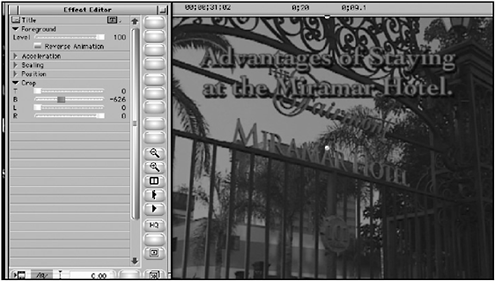
Place the Position Indicator on the first title and open the Effect Editor. Using the Crop parameters, crop out everything but the top line. For this example, it's the headline (see Figure 10.38).
Figure 10.38. For the first title in the build, change the cropping values to crop out everything but the top line.
-
For the next title, crop everything out except the first and second lines.
-
Continue this until you get to the last title. This doesn't need any cropping because it displays all the lines or bullets.
-
Place a dissolve between each title and render them. Play the sequence. The first title fades up, the next, and so on.
Re-Creating Title Media
If your titles ever go offline, Avid Xpress Pro can re-create them. For example let's say you finished a project, got rid of the media files from your hard drive, and now want to re-create the project. After you Batch Record all your clips and Batch Import all your files, it's time to re-create any titles you created using Avid Xpress Pro. Mark an IN at the beginning of your sequence and an OUT at the end of the sequence. Select the tracks that contain the titles and choose Re-create Title Media from the Clip menu (see Figure 10.39).
Figure 10.39. The Re-create Title Media command.
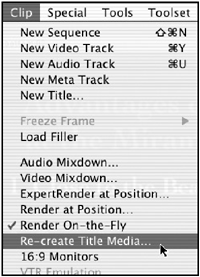
You'll need to select a bin where the new titles will be saved. Click the OK button; Avid Xpress will search through the Timeline and find all the titles. It will re-create each one and place them in the bin.
| [ LiB ] |