Creating a Web Gallery
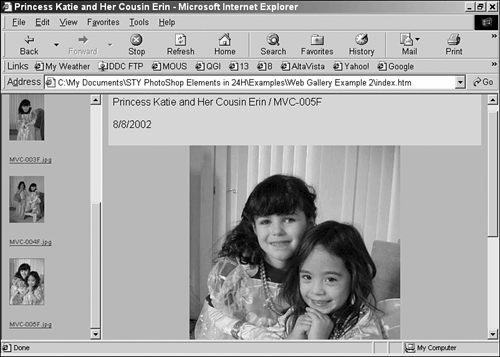
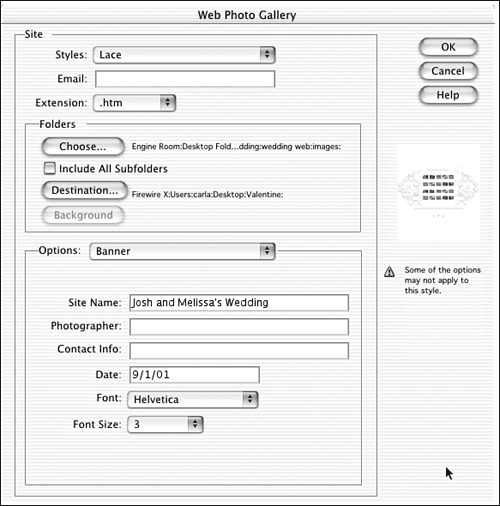
| Elements, like iPhoto, has an easy and elegant method of converting your stacks of photos into a Web-ready gallery that will display thumbnails of your pictures. Visitors clicking on a thumbnail will open up a full-page view of the image to appreciate it more fully. There are 14 different styles you can choose from, ranging from simple to elaborate. Bears is great for kid pictures, while Office is more businesslike, and Antique Paper is ideal for scanning in the old family album. Figure 22.8 shows a typical gallery page, as viewed from my Web browser. I chose the Horizontal Frame style, and selected pink for the background to best suit these little princesses. Figure 22.8. These old photos and etchings are displayed in the Antique Paper format. To access this feature, choose File, Create Web Photo Gallery. You'll see the dialog box shown in Figure 22.9. First, though, make sure your pictures are all in one folder. Because they will be listed in alphabetical order by default, if you'd prefer some different arrangement, add numbers to the front of their filenames. Choose a gallery style from the Styles list and then click Browse and select your folder. Choose whether or not to include subfolders as well. Click Destination, and tell Elements where to place the completed gallery. Figure 22.9. Select the gallery style and set other options from this dialog box. Some gallery styles have options; others do not. Here's a list of the options you may be able to set by selecting their category from the Options list:
If you select the Table gallery style, you can choose your own graphic to use as the background if you like, by clicking the Background button. Click OK after choosing all your options to create the gallery. The home page opens in your browser so you can try out your creation. The destination folder you select will contain folders with the thumbnails and larger pictures, plus the HTML code to go into your Web page editor. Follow the usual procedures for adding pages to your Web site. |
EAN: 2147483647
Pages: 349