| Let's take a look at some of the Final Cut Express settings that will affect how you capture your video and affect your project. There are two places you can change settings: in User Preferences and System Settings. The User Preferences dialog box is where most of your editing settings and some capture settings are stored. You have already worked with a few preferences and changed a few settings in previous lessons, and you will work with still others in later lessons. Exploring User Preferences The User Preferences dialog box has four tabs. Each tab organizes settings related to specific functions of Final Cut Express. 1. | Choose Final Cut Express HD > User Preferences, or press Option-Q.
 The User Preferences window opens with the General tab in view. The General tab is where you choose assorted preference settings for capturing and saving your project.
| 2. | Click the Editing tab.
This is where you choose settings for several editing functions, such as the length of your Pre-rolls, Freeze durations, Multi-Frame Trim Size, and so on.
| 3. | Click the Timeline Options tab.
This is where you choose settings for all new Timelines. Any changes made here will not affect existing sequences in the Timeline.
Tip To change Timeline settings for an active sequence, choose Sequence > Settings, or press Cmd-0 (zero), and make adjustments in that window. | 4. | Click the Render Control tab.
Final Cut Express has numerous effects that can be applied to an edited clip. These effects are discussed in more detail in Lesson 14. Some of these effects are real-time effects, referred to as RT. This means that the effect can be viewed immediately after applying it. Other more complex effects may need to go through an additional step of creating a new media file of the effect in order to be viewed in real time. This process is called rendering. You can set controls for the rendering process in this tab.
| 5. | Select the General tab, where you will set preferences for capturing.
|
Setting General Preferences Many of the General Preferences options are personal preferences, such as the number of undos you want to work with or the number of recent clips available in the Viewer's Recent Clips pop-up menu.  Tip Final Cut Express opens with the above standard default preference settings. If you are ever unsure about how to set your preferences, make sure your settings match these and then make changes from there.
1. | Review your personal preferences in the upper left of the General tab.
| | | 2. | Look in the lower-left Autosave Vault area of the General tab.
Many computer programs have the capability to save your work automatically and create a backup copy of your document for you. Final Cut Express does this as well in its Autosave Vault. You can choose how frequently a project will be saved, how many versions of the project will be saved, and the maximum number of projects saved.
 If you have named a project, you have begun the saving process. Final Cut Express quietly saves the project at specified intervals. There can sometimes be a slight hesitation in your editing operations while the project is being saved.
Note If you are working in a new project and have not yet begun the saving process by naming it, the Final Cut Express HD icon in the Dock will start bouncing to get your attention. The program really wants to save your project for you, but it can't until you name it and decide where you will place it. If the following message appears on the screen, click Yes and name the project. 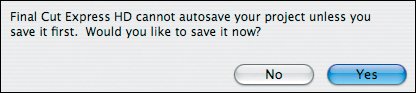 |
Setting Capture Preferences On the right-hand side of the Preferences dialog box, there is an option that relates to capturing: "Abort capture on dropped frames." This option does not have to be changed unless you run into difficulty capturing your source material. Let's look at what this capture setting does.  If Final Cut Express notices any frames of video being dropped or left out while capturing your source material, it will stop the capture process and report the dropped frames in a message onscreen. Note Use the default settings when you start to capture. If you find there is a problem with dropped frames, deselect this option and try again.
Exploring System Settings Another set of options you can use to set up your project is the System Settings. These settings affect where you will be saving your media files during the capture process, as well as other settings used throughout your editing. 1. | Close the open User Preferences window, and choose Final Cut Express HD > System Settings, or press Shift-Q.
 The first tab, Scratch Disks, is where you specify the location or drive where you want to save media files during the capture process, and where you want to save render files during the editing process. The first tab, Scratch Disks, is where you specify the location or drive where you want to save media files during the capture process, and where you want to save render files during the editing process.
| | | 2. | Click the Search Folders tab.
If your clips should become disconnected from their media files, you can limit the search for them to specific folders or media drives. Reconnecting files is covered in Lesson 16.
| 3. | Click the Memory & Cache tab.
This is where you make changes to memory usage while in Final Cut Express. Generally, you will use the default settings.
| 4. | Click the Playback Control tab.
This is where you make choices about playing back effects in real time (RT) and the playback quality of the effects. This will be discussed in more detail in Lesson 14.
| 5. | Click the External Editors tab.
In this tab, you can set other software applications as external editors and access them directly from within Final Cut Express.
|
Setting the Capture Destination Some computers have large hard drives that give you plenty of room to capture footage for your editing project. Others, perhaps certain laptops, may not give you quite enough room to store all your source material, especially if you're working on a larger project or several projects at one time. If you are going to work with an additional internal hard drive or an external FireWire hard drive to store your QuickTime media files, you will need to direct Final Cut Express to that drive as the destination for your captured clips. The destination drive is called the scratch disk. The program defaults to your main hard drive unless you redirect it to a different location. 1. | If you're working with an external FireWire drive, make sure the drive is connected to your computer before setting the scratch disk.
| | | 2. | Select the Scratch Disks tab in the System Settings window.
When you begin creating new render files of clips with effects, they can be stored in a different location. For now, let's capture everything to the same location.
Tip The Scratch Disks tab always tells you how much hard-drive space you have available for capturing. | 3. | In the first line, click the Set button.
 The Choose a Folder window appears, where you can navigate to a different destination for your captured media. The Choose a Folder window appears, where you can navigate to a different destination for your captured media.
Note The default scratch disk is your internal hard drive. More specifically, it is the Final Cut Express Documents folder, located in your home Documents folder. | 4. | In the Choose a Folder window, scroll to the left until you see all of the storage devices attached to your computer and all of your hard-drive options.
| | | 5. | Select the hard drive you want to capture your media to and click Choose.
The Choose a Folder window closes and returns you to the Scratch Disks tab of the System Settings window. Leave this window open through the next exercise.
In the lower portion of the Scratch Disks tab, you can also set a different destination for other items such as Thumbnail Cache and Autosave Vault. The Autosave Vault is just a folder located on your hard drive.
You can change the destination of this folder just as you chose a scratch disk in the previous steps.
 Note Caches are temporary files that Final Cut Express creates when it needs to generate information on the fly. For example, when you use the Show Thumbnail command in the Browser, Final Cut Express has to create tiny versions of your video clips to display in the Thumbnail column. It then stores those thumbnails in a cache on disk so that it doesn't have to generate them all over again every time you expand the bin that contains those clips. |
Limiting Capture Now Capture Now is one of the three capture options covered in the "Capturing Options" section earlier in this lesson. Part of the Scratch Disks tab information includes an option to limit the amount of video you can capture in one stretch while using the Capture Now option.  The default for Limit Capture Now is 30 minutes. To change this to a lesser or greater amount of time, just enter the amount in the Minutes field and click OK. You may want to practice logging clips and capturing them different ways, or just dive in and practice as you go. Just make sure you keep an eye on your available hard-drive space so that you have room to capture the really good shots into your project. |