Capturing Options


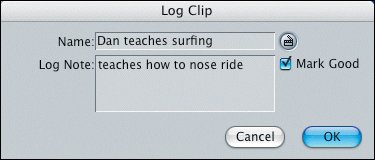
There are three Capture buttons in the lower portion of the Logging tab area, which represent three capture options: Clip, Now, and Project. Each of these options converts footage from your tape source into computer media files, such as the QuickTime files you worked with in Lesson 2. Although all the capture options create media files, they go about the process differently. For example, to capture DV footage, you use the Capture Clip option. To capture HDV, you capture the footage first, then enter any log information in the Browser columns.

Capturing a Clip

When working with DV, you play the footage, mark In and Out points to define the clip, and log the clip information before capturing it. If you have marked In and Out points on your DV source footage, you have identified a specific clip. The Capture Clip option will capture just the marked portion of your source material.

1.

Mark a new clip from your source footage, or use the clip you marked in previous exercise steps.

2.

Enter or amend the logging information for your clip. For example, you may want to deselect the slate boxes for Scene and Take so that information is not included in the clip name. You may also want to select the Mark Good box if it's a really good clip.

3.

In the Capture tab, click the Capture Clip button.

If the Prompt check box in the Name area was selected, the Log Clip window appears with the new clip's name, Log Note entry, and Mark Good check box.

4.

If necessary, make changes to the Name or Log Note, and click OK.

When capturing begins, a window appears that displays the material you are capturing. Don't worry if it looks jagged at this point. The display during capturing doesn't always reflect the quality of the captured image. When the capture process is complete, the clip appears in the Browser Capture bin.

5.

To stop the capture process manually at any time, press the Escape key on your keyboard.

Capturing Now

The second way to capture is to use the Capture Now option. This option is helpful when you want to capture unmarked portions of your source tape as one long clip, or when you don't have FireWire control over a source device, such as a VHS VCR or Hi8 camera, playing through a digital converter box.
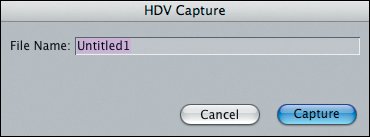
1.

Enter a clip name and reel number.

2.

Cue the source tape about 10 seconds before the action begins in the footage you would like to capture.

3.

Play the tape from that point.

4.

In the Capture tab, click the Capture Now button to begin capturing.

Tip

This is a less-exact method than the Capture Clip option, so make sure you give yourself adequate pre-roll time before the action you want to capture.

5.

To stop capturing, press the Escape key on your keyboard.

Capturing HDV Footage

To capture HDV footage, you begin as you would with DV. You connect your camera via FireWire to your computer, turn it on and switch it to VCR mode, then launch Final Cut Express HD. At this point, the capture process is more similar to Capture Now in that you do not mark In or Out points or enter detailed clip information before you capture.
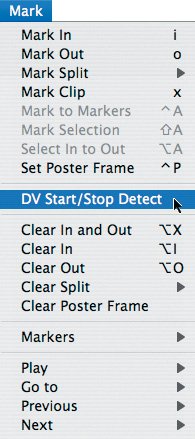
1.

Choose Final Cut Pro HD > Easy Setup and choose the appropriate HDV preset.

2.

Cue the HDV tape up to the area you want to capture, giving it a few extra seconds of handles before the desired material begins.

3.

Choose File > Capture.

In the dialog that appears, you can name the clip you are going to capture.

4.

Enter the clip name and click Capture.

Final Cut Express automatically plays the HDV camera and begins to capture from its current location. As the footage is being captured, the computer image may lag behind, so use your camera monitor as a reference.

5.

To stop capturing, press the Escape key on your keyboard.

Each captured clip appears in the Capture Bin after capturing is complete.

Note

HDV cameras use the MPEG compression format to compress HD footage. This format records audio and video files separately. During the capture process, Final Cut Express joins the audio and video together and creates QuickTime movies out of these files so you can work with them as single clips, as you do DV footage. This is why the capture process is different for HDV.

Working with Long Captured Clips

If you capture a portion of your tape or the entire tape in one long clip, there are a few ways that material can be divided into smaller clips. First, you can always create subclips from that clip before you begin editing. Second, if there are places in your source tape where the camera stopped and started again, the timecode will have changed. Final Cut Express can detect when the timecode changes and will create a new clip as it captures the material. You will work with this setting in the section on User Preferences.

Tip

There is also a feature called DV Start/Stop Detect in the Mark menu. After capturing a long clip, you can open that clip into the Viewer and select this feature. The clip (QuickTime movie) will be scanned for where the camera stopped and started, and markers will automatically appear in the Viewer scrubber bar at those locations. You can then use those markers to create subclips.


The third capture option, Project, is used once you have completed editing a project. This option will be covered in Lesson 19.


Apple Pro Training Series Final Cut Express HD
Apple Pro Training Series: Final Cut Express HD
ISBN: 0321335333
EAN: 2147483647
Year: 2006
Pages: 174
Authors: Diana Weynand

flylib.com © 2008-2017.
If you may any questions please contact us: flylib@qtcs.net