The Menus
| The menus iDVD, File, Edit, Project, Advanced, Window, and Help are where much of the action in iDVD begins and ends. If you know what each menu contains and what each item does, working with iDVD will be faster and easier.
That said, let's look at those menus one by one, from left to right, starting with… The iDVD menuThere's really only one item of much interest in the iDVD menu: the Preferences item (shortcut: Command-,), as shown in Figure 9.1. Figure 9.1. Preferences is the only item of real interest here.
In every Mac program, an ellipsis at the end of a menu item indicates that selecting the item won't have any immediate effect. Instead, choosing the item opens a window with additional choices and options, as shown in Figure 9.2. Figure 9.2. The iDVD Preferences window has three panes, as indicated by the three buttons in its toolbar.
In the General pane are two sections: Project Settings and Video Standard. Project Settings offers four checkboxes, each of which is pretty self-explanatory as are the two radio buttons under Video Standard. In the Video Standard section, choose NTSC or PAL depending on what the standard is in your country. It's NTSC in North America and Japan and PAL in most of Europe and the rest of Asia. As the note says, this will only affect new projects, not the current one or any others you have saved.
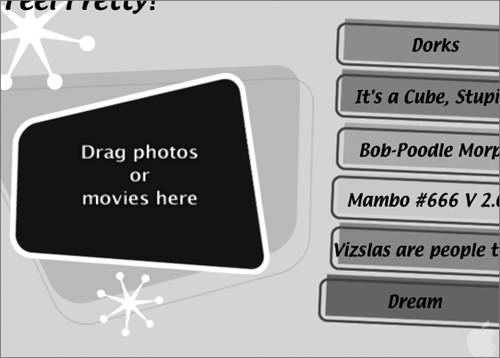
If you want Drop Zones highlighted (which I recommend), leave Show Drop Zones checked. Now, when a menu screen contains a Drop Zone, you'll see text telling you to "Drag photos or movies here," indicating where the Drop Zone is located. The "Show Apple logo watermark" checkbox shows and hides the Apple logo. Select the box if you want a semi-transparent Apple logo in the lower-right corner of your DVD, like this:
If you don't want an Apple logo, don't check the box. "Enable background encoding" tells iDVD to do its MPEG-2 encoding while you work. Unchecking the box means that when you click Burn, iDVD has to encode all your movies and menus before it can start burning your DVD. Unless you notice your Mac slowing down a great deal when background encoding is enabled, I recommend leaving this box checked.
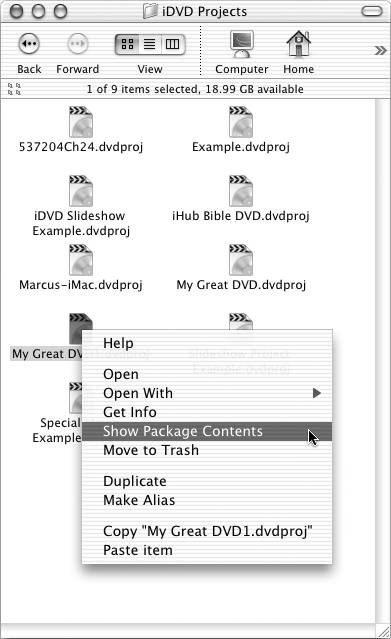
The check box for "Delete rendered files after closing a project" requires a bit of explaining. Its purpose is to help you conserve space on your hard drive. Here's why that's important: When it comes time to burn your DVD to disc you'll need a certain amount of free space on your hard disk or the burn will fail. The rule of thumb is that you need at least half as much free space on your disk as there is DV content on your DVD. So if your DVD contains 12 GB of original DV movie files (roughly one hour), you should try to keep at least 6 GB free. If you select the checkbox, when you quit or close the project, iDVD automatically deletes the MPEG files it rendered in the background. Your original DV movie files are untouched. The only downside is that iDVD will have to re-encode the movie files again before you can burn the project, which could take several hours. Oh, I know what you're thinking. Why let iDVD delete them at all? Why not just do it yourself if space gets tight on your hard disk? What's so hard about dragging a file to the Trash and emptying it? Here's where it gets tricky. OS X and iDVD hide those render files from you. If you want to delete the files manually, you'll have a hard time finding them unless you know the secret, which, of course, I'm about to share with you. Here it is: Your project document isn't really a document. It may look like a document, but it's really an OS X container known as a package. In this case, it's a package masquerading as a document, but packages may also pretend to be applications. Many of the icons you think of as applications are actually packages. How can you tell which icons are packages? Read on. A package is nothing more than a special folder that does one thing when you open it and does something else when you Control-click it and then choose Show Package Contents from the contextual menu, shown in Figure 9.3. Figure 9.3. Ah ha! So that's how you get to the stuff inside a package icon.
When the package opens, open the folder called Contents.
Open the Resources folder inside the Contents folder, then open the MPEG folder in the Resources folder. The files in the MPEG folder are your render files, as shown in Figure 9.4. You can now delete them in the usual way if you want to, by dragging them to the Trash. Figure 9.4. MPEG001097 and MPEGa01097 are the rendered versions of two movies in my project, which iDVD would delete for me if I checked the box.
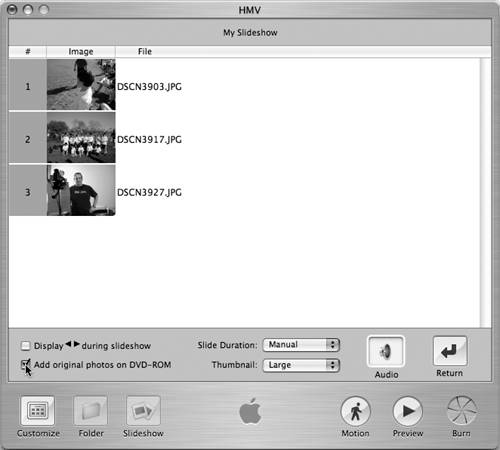
The Preferences' Slideshow pane has only two checkboxes. The first, Add original photos on DVD-ROM tells iDVD to include the originals of any photos in the data portion of your DVD. Images used in iDVD slideshows are always resized to 640 x 480 pixels, and these scaled pictures are embedded in the MPEG-encoded file written to your DVD. Suppose you want the user of your DVD to have access to the actual image files (probably jpeg or TIFF files) that were used to produce the slideshow. Check this box to have iDVD copy the original picture files to the disk separately from the DVD-Video content. Then, if your disk is loaded into any computer's DVD drive, the user will see a folder on the disk called "Slideshows." This folder will contain the photos, at their original resolution, used to make the slideshow. You can also change this setting on a slideshow-by-slideshow basis, in the screen where you set up your slideshow.
The second checkbox, Display during slideshow, adds forward and back arrows to your slideshow. When displayed on a TV, viewers won't be able to click the arrows on-screen to advance or reverse your slideshow, but the arrows will indicate which buttons to push on the remote control. Basically, your audience will know if they're at the beginning, middle, or end of your slideshow by looking at the arrows. Since most digital photos are going to be much larger than the 640 x 480 scaled picture in iDVD, this means your friends and family (or whoever you give the DVD to) can access the original photo on their computer, assuming the computer has a DVD drive. Always scale slides to TV Safe area tells iDVD to scale the photos even smaller than the 640 x 480 nominally available, so the edges of the photos don't get cropped when you watch the video on a TV set.
The final pane, Movies, has two sections. The first is a set of three radio buttons where you establish whether and how chapter marker submenus are created. The second is a scrolling list to which you can add folders that iDVD should search for movies to display in the Customize drawer's Movies pane. Your Home directory's Movies folder is always searched, but you can add other folders to the list. This is especially useful when, like me, you dedicate an external disk to your video editing projects. The iDVD menu has three Internet-related items directly below Preferences. Shop for iDVD Products takes you to the Apple Store Web page, pointing at items you might want to buy for iDVD (like blank DVD-R discs). Provide iDVD Feedback transports you to the iDVD Feedback page on Apple's Web site. Finally, Register iDVD presents the Apple Product Registration page where you can register with Apple as an iDVD owner. The remaining items below Preferences in the iDVD menu the Services submenu, and the Hide and Show triplets do the same thing they do in all OS X programs and have no special functions here in iDVD. Finally, the Quit item (shortcut: Command-Q) quits iDVD. But first, it will ask if you want to Save (if you've made changes since your last Save, but iDVD seems to always think you've made changes, so it almost always asks). The File menuThe File menu (shown in Figure 9.5) mostly handles your interactions with the items on your hard disk. The File menu's items let you create new projects, open and save existing projects, rename projects (Save As), and import media. Figure 9.5. The File menu deals primarily with, well, files.
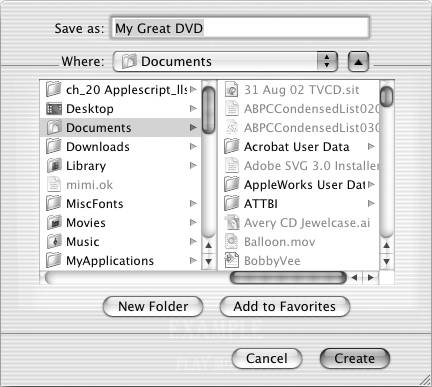
OK then, from the top we have: New Project (Command-N), Open Project (Command-O), and the Open Recent submenu. New Project begins a new project document (package) with the default name My Great DVD.
But before iDVD lets you use your new project document, you first have to give it a name and save it to a disk using a Save dialog that looks either like this:
Or like this:
Name your project and click the Save button. A new, empty project window appears with whichever theme you last used in iDVD applied. In this case it's my old favorite, the Global theme. Open Project serves up a standard Open file dialog, as shown in Figure 9.6. Figure 9.6. The Open dialog box (foreground) and an empty project (background).
Open Recent is a submenu:
It lets you open any of the last ten projects you've used directly, without the hassle of navigating an Open file dialog. Save Project and Save Project As are the usual Mac OS X Save and Save As commands, just like you've seen and used in almost every Mac OS X program ever made. Import is a submenu:
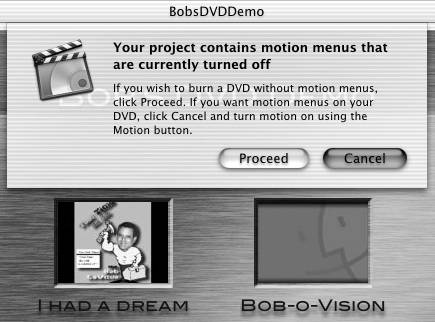
Since Chapters 5 and 7 cover this particular function getting your content into iDVD we'll leave it at that for now. Finally, Burn DVD (Command-P) burns the project on a blank DVD-R disc. If you have motion menus in your project and they're turned off, you'll receive a warning first.
Then it's show time.
The Edit menuThere's nothing unique about this Edit menu it does the same things it always has in almost every Macintosh program since time immemorial. They say a picture is worth a thousand words, so here's a picture:
That picture's not gratuitous, either. The one thing about this menu worth noting is the keyboard shortcuts. They're faster and easier than using the menu and they're worth remembering. One last thing while we're talking about the Edit menu: iDVD offers multiple Undos. That means you can not only Undo the last thing you did in iDVD, but you can also Undo the thing before it, and the thing before that, and so on. Usually. And if after undoing all those things you change your mind, you can just Redo them one, a few, or all. Usually.
Even blindfolded in the dark with my hands tied behind my back, my fingers know that Command-Z will Undo and Command-Shift-Z will Redo. These are such great commands that you should memorize their shortcuts even if you memorize no others. They're the key to creative freedom. When you use them, you don't have to worry about making a change and totally screwing up your project. Just Undo it.
The Project menuThe Project menu is where commands pertaining to your project live.
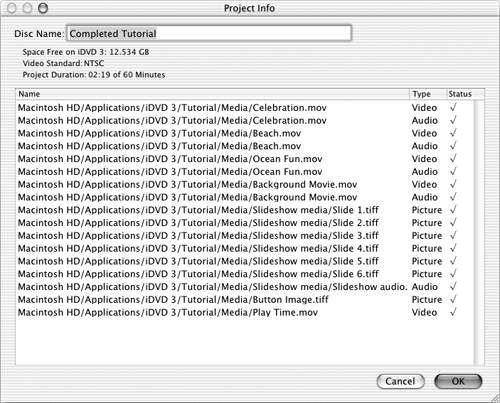
The first item, Project Info (Command-I), opens a window that displays each media item audio, video, or picture contained in the project, as shown in Figure 9.7. Figure 9.7. This project has seventeen media items in it.
The path to the item is displayed as its name. So the first item is a QuickTime audio file named Celebration.mov. It's in the Applications folder on my boot disk, in the Media folder, in the Tutorial folder, in the iDVD 3 folder. In Project Info window shorthand, that's Applications/iDVD 3/Tutorial/Media/Celebration.mov.
The next item, Show/Hide Customize Panel (Command-Shift-B), is a toggle. Choose it once and it shows the Customize drawer; choose it again and it hides the Customize drawer. Since using the Customize drawer is discussed in great detail in Chapter 6, "Working With Menus and Buttons,"and the items in the Customize drawer are described later in this chapter, we'll leave it at that for now. Add Folder (Command-Shift-N) adds a new folder to the current screen.
You can only have six items (folders, slideshows, or movies) on each screen (menu) of your DVD. If you try to add a seventh item, iDVD will gently scold you as shown in Figure 9.8. Figure 9.8. No, no, no. You may not do that!
If you want your DVD to contain more than six items, at least one of the items on the first screen must be a folder. That folder can contain up to six additional items. But if you need more than 12 total, you have to make one of the items on the second screen a folder or another item on the first screen a folder. That folder can contain up to six additional items. And so on. As far as I can determine, there is no limit to the number of folders and subfolders iDVD will let you create. I try to keep my projects as simple as possible, though. The more folders and subfolders you throw into the equation, the more confusing the DVD's navigation.
Add Slideshow (Command-L) adds a new slideshow to the current screen.
New Menu from Selection is a shortcut that removes the selected button from the menu and creates a new folder in its place (takes the place of choosing Delete from the Edit menu, followed by Add Folder from the Project menu). Go Back (Command-B) is a menu command equivalent to clicking the Back button when you're in a submenu. The keyboard equivalent is a lot more useful than the menu item, in most cases. The Advanced menu
There's nothing particularly advanced about any of the items in this menu, but I suppose they're more advanced than Cut and Copy. Maybe. First up is Show/Hide TV Safe Area (Command-T). This important item highlights the area of your project that is "title safe." Since most consumer television sets are incapable of displaying a broadcast signal or videotape or DVD image from edge to edge, corner to corner (as I mentioned earlier in the chapter, the technical term is "overscan"), some part of it always gets cropped. I doubt you want to burn a disc that looks like this:
So you should turn on the TV safe area, which looks like this:
At the very least, use the TV safe area one time just before you burn a DVD. Assume that anything outside the line isn't going to be seen by most (or all) people.
I suggest you just leave it showing all the time. It couldn't hurt and it just might save you $3 some day. Motion (Command-J), toggles your project's motion menus (if it has them) on or off. Thanks to the Redundancy group, this is the same thing as clicking the Motion button.
Since it's annoying to work in iDVD with motion menus chugging away, and since, as you've seen, iDVD will warn you if you try to burn a DVD with them turned off, you'll probably prefer them off until just before you either Preview or Burn.
The last two "Advanced" items Apply Theme To Project and Apply Theme To Folders do pretty much what you'd expect them to. When you click on a theme in the Customize drawer's Themes pane, it is applied to the current screen only. If you want every screen in the project to use this theme, choose Apply Theme to Project; if you want this folder and all its subfolders to use this theme, choose Apply Theme to Folders. And that's the not-so-Advanced menu. The Window and Help menusThese two menus don't have much going on, or at least not much to do with iDVD itself. The Minimize (Command-M) command in the Window menu stashes your project window in the Dock. When you want to work on it again, you won't have to relaunch iDVD and wait for everything to load. Just click the Dock icon and your project will reappear on-screen. Finally, the Help menu has only three entries: iDVD Help (Command-?), iDVD Tutorial, and Keyboard Shortcuts. The first launches Mac Help (if it's not already running) and displays the Help page for iDVD; the second launches Mac Help (if it's not already running) and displays the first page of the iDVD tutorial (which we covered in Chapter 3, "Introduction to Making DVDs"); and the third also launches Mac Help (if it's not already running) and positions you to the iDVD Help Keyboard shortcuts page. By now, you know how I feel about using keyboard shortcuts, so learn them, know them, use them. |