Creating a custom interface for a Notes database can give it a professional look and can also help the user navigate the application. By default, when a database is created, the left pane contains the list of available views. By adding a custom interface, you can incorporate graphics, add buttons, format the font, and customize the view names. For example, Figure 17.9 illustrates a database that includes a custom user interface.
Building a custom application interface requires a number of Domino design elements including a frameset, page, and outline. The combination of these elements is used to build and display the interface when the user opens the database.
In this example, the frameset will contain two panesLeft and Right. The interface will be displayed in the left pane of the frameset. This pane will contain a page, and the page will contain an outline. As such, you will start by creating the outline, followed by the page and frameset. Optionally, a navigator can be created for Web navigation. The right pane will display data and will reference database views.
To implement this solution, complete the following steps.
Step 1. | Create a database with one or more views and forms.
|
Step 2. | Create the outline. The outline defines the navigational elements and will be displayed in the left pane of the frameset. To create the outline, select the Create > Design > Outline menu options.
|
| |
Step 3. | Add entries to the outline. There are two methods to generate the outline entriesmanually create the entries one at a time or have the Domino Designer client generate entries. To have Designer perform this function, click the Generate Default Outline button. This will create an outline entry for each view in the database.
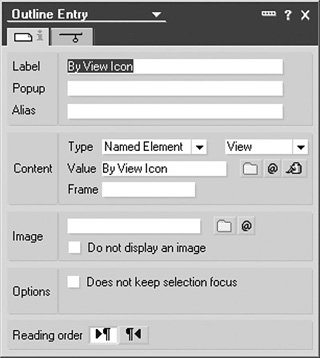
Alternatively, to manually create entries, click the New Entry button. This will display the Outline Entry properties dialog. You will need to specify a Label and set the content type to Named Element and View (see Figure 17.10). In the content value field, you will need to specify the view name (or click on the folder icon to select a design element from a list). Repeat this process until all desired entries have been applied to the outline.
Figure 17.10. Outline Entry settings
Tip
To create a spacer, or a blank link between outline entries, click the New Entry button but do not specify a label. A spacer might be used to separate groups of views or entries to improve overall readability.
Note
As a general practice, you should always use the alias name when working with design elements. However, outlines automatically default to the primary name and do not allow the alias name to be specified. This means that if the view name is changed, youll also need to update the outline to reflect the name change.
|
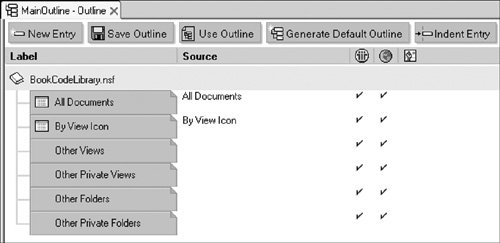
Step 4. | Save the outline. Select the Save Outline button and specify MainOutline for the design element name. The outline should look similar to Figure 17.11 (except the outline entries reference views that are specific to your database design).
Figure 17.11. Newly created outline
Tip
By default, icons are displayed next to the view design element when the application is accessed via the Lotus Notes client. To disable the icon from displaying (or to change the icon), double-click on the Outline Entry to display the properties dialog. Then check the Do not display image option. To change the icon, import a graphic resource file and then select it from the properties dialog.
|
Step 5. | Create a page. The outline must be embedded in a page in order to display the interface. To create the page, select the Create > Design > Page menu options.
|
| |
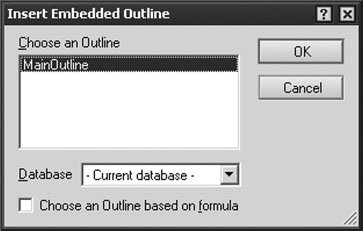
Step 6. | Add the outline to the page. Select the Create > Embedded Element > Outline menu options. When prompted, select MainOutline to add the design element to the page (see Figure 17.12).
Figure 17.12. Embed the newly created outline in the page.
|
| |
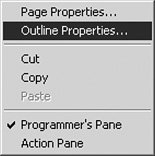
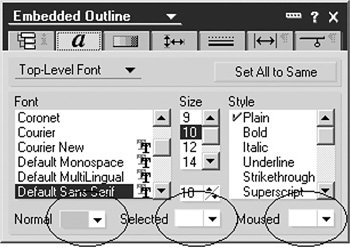
Step 7. | Set the text properties. Right-click on the embedded outline design element and select Outline Properties from the popup menu (see Figure 17.13). (Note: If the "outline properties" menu option does not display, then the underlying "page" element is still in focus. Single-click on the embedded outline, and then the menu should be available.)
Figure 17.13. Open the outline properties using the popup menu.
To set the text properties, switch to tab 2. Select light gray for the Normal setting and white for the Selected and Moused options (see Figure 17.14). These settings will make the text more visible with the selected background graphics.
Figure 17.14. Change the text color properties for the outline.
|
| |
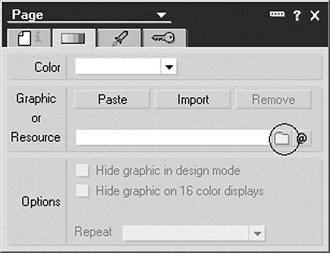
Step 8. | Add a background image to the page. This will add some color to the display and make the outline text more visible. Select the Design > Properties menu options. Switch to tab 2 and select the yellow folder icon located to the left of the Resource field (see Figure 17.15).
Figure 17.15. Click the folder to select a graphic or resource file.
This will display the Insert Image Resource dialog window (see Figure 17.16). Click the New button to add an image resource file.
Figure 17.16. Click New to insert a new image.
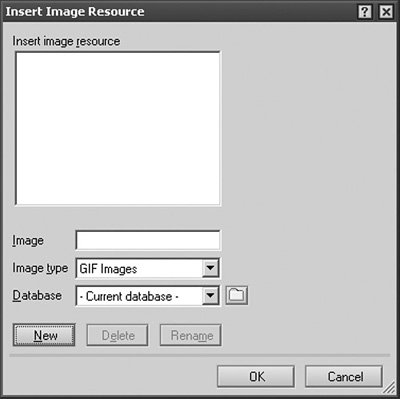
Use the file finder dialog to locate the SampleBackground.gif image file in the developers toolbox folder. Click Open to add the image. Then click OK to apply the image to the page.
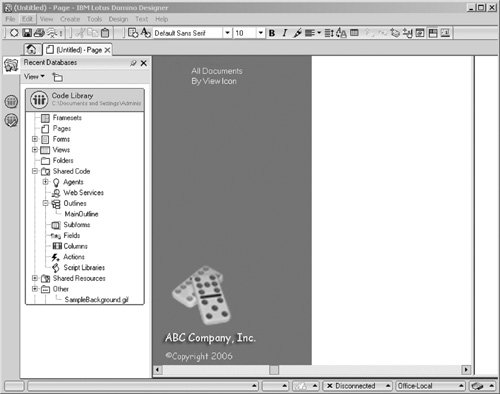
After it is applied, change the Repeat setting to Repeat Once in the Page properties dialog. The MainPage should look similar to Figure 17.17.
Save and close the design element. When prompted, name the item MainPage.
Figure 17.17. Completed Outline Entry settings with a sample background image
|
Step 9. | Create a two-pane frameset. The left pane will contain the page, and the right pane will display a corresponding view. To create the frameset, select the Create > Design > Frameset menu options. When prompted to select a design, click OK to accept the default.
|
| |
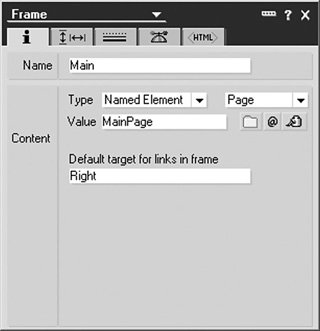
Step 10. | Configure the frameset. The frameset configuration will be completed in two parts. First, configure the left pane followed by the right. To configure the left pane, click inside the left pane. Then, using your right mouse button, select Frame Properties from the popup menu. Set the values as shown in Figure 17.18.
Figure 17.18. Setting the right-side frame properties
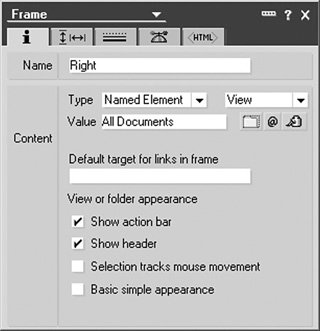
With the property window still displayed, use your mouse and click on the right pane. This will shift the focus of the properties dialog and provide the option to configure the other pane. Set the values shown in Figure 17.19. Be sure to select a view that corresponds to your database when setting the content value (as opposed to All Documents, which is used for illustrative purposes).
Figure 17.19. Setting the left-side frame properties
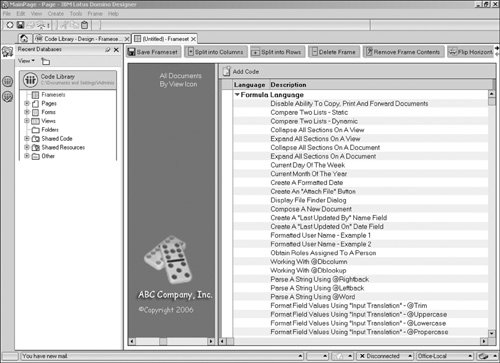
Save and close the frameset. When prompted, name the design element MainFrame. The frameset should now look like Figure 17.20.
Figure 17.20. Completed frame design
|
| |
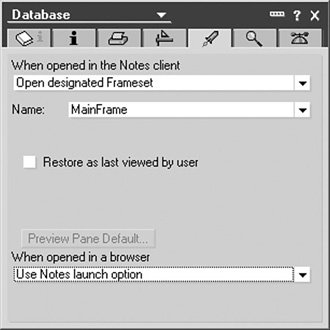
Step 11. | Enable the user interface. Select the File > Database > Properties menu options and switch to tab 5. Select Open designated Frameset and MainFrame when opened in Notes client (see Figure 17.21).
Figure 17.21. Set default frameset for the database
|

