| In Lesson 5, "Changing How Text Looks," you learned that you can use various font attributes, such as font size, bold, italic, and underline, to emphasize and otherwise denote certain text in your document. You also learned that alignment, such as centering, can be used to set off certain text lines on a page. Word provides you with the capability to add borders to your text and even place a shadow on the edge of a border for greater emphasis. You can add borders to text on a page or to an entire page. Adding Borders to Text A border can be placed around any text paragraph (any line followed by a paragraph mark). This means that one line of text or several lines of text can have a border placed around them.  | Remember How Word Views a Paragraph  Whenever you type a line or several lines of text and then press Enter, you are placing an end-of-paragraph mark at the end of the text. Word views any line or lines followed by a paragraph mark as a separate paragraph. If you need to view the paragraph marks in your document, click the Show/Hide button on the Word Standard toolbar. Whenever you type a line or several lines of text and then press Enter, you are placing an end-of-paragraph mark at the end of the text. Word views any line or lines followed by a paragraph mark as a separate paragraph. If you need to view the paragraph marks in your document, click the Show/Hide button on the Word Standard toolbar. |
To place a border around a text paragraph, follow these steps: -
Place the insertion point in the paragraph that you want to place the border around. If you want to place a border around multiple paragraphs, select all the paragraphs. -
Select the Format menu, and then Borders and Shading . The Borders and Shading dialog box appears, as shown in Figure 6.1. Figure 6.1. The Borders and Shading dialog box enables you to place a border around your text. 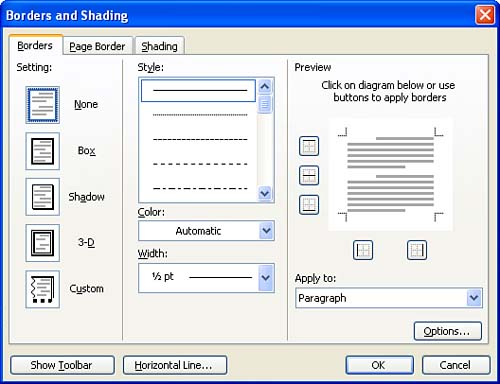 -
Make sure the Borders tab is selected on the dialog box. You are provided with several settings for how the border should appear around the text. -
In the Setting area of the dialog box, select the type of box you want around your text; choose Box, Shadow, 3-D , or Custom by clicking the appropriate setting sample. The Custom option enables you to create a border that uses different line styles for the various sides of the border. | | Removing a Border from a Paragraph If you want to remove the border from a paragraph, choose None in the Setting area of the Borders and Shading dialog box. |
-
Several line styles are available for your border. Click the Style scroll box to scroll through the various line styles, and then click the style you want to use. -
To change the color of the border lines, click the Color drop-down arrow and select a color from the color palette that appears. -
As you select the various parameters for your border (in cases where you have selected Box, Shadow, or 3-D as the border setting), you can view a preview of the border in the Preview box. The Preview box also makes it easy for you to place an incomplete border around a paragraph in cases where you might only want a line above or below the text (refer to Figure 6.1). -
When you have finished selecting the settings for the border, click the OK button. The border appears around the paragraph or paragraphs in the document, as shown in Figure 6.2. Figure 6.2. A border appears around the selected text after you set the border parameters in the Borders and Shading dialog box. 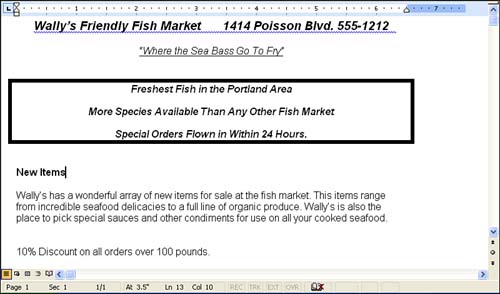  | Borders Around More Than One Paragraph If you select several paragraphs that are using the same style and indents, Word places one border around all the paragraphs. If you want separate borders around the paragraphs, assign borders to them one at a time. For more discussion about indents, see Lesson 7, "Working with Tabs and Indents." You can find more information about styles in Lesson 10, "Working with Styles." |
You also can quickly place a border around a paragraph or other selected text by using the Tables and Borders toolbar. Right-click anywhere on one of the currently shown toolbars and select Tables and Borders from the toolbar list. The Tables and Borders toolbar appears in the document window. Figure 6.3 shows the Tables and Borders toolbar. Figure 6.3. You can add borders to selected text using the Tables and Borders toolbar.   To apply a border to a paragraph, make sure the insertion point is in the paragraph, and then click the drop-down arrow on the Borders button located on the Tables and Borders toolbar (this button also appears on the Formatting toolbar). From the border list provided, select the type of border you want to place around the text. To apply a border to a paragraph, make sure the insertion point is in the paragraph, and then click the drop-down arrow on the Borders button located on the Tables and Borders toolbar (this button also appears on the Formatting toolbar). From the border list provided, select the type of border you want to place around the text. |