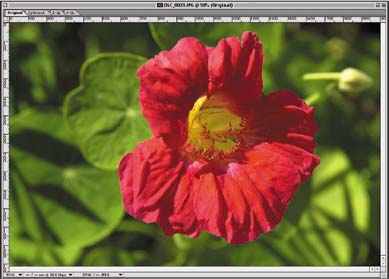
| Photoshop and ImageReady enable you to create impressive animation sequences using progressive applications of various texture filters or distortion filters. (You can create the frames in Photoshop as layers but only ImageReady can create the animation.) By creating duplicate layers of the same file and then applying a filter with increasing intensity, it is easy to animate the filter application. In this task, we take a close-up image of a flower and apply the Twirl filter in successive layers to create a nifty animation. Although you can start with any type of file, animations must be saved in the GIF format. Open the File in ImageReady In ImageReady, choose File, Open and select the file you want to animate with a filter. 
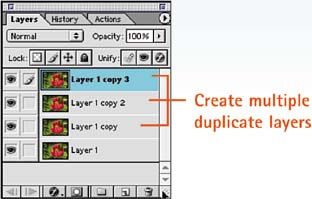
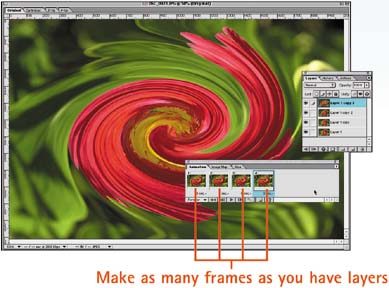
Duplicate Layers Choose Window, Layers to open the Layers palette. Choose Duplicate Layer from the palette menu multiple times to create several individual states for the animation. In this example, I created three more layers. 
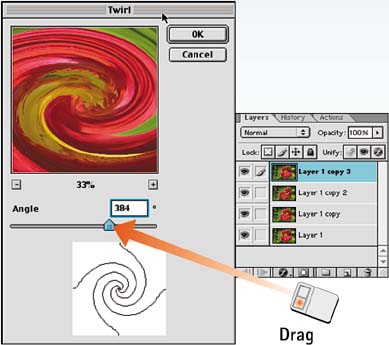
Filter the Layers Select the first layer in the Layers palette and open the desired filter (for this example, I chose Filter, Distort, Twirl). Apply a modest filter amount and click OK. Select the other layers in sequence, applying the filter to each layer with increasing intensity. 
Open the Animation Palette Choose Window, Animation to open the Animation palette. 
Create Frames Choose New Frame from the Animation palette menu to create a new animation frame. Repeat this step to create a corresponding frame for each filtered layer you created in Step 3. For example, if you have the original layer and created three filtered copies in Step 3, create four animation frames now. 
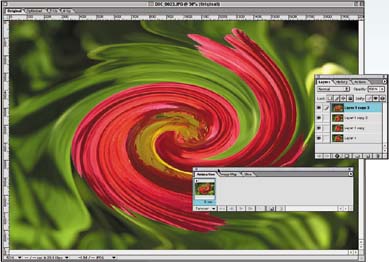
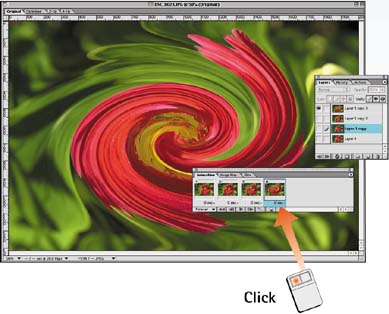
Assign Layers to Frames With both the Layers and Animation palettes visible, click the first animation frame and select the corresponding first layer of the filter progression. Click the visibility icons (the eye icons) for all the other layers so that only the selected layer is visible. Then click the next animation frame and select the next filtered layer in the Layers palette, making sure that only the selected layer is visible. Continue until each frame is assigned to a layer. 
How-To Hints Begin in Photoshop if Necessary Because Photoshop offers many more filter options than does ImageReady, you might want to perform Steps 1 through 3 of this task in Photoshop. After you have filtered all the layers, click the Jump To button at the bottom of the toolbox to open the file in ImageReady and continue with Step 4. |
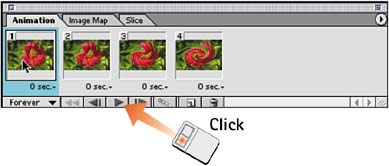
Play Back in ImageReady Click the Play button at the bottom of the Animation palette to play the animation. Check for smoothness, alignment, and timing between frames. The animation will replay continuously; click the Stop button to stop the playback. 
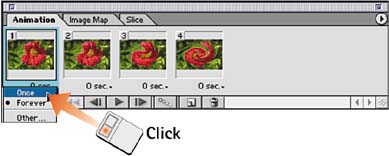
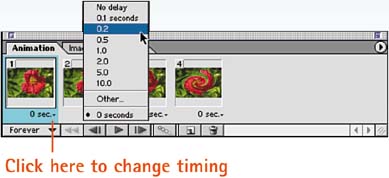
Set the Loop Count The Loop Count option controls whether an animation plays once, forever, or a specific number of times. Select Once or Forever from the pop-up menu; alternatively, select Other and enter the number of repetitions in the dialog box that appears. 
Set the Frame Timing To add a timing delay for a single frame, click the timing pop-up menu underneath the frame you want to modify and select the desired time delay. For example, you might want to add a longer delay to the first frame to emphasize the original state of the image. 
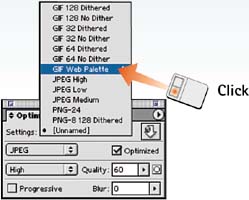
Set GIF Optimization Choose Window, Optimize to open the Optimize palette. Optimize the animation as a GIF file as explained in Part 4, Task 4, "How to Build GIF Files for the Web." 
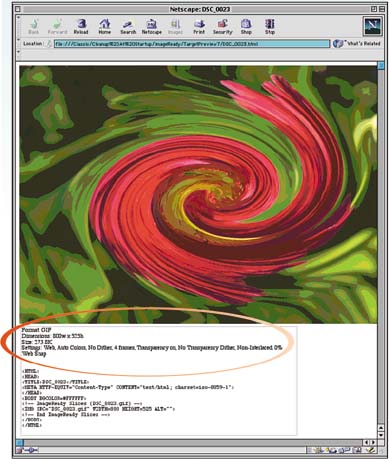
Preview in a Browser Choose File, Preview In and select the target browser from the Preview In submenu. The animation file opens in the specified browser with information about the file size, file type, and compression type displayed at the bottom of the window. 
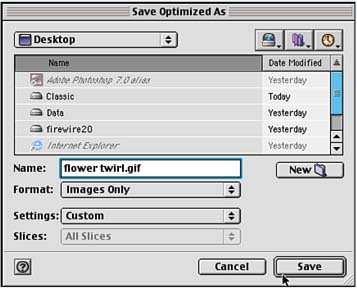
Save as GIF Configure the GIF format settings in the Optimize palette and select File, Save Optimize to save the GIF file. For details on how to save GIF files, refer to Part 4, Task 4. 
How-To Hints Optimizing and Saving Although you optimized the image file as a GIF in Step 10 of this task, you must also save the file as a GIF in Step 12. Optimizing the file as a GIF sets the number of colors and so on; it does not save the file. You must save the file using the GIF89a format, or the file will not animate. Keeping the Number of Animation Frames to as Few as Possible Animation frames dramatically increase file size and, consequently, download times. Keep the number of frames to a minimum to ensure fast download times and to guarantee fast-loading pages. Animating Text with Warp Text Consider using the Warp Text tool for sophisticated text animation. Create the text with the Type tool, build animation frames, and apply Warp Text effects gradually to each frame. Warp Text is an icon in the upper-right corner of the Options bar for the Text tool. |
|
