Task 4 How to Improve Contrast with ShadowHighlight
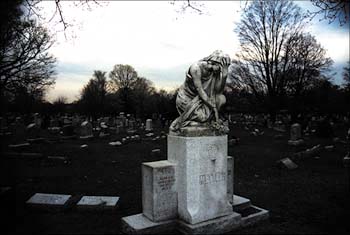
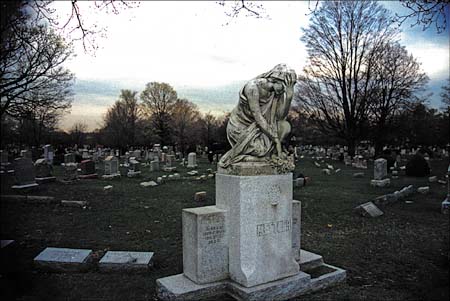
Task 4 How to Improve Contrast with Shadow/HighlightShadow/Highlight is an extremely smart set of controls that enables you to brighten shadows and darken highlights simultaneously, controlling the tonal range affected and the overall intensity of the effect. With these controls, you can increase image contrast in the shadows or highlights without significantly sacrificing contrast in the other tonal regions. 1. Open the ImageOpen the image you want to affect. In this example, a white stone monument and a bright sky have overwhelmed the darker values in the image. The goal is to add contrast to the shadows without losing contrast in the sky.
2. Launch Shadow/HighlightSelect Image, Adjustments, Shadow/Highlight to open the Shadow/Highlight dialog box. Enable the Preview and Show More Options check boxes to display all the options in the dialog box. The default settings often create dramatic results right away. In this case, the default settings have lightened the shadow areas, bringing out details in the grass. 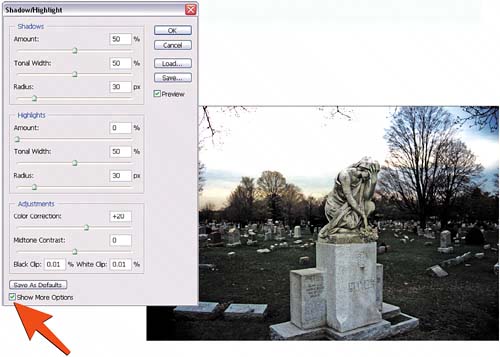 3. Tweak the ShadowsIn the Shadows section of the dialog box, use the Amount slider to control the degree of change to each shadow pixel; the higher the number, the more the shadows are brightened. The Tonal Width slider controls the range of tone to be modified; lower values restrict the effect to just the shadows, and higher values modify lighter tones. The Radius slider averages neighboring pixels and controls the overall contrast within the tonal range. For this image, I set the Amount to 33, the Tonal Width to 40, and the Radius to 16. 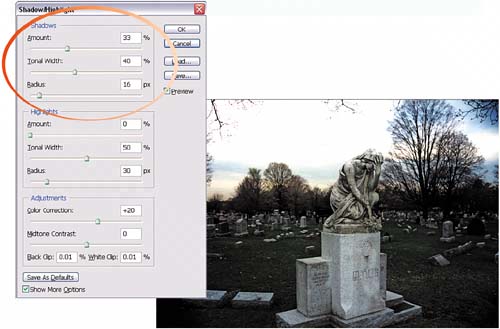 4. Darken the HighlightsThe Highlights section enables you to darken the highlight areas using the same control options described in step 3. To bring out the available sky detail, I set the Amount to 20, the Tonal Width to 33, and the Radius to 18. 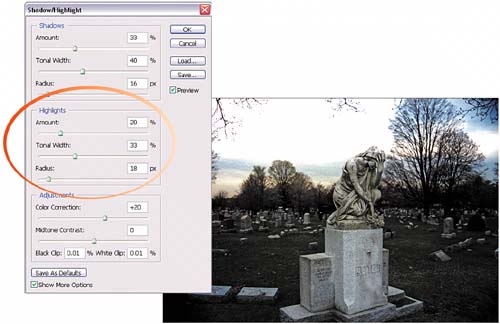 5. Make Further AdjustmentsThe Adjustments section allows you to tweak the Color Correction and Midtone Contrast. Increase the Color Correction value to bump up the color saturation globally. The Midtone Contrast slider lightens or darkens the middle tones in the image. In this example, Color Correction was set to +58 and Midtone Contrast was set to 11. 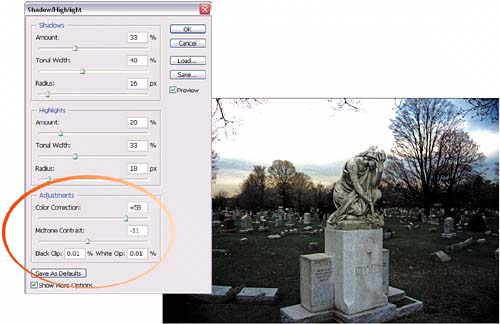 6. View ResultsCompare the final result of the Shadow/Highlight adjustment shown here to the image from step 1. Notice the improved detail and clarity in the adjusted image.
|
EAN: 2147483647
Pages: 184
