50. Freeze a Frame  BEFORE YOU BEGIN BEFORE YOU BEGIN
27 Change Slides to the Beat of Music 29 About the Timeline and Video Tracks
 SEE ALSO SEE ALSO
21 Grab a Still from Video 40 Slow/Speed/Reverse Audio/Video
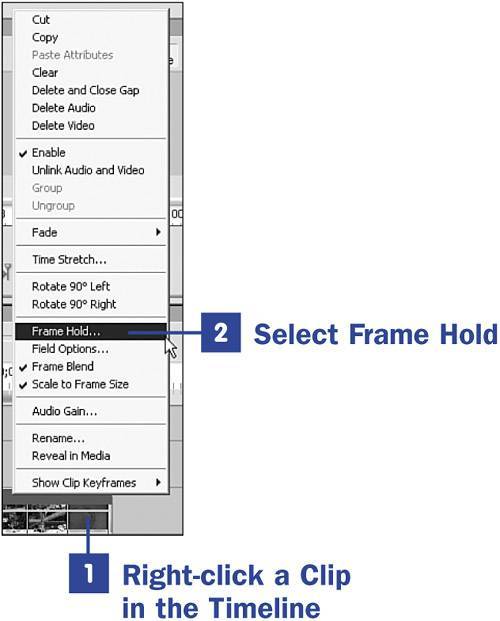
Frame Hold, or freeze frame, is one of the fun video tricks you can use in your movies. This option allows the audio to continue rolling while the video stays put on a single frame. I imagine that at some time during the editing of your movies that you will come up with that one frame in a clip that just needs to be frozen in time. The frame you choose as the freeze frame will appear and freeze from the beginning (the In Point) to the end (the Out Point) of the clip. Take this into consideration to determine whether your clip needs to be split to better isolate the freeze frame; that way you are not freezing a frame for an entire 45-minute movie. 1. | Right-click a Clip in the Timeline
Right-click the clip in the Timeline that contains the frame you want to freeze. The clip is selected and the clip's context menu opens.
| 2. | Select Frame Hold
Select Frame Hold to open the Frame Hold Options dialog box.
| 3. | Select Hold On
Enable the check box in front of the Hold On option. This option selects and applies the freeze frame option to the selected clip.
50. Freeze a Frame 

 NOTES NOTES
The Hold Filters option, also in the Frame Hold Options dialog box, prevents any keyframed effects that were applied to the clip from taking place. The Deinterlace option removes one field from an interlaced clip and doubles the remaining field. This option removes interlace artifacts from the freeze frame, if they exist. | 4. | Select Hold Point and Click OK
You must identify the frame in the clip you want to freeze. The frame you want to freeze is called the hold point, and Premiere Elements offers three options for the identifying the hold point in your clip: In Point, Out Point, and Marker 0:
- In Point The hold point is the very first frame of your clip as it appears on the Timeline. When you choose this option, the very first frame of the clip is frozen for the entire clip.
- Out Point The hold point is the very last frame in your clip. When you choose this option, the very last frame of the clip is frozen for the entire clip.
- Marker 0 This option requires that you set an other numbered clip marker and specify 0 (zero). The marker indicates the frame you want to freeze; that frame is frozen for the entire clip. For details about numbered markers, see 57 Add an Interactive Marker.
 TIP TIP
To set an other numbered clip marker, zoom in on the clip so you can see the individual frames and position the CTI so the frame you want to freeze is selected. From the menu at the top of the screen, choose Marker, Set Clip Marker, Other Numbered. A dialog box opens with the option to enter a number; be sure that the marker's number is 0 (zero), and then press OK. The marker is applied to the current frame marked by the CTI. When selecting the hold point option, remember that when you choose In Point or Out Point, later changing the In or Out point (as described in 19 Trim Clips in the Media Panel) does not change the freeze frame. When you choose the Marker 0 option, however, changing the position of the marker does change the freeze frame.
When you are finished setting your options, click the OK button. You can then view the results of your freeze frame by scrubbing over the clip in the Timeline. The audio from the clip plays as usual, but the video freezes on the frame you selected as your hold point.
|
|
 BEFORE YOU BEGIN
 SEE ALSO

 NOTES
NOTES