| All surfaces have normals, but Polygons give you a great deal of control over them. Normals tell the renderer how to shade the surface. The direction and angle of a normal determines how hard or soft to render the edge between two faces. To display vertex normals: 1. | Select the polygon object.
| 2. | From the Display menu, select the box next to Custom Polygon Display.
The Custom Polygon Display Options dialog box opens (Figure 8.110).
Figure 8.110. Use the Custom Polygon Display Options dialog box to display vertex normals. 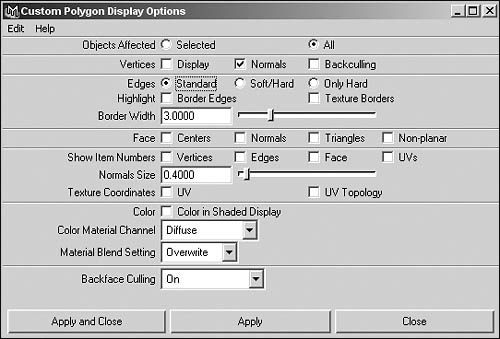
| 3. | In the Vertices section, check Normals and click Apply.
The selected object displays the vertex normals with lines pointing from the vertices (Figure 8.111).
Figure 8.111. The selected object displays the vertex normals with lines pointing from the vertices. 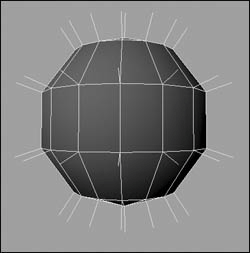
|
By controlling the angle of the vertex normal, you can make a low resolution surface look smoother than it actually is. To soften vertex normals: 1. | Create a polygon sphere by selecting Create > Polygon Primitives > Sphere.
| 2. | Press  to switch to shaded mode. to switch to shaded mode.
| 3. | From the Polygon menu, choose Edit > Normals and select the box next to Soften/Harden.
The Polygon Soften/Harden Edge Options dialog box opens (Figure 8.112).
Figure 8.112. Change the appearance of your object in the Polygon Soften/Harden Edge Options dialog box. 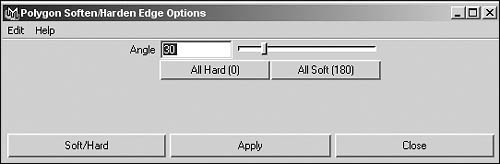
| 4. | Click All Hard (0) and then click Apply.
The sphere now has the appearance of a harder surface (Figure 8.113)
Figure 8.113. Click All Hard (0) to make the sphere look a little like the Death Star. 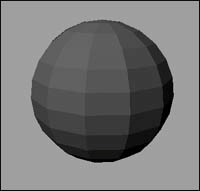
| 5. | Click All Soft (180) and then click Apply.
The sphere now has the appearance of a smooth surface again (Figure 8.114).
Figure 8.114. Click All Soft (180) to make the sphere look smooth again. 
|
The Vertex Normal Edit Tool lets you manually edit individual vertex normals, giving you precise control over the shading of a face. To edit a vertex normal: 1. | Select the polygon object.
| 2. | Press to switch to shaded mode.
| 3. | Press  to switch to component mode and select Points to switch to component mode and select Points  . .
| 4. | Select a single vertex to edit.
| 5. | From the Edit Polygons menu, choose Normals > Vertex Normal Edit Tool.
The vertex normals are displayed on the selected object and the Vertex Normal Edit Tool manipulator appears (Figure 8.115).
Figure 8.115. The Edit Vertex Normal tool manipulator appears on the selected vertex and is ready to be rotated. 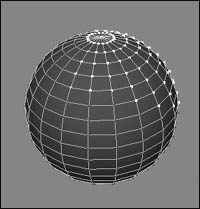
| 6. | Click one of the manipulator circles and drag it to rotate the vertex normal (Figure 8.116).
Figure 8.116. Rotate the vertex normal. 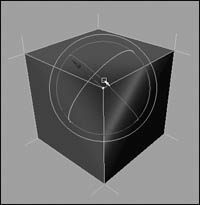
|
As you rotate the vertex, you will see the change in shading on the surface. If you see diamond-shaped black areas on a mesh, that probably means that your vertex normals are locked or won't respond to attempts to soften them. To solve this, you need to unlock the vertex normal. To unlock vertex normals: 1. | Select the polygon object (Figure 8.117).
Figure 8.117. Locked normals appear as black diamond shapes on a surface. 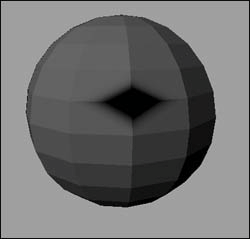
| 2. | Press to switch to shaded mode.
| 3. | Press switch to component mode and select Points .
| 4. | Select the locked vertex or vertices.
| 5. | From the Edit Polygons menu, choose Normals and select the box next to Set Vertex Normal.
The Set Vertex Normal Options dialog box opens (Figure 8.118).
Figure 8.118. Check Unlock in the Polygon Set Vertex Normals Options dialog box. 
| 6. | Check Unlock Normals and click Apply.
The normals return to a default orientation (Figure 8.119).
Figure 8.119. The result of unlocking a vertex. 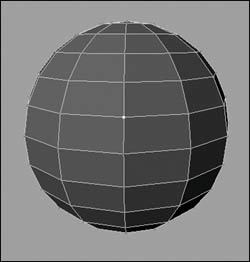
|
The face normal determines which side of the surface to render. To display face normals: 1. | Select the polygon object.
| 2. | From the Display menu, select Polygon Components > Normals.
The face normals are displayed as perpendicular lines pointing up from the center of each face (Figure 8.120).
Figure 8.120. Face normals project from the center of each face in a polygon object. 
|
By default, Maya creates double-sided polygons. If you create a single-sided polygon, the side of the face that has the normal will be displayed. If you look at the polygon from the other side, you see right through it. This is also referred to as Backface Culling. To make a mesh single sided: 1. | Press to switch to shaded mode.
| 2. | Select the polygon object (Figure 8.121).
Figure 8.121. Select a double-sided object. 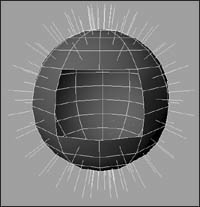
| 3. | Press  to open the Attribute Editor for the selected object. to open the Attribute Editor for the selected object.
| 4. | In the Render Stats section, uncheck Doubled Sided (Figure 8.122).
Figure 8.122. Uncheck Double Sided in the polygon's Attribute Editor. 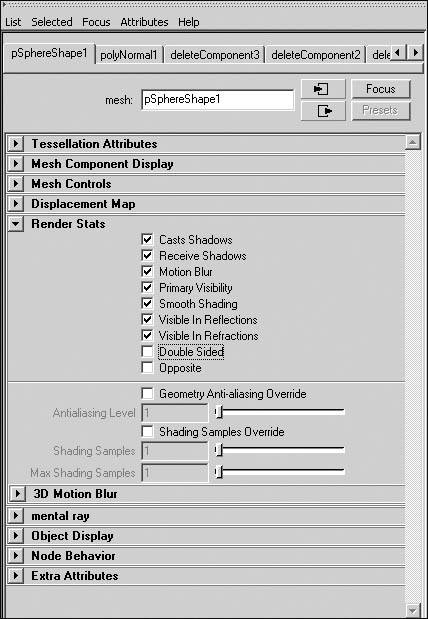
The object updates and only one side of the object's surface is visible (Figure 8.123).
Figure 8.123. You can see through the back face of a single-sided surface. 
|
Whether you are working with single- or double-sided polygons, it is important that normals on the same mesh all point in the same direction. However, normals on one surface might not face the same direction as those on another surface to which you are attaching. When this happens, many Maya functions will not behave as expected. To correct this, select the offending faces and reverse their face normal. To reverse a face normal: 1. | Select the polygon object.
| 2. | Display the face normals for the object as described above.
The face normals project from the centers of all the faces (Figure 8.124).
Figure 8.124. The face normals point outward... 
| 3. | From the Edit Polygons menu, select Normals > Reverse.
The face normals now project in the opposite direction (Figure 8.125).
Figure 8.125. ... until they are reversed. 
|
 Tip Tip
You can set Maya to create single-sided polygonal surfaces by selecting Polygons > Tool Options > Create Meshes Single Sided. All of the above normal tools can be applied to an entire object or just to selected faces, and many of these tools will also work on selected vertices, faces, and edges.
|