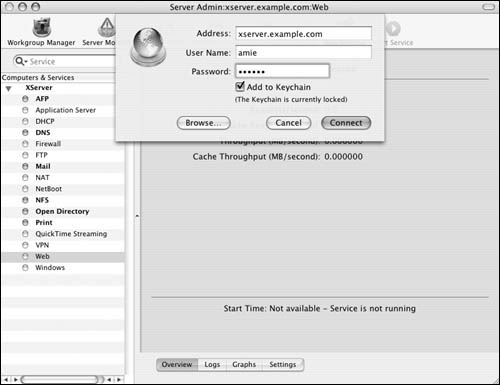
| Configuring the Mac OS X Web server, although relatively simple, is only half of what you need to do in order to make your Web sites accessible to the Internet. Obviously, having static real-world IP addresses is necessary if your Web sites are to be accessed by anyone on the Internet. Further, because it's difficult for most people to remember IP addresses, Web sites usually have a DNS record name that makes them easier to find. You can certainly enable a Web site without a DNS record, but this isn't standard practice. As you may already know, Mac OS X Server can act as a DNS server (see Chapter 6, "Network Configuration Options"). Your Web server doesn't have to host these DNS records, because you may have a service provider already doing this for you. Aside from making your Web sites easier to find, unique DNS names lets you host multiple Web sites on one Mac OS X Server using only one IP address. In order to have separate Web sites on one server, you must choose at least one of three unique host identifiers: Each Web site can be tied to a unique IP address, port number, or DNS name. Using multiple static IP addresses can be wasteful, because real-world addresses are limited and usually cost money. Using unique port numbers is free, but using any port number outside of the default for HTTP (port 80) requires a user to type in the custom port number after the address. Multiple DNS names are cost efficientor free, if you host your own DNS serverand easiest for your users to access. To set up a Web site: 1. | Launch the Server Admin tool located in /Applications/Server, and authenticate as the administrator (Figure 9.1).
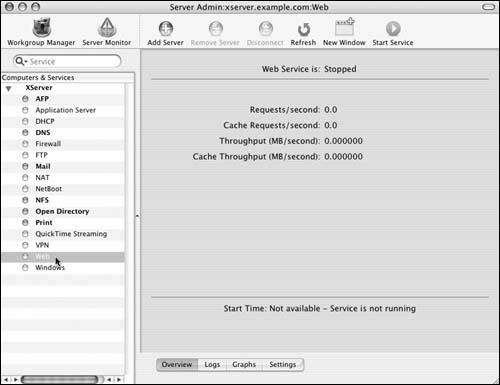
| 2. | Select the Web service for your server in the Computers & Services list (Figure 9.2).
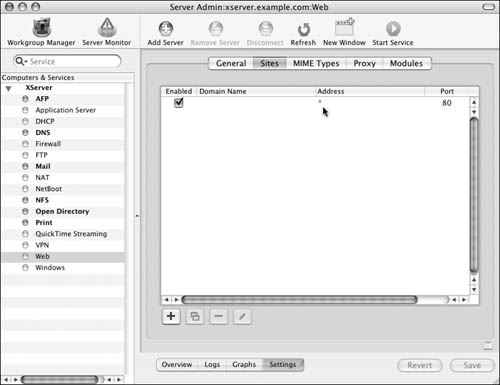
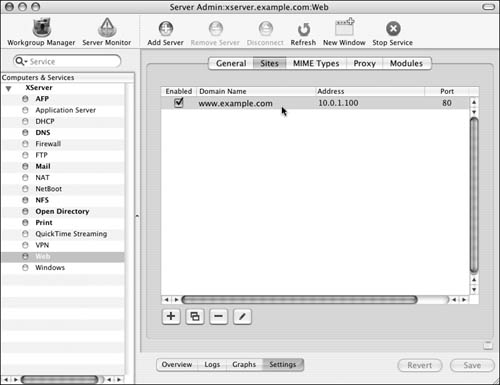
| 3. | Click the Settings button  and then the Sites tab and then the Sites tab  . .
Initially, the default Web site in the Sites list is configured with no Domain Name value and an asterisk for the Address (Figure 9.3).
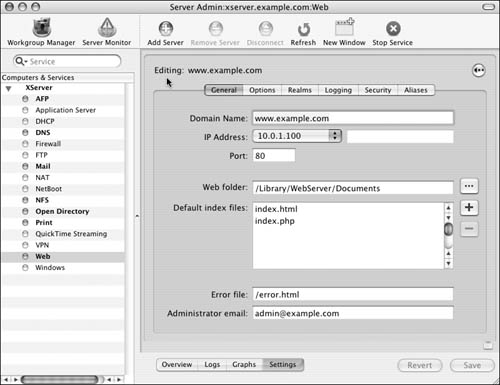
| 4. | To reconfigure the default Web site with your settings, double-click its entry in the Sites list to open an editing pane (Figure 9.4).
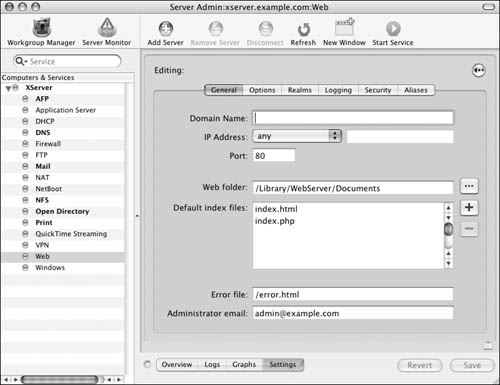
| 5. | If it isn't already selected, click the General tab  to see this Web site's general settings. to see this Web site's general settings.
| 6. | Configure your Web site's unique host identifiers (Figure 9.5):
Domain Name If you've registered a domain name for this Web site, enter it here. Otherwise, leave this field blank; the server will respond to requests based on the other two identifiers. This also may require editing your DNS entries. (See Chapter 6 for more information.)
IP Address The default setting will respond to any request to any IP address the server may have (remember, a Mac OS X Server can be configured with multiple addresses). You can also select a specific address from the pop-up menu.

Doing so directs all requests to the selected IP address. This also may require editing your DNS entries. (See Chapter 6 for more information.)
Port The default setting is port 80, which is the default for all HTTP traffic. Enter a different port number if desired. Remember, only one of these three settings must be unique from other Web sites.
| 7. | Choose to do one of the following:
Use the default location for your Web site's files: /Library/WebServer/Documents/ (Figure 9.6). 
Change the location of the files by typing a new path in the "Web folder" field or clicking the ellipsis button  to use the browse dialog (Figure 9.7). (To use the browse dialog, the folder must already exist on the server.) to use the browse dialog (Figure 9.7). (To use the browse dialog, the folder must already exist on the server.) 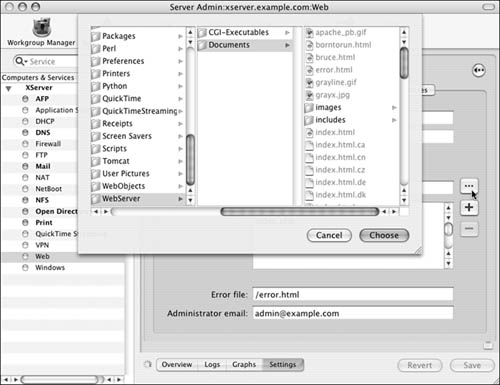
| 8. | Choose to do one of the following:
Use the default filenames for your Web site's files: index.html and index.php. Replace the installed files with your Web site's files. To add new index filenames, click the Add button  . To delete an index filename, click the Delete button . To delete an index filename, click the Delete button  . .
| 9. | In the "Error file" field, specify a custom HTML file that will appear when a user tries to access an invalid link on your Web site.
In the "Administrator email" field, specify the email address where users may contact you about Web site problems (Figure 9.8).

| 10. | When you've finished making changes, click the Save button  . .
| 11. | Click the Back button  to return to the Sites list view (Figure 9.9). to return to the Sites list view (Figure 9.9).
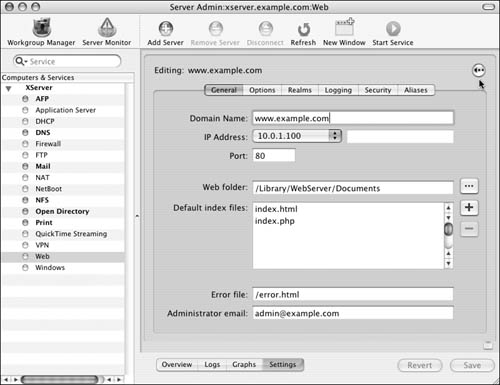
Verify that your Web site's general settings have been updated in this list.
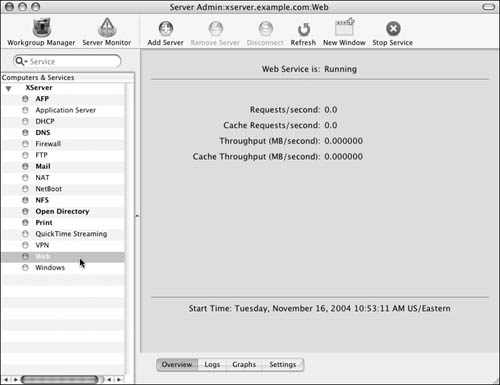
| 12. | Click the Overview button  , and verify that the Web service is running (Figure 9.10). , and verify that the Web service is running (Figure 9.10).
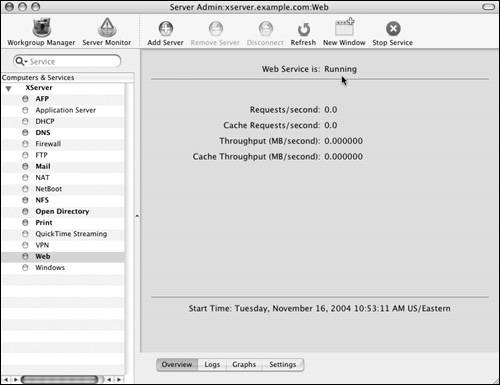
If it isn't, click the Start Service button  to activate the Web server. to activate the Web server.
|
 Tips Tips
It's good practice to restart the Web service manually each time you make a configuration change. Also make sure to thoroughly test your Web site by opening any Web browser and entering the host name you configured. The Apache Web Server used by Mac OS X Server is very robust and can handle literally hundreds of requests every second, even on an older computer. To get the most out of your Web server, you can configure multiple Web sites by repeating steps 410 in the previous task. To duplicate an existing Web site to use as a template for a new Web site, select a site in the Sites list and then click the Duplicate button  . . To configure another new Web site, click the Add button  . . To delete a Web site, select its entry in the Sites list and click the Delete button  . . It's bad practice to leave the default placeholder Web site enabled. That Web page is a good indication to crackers that a server isn't fully configured and is possibly insecure. Configure multiple IP addresses using the Network Port Configurations view of the Network System Preference pane. The Server Admin tool should automatically restart the Web service when you click the Save button  . .
| Apache has been around for quite some time, and many Unix administrators are familiar with its configuration files. Originally, Apache had no graphical interface; all setup was done by editing the plain-text configuration files. Although the Server Admin interface is handy, some options are available only in the configuration files: The main Apache service configuration file is /etc/httpd/httpd.config. Each Web site has its own configuration file, saved in /etc/httpd/sites/.
You need to remember a couple of rules when you're editing the Apache configuration files. First, always back up any configuration file before you change it! Second, to activate any changes, you must restart the Apache Web service. |
Configuring Web site options In addition to the required settings for each of your Web sites found under the General tab, each Web site has a variety of options that let you customize its capabilities. As you turn on more options for your Web sites, you may need to enable new Apache modules. These modules, typically installed in /usr/libexec/httpd/, are coded extensions that add functionality to the Web server. Literally hundreds of freely downloadable Apache modules are available at http://modules.apache.org. It's important to remember that the options settings are configured separately for each Web site. However, the module settings affect every Web site on your server. It's good practice to restart the Web service manually each time you make a configuration change. Also make sure you thoroughly test your Web site options by opening any Web browser and entering the host name you configured. Every option and module that you implement can potentially use more RAM, so you may want to keep an eye on RAM usage as you test the various options and modules. To change Web site options: 1. | Launch the Server Admin tool located in /Applications/Server, and authenticate as the administrator (Figure 9.11).
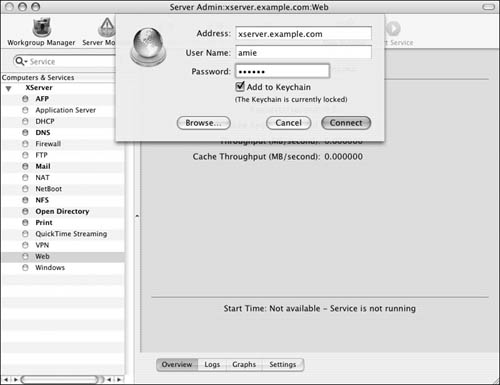
| 2. | Select the Web service for your server in the Computers & Services list (Figure 9.12).
| 3. | Click the Settings button  and then the Sites tab and then the Sites tab  (Figure 9.13). (Figure 9.13).
| 4. | In the Sites list, double-click the Web site you wish to configure.
An Editing pane opens (Figure 9.14).
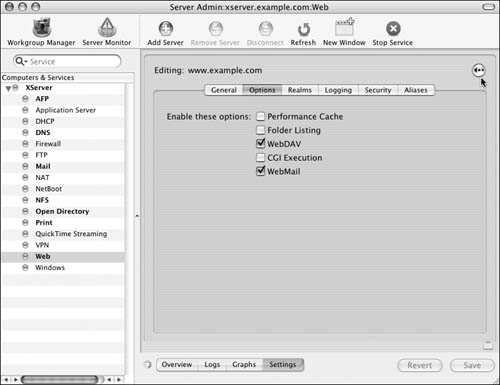
| 5. | If it isn't already selected, click the Options tab  to see this Web site's optional settings. to see this Web site's optional settings.
Enable any of the following optional settings (Figure 9.15):
Performance Cache Enabled by default. Improves the server's response to static Web page requests by storing the Web site files in RAM. You may have to disable this option if your Web site uses dynamically generated Web pages.
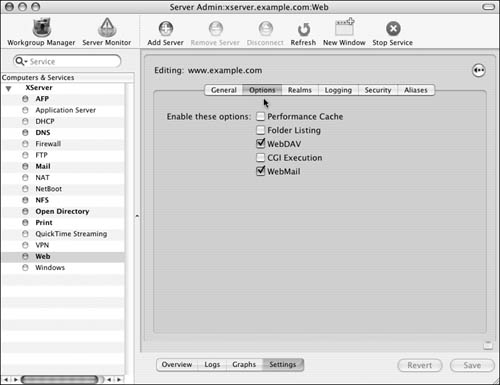
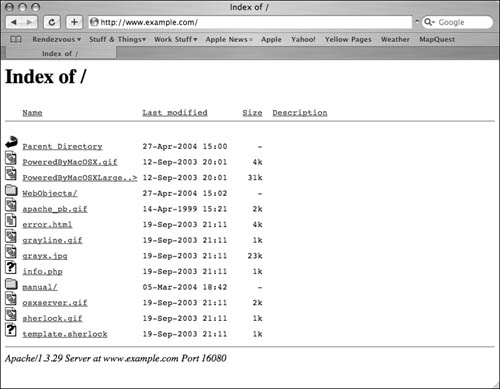
Folder Listing Lets you browse the contents of your Web folder with a standard Web browser (Figure 9.16). Typically, it's a good idea to leave this option off, because it may aid malicious users in trying to crack your Web site.
WebDAV Enables WebDAV support for you Web site. See "Configuring WebDAV access," later in this chapter.
CGI Execution Enables the Common Gateway Interface (CGI) system for your Web site. The CGI system is a common method used to facilitate dynamically generated Web pages based on user input.
See the sidebar "Web Server Scripts" for more information about CGI scripts.
WebMail Enables the SquirrelMail Web mail server for your Web site (Figure 9.17).
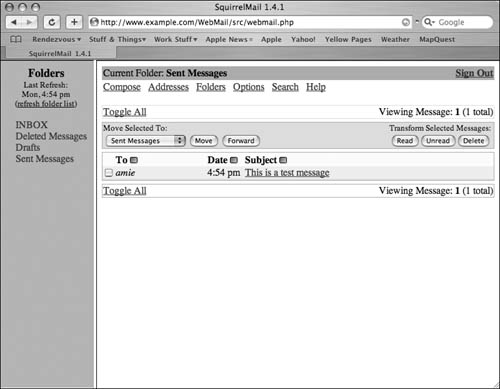
Assuming this Web server is also running the Mail service (see Chapter 8, "Mail Services"), your users will be able to access their mail accounts at http://sitename/WebMail/. (For more information about SquirrelMail, visit http://www.squirrelmail.org/.)
| 6. | When you've finished making changes, click the Save button  . .
| 7. | Click the Back button  to return to the Sites list view (Figure 9.18). to return to the Sites list view (Figure 9.18).
| 8. | To enable additional Web server modules, click the Modules tab  . .
In the Modules frame, you can enable additional Apache code modules for the entire Web server (Figure 9.19).
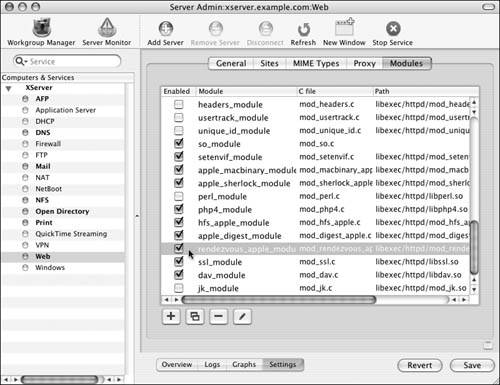
| 9. | Select a check box to enable a specific Module from the list.
You can also click one of the editing buttons  below the Module list to do further configuration. below the Module list to do further configuration.
| 10. | When you've finished making changes, click the Save button  . .
If you aren't prompted by Server Admin, you may need to restart your server after making these changes.
|
| Web scripts differ from regular Web site files in that they're coded instructions that let the server dynamically generate Web page information. Apache, through its extensive modules, supports common open-source scripting languages. The most commonly used scripts are CGI scripts written in Perl or Python and PHP scripts: CGI option 1 The default location for CGI scripts available to all Web sites is /Library/WebServer/CGI-Executables/. In your Web browser, enter http://sitename/cgi-bin/script.cgi. CGI option 2 If a script will be used by only one specific Web site, you can put it in that Web site's folder. In your Web browser, enter http://sitename/script.cgi. PHP Enable PHP script execution by selecting the php4_module in the Web server Modules list. PHP scripts can be located in any Web site's folder. In your Web browser, enter http://sitename/script.php. |
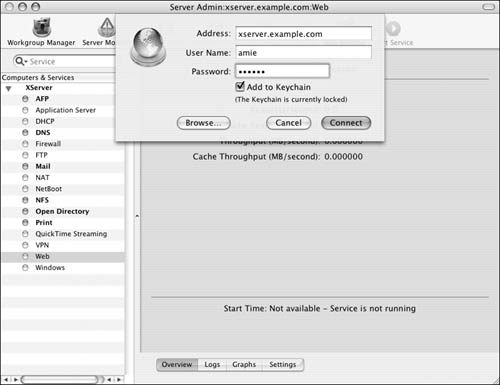
Configuring Secure Sockets Layer Secure Sockets Layer (SSL) is a technology that facilitates a secure connection between your Web server and its users. Users trust your server based on its certificate of authenticity. Before you set up SSL for your Web site, you must first properly obtain and configure this certificate. (Refer to Chapter 10, "Security," for more about certificates.) Assuming you've already installed the certificate, the following task will guide you through the process of enabling SSL for a Web site. To enable SSL: 1. | Launch the Server Admin tool located in /Applications/Server, and authenticate as the administrator (Figure 9.20).
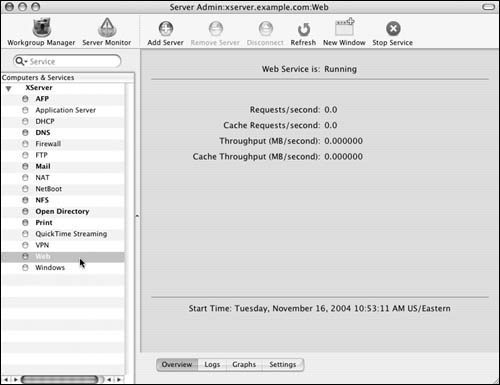
| 2. | Select the Web service for your server in the Computers & Services list (Figure 9.21).
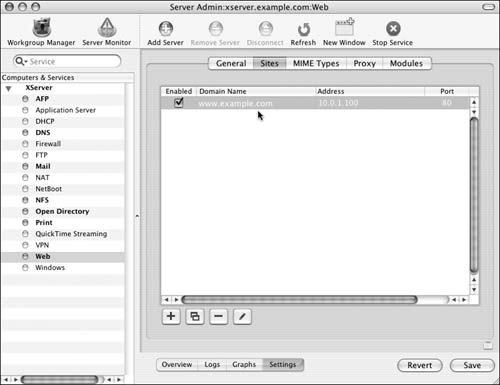
| 3. | Click the Settings button  and then the Sites tab and then the Sites tab  (Figure 9.22). (Figure 9.22).
| 4. | In the Sites list, double-click the Web site you wish to configure.
An editing window opens (Figure 9.23).
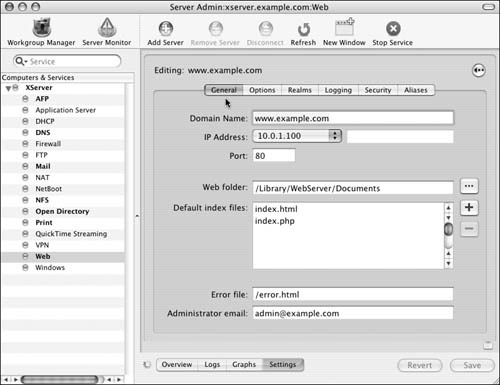
| 5. | If it isn't already selected, click the Security tab  to see this Web site's SSL settings (Figure 9.24). to see this Web site's SSL settings (Figure 9.24).
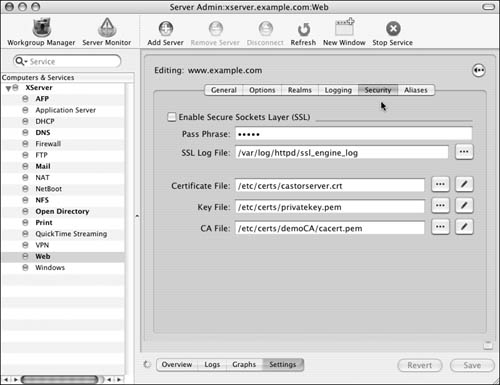
| 6. | Select the Enable Secure Sockets Layer check box (Figure 9.25).
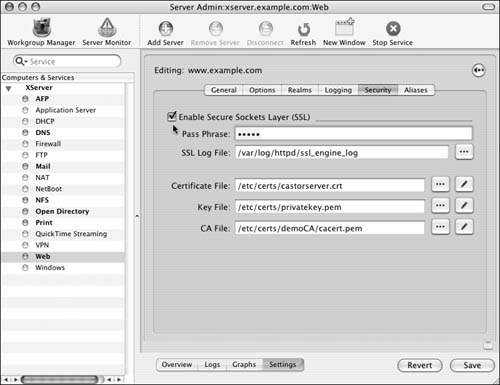
| 7. | Enter an appropriate password (read: long and complicated) in the Pass Phrase field (See Chapter 10, "Security," for more information about the passphrase).
| 8. | Configure the Certificate File, Key File, and CA File using one of the following methods:
Enter the absolute path on the server of each SSL file in its associated field. Click the ellipsis button  , and use the browse dialog to select the SSL files (Figure 9.26). To use the browse dialog, the files must already exist on the server. , and use the browse dialog to select the SSL files (Figure 9.26). To use the browse dialog, the files must already exist on the server. 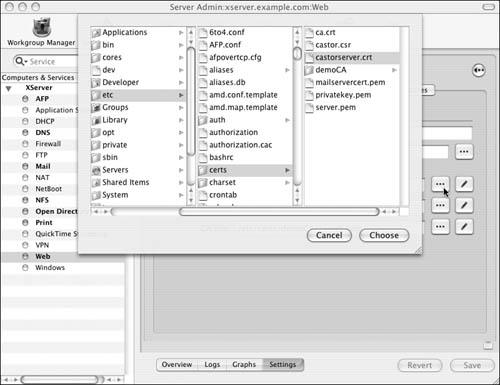
Click the Edit button  , and use the edit dialog to paste a certificate into the SSL file directly (Figure 9.27). , and use the edit dialog to paste a certificate into the SSL file directly (Figure 9.27). 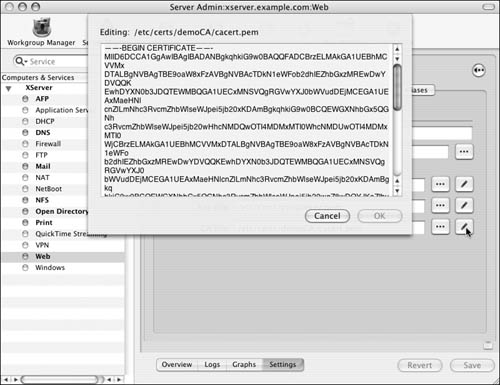
To use the edit dialog, the files must already exist on the server.
| 9. | When you've finished making changes, click the Save button  . .
If you aren't prompted by Server Admin, you may need to restart your server after making these changes.
|
 Tips Tips
It's important to remember that the SSL settings are configured separately for each Web site you have. It's good practice to restart the Web service manually each time you make a configuration change. Make sure you thoroughly test your secure Web site by accessing it from any Web browser. To specify a secure connection to your Web server, append s after the http protocol specification in the host name: for example, https://sitename/index.html.
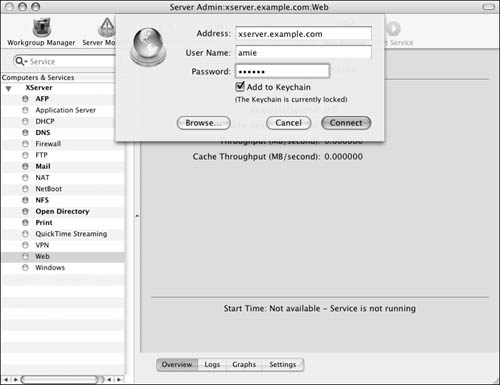
Adding Web site aliases Web site aliases work very similarly to file aliases: They're items that act as pointers to another destination. Web site aliases are often used if you want a Web site to access documents that are on the local server but are outside of the Web site's folder. Another type of Web site alias, called a redirect, is used to let your Web site access documents on another Web server. To configure a Web site alias: 1. | Launch the Server Admin tool located in /Applications/Server, and authenticate as the administrator (Figure 9.28).
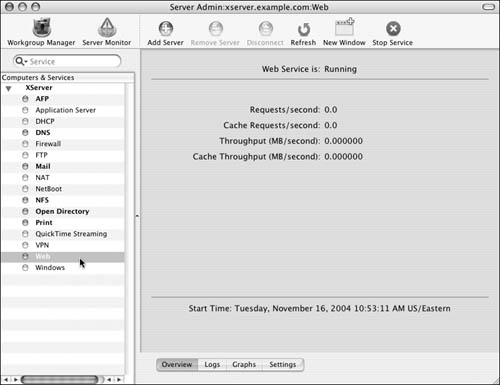
| 2. | Select the Web service for your server in the Computers & Services list (Figure 9.29).
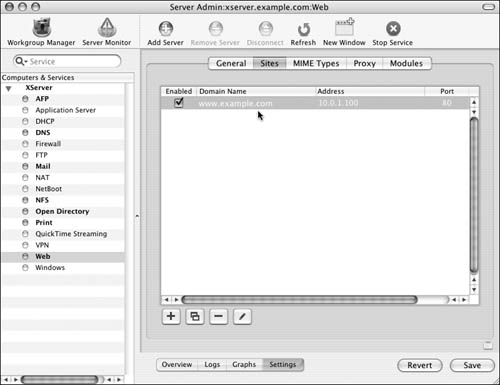
| 3. | Click the Settings button  and then the Sites tab and then the Sites tab  (Figure 9.30). (Figure 9.30).
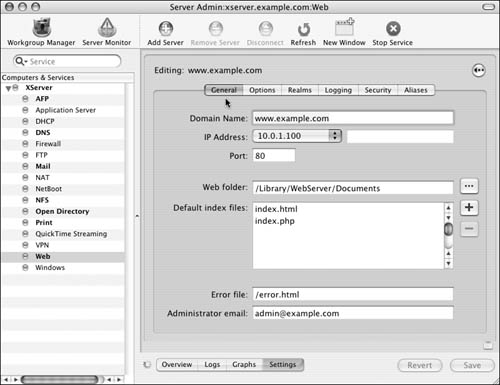
| 4. | In the Sites list, double-click the Web site you wish to configure.
An editing window opens (Figure 9.31).
| 5. | If it isn't already selected, click the Aliases tab  to see this Web site's alias settings (Figure 9.32). to see this Web site's alias settings (Figure 9.32).
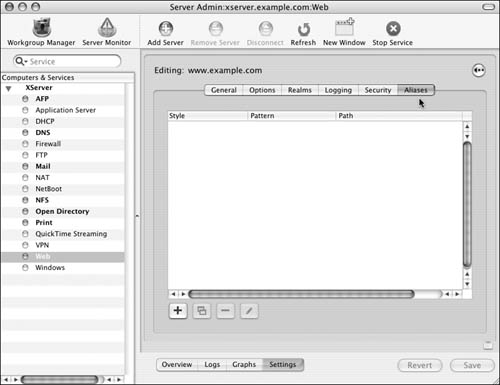
| 6. | Click the Add button  . .
An editing dialog drops down from the title bar (Figure 9.33).
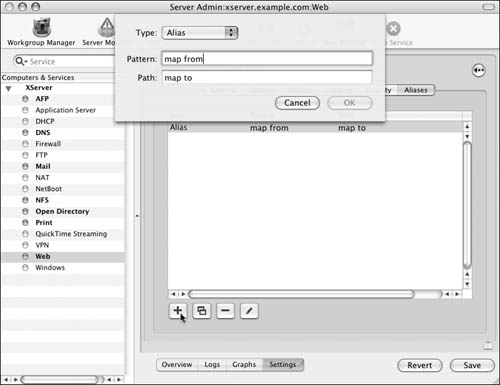
| 7. | Click the Type pop-up menu, and choose one of the following alias types (Figure 9.34):
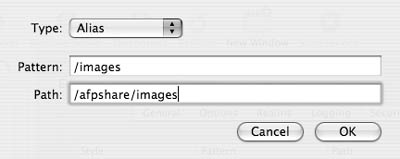
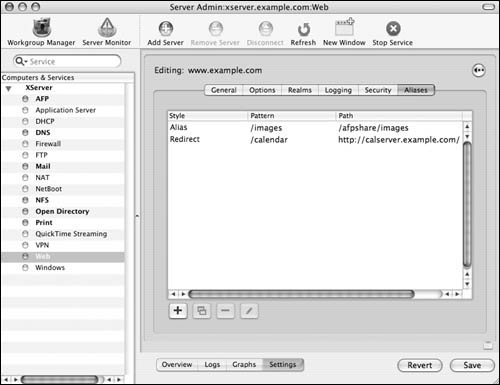
Alias The Pattern field defines the name of the item to be accessed in the browser address. The Path field defines the location to which the alias is pointing (Figure 9.35). For example, when you enter http://sitename/images/ in a Web browser, instead of accessing the folder called images in the Web site's folder, you access the /afpshare/images folder on the Web server's local volume.
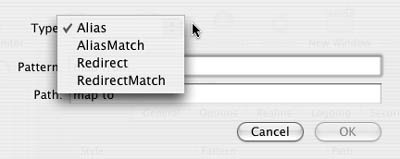
Redirect The Pattern field defines the name of the item to be accessed in the browser address. The Path field defines the Web server to which the redirect is pointing (Figure 9.36). For example, when you enter http://sitename/calendar/ in a Web browser, instead of accessing the folder called calendar in your Web site's folder, you access http://calserver.example.com/.
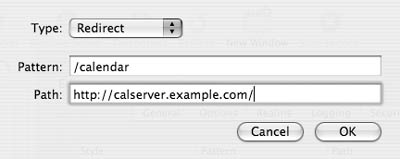
AliasMatch/RedirectMatch These types work similarly to standard aliases and redirects, but they allow the use of standard regular-expression matching.
| 8. | Check your configuration by verifying the entries in the Aliases frame list (Figure 9.37).
| 9. | When you've finished making changes, click the Save button  . .
If you aren't prompted by Server Admin, you may need to restart your server after making these changes.
|
 Tips Tips
You can use the editing buttons  to further customize alias configurations. to further customize alias configurations. It's important to remember that alias and redirect settings are configured separately for each Web site you have. It's good practice to restart the Web service manually each time you make a configuration change. Be sure you thoroughly test your aliases and/or redirects by accessing them from any Web browser. Make sure you verify that the aliased folder has at least read privileges to the www user or group.
|


