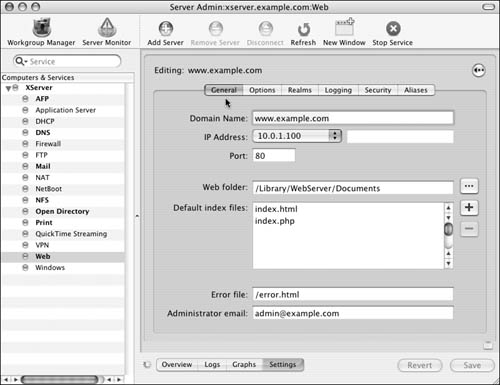
| The Apache Web server uses realms to control access to items in a Web site's folder. By default, everything in your Web site's folder can be read by everybody. However, once you specify a folder in your Web site's folder as a realm, you can enable restricted access to those Web site items based on user authentication. Configuring realms is also the first step required to enable secure Web Distributed Authoring and Versioning (WebDAV) support for your Web site. To add a realm to a site: 1. | Launch the Server Admin tool located in /Applications/Server, and authenticate as the administrator (Figure 9.38).
| 2. | Select the Web service for your server in the Computers & Services list (Figure 9.39).

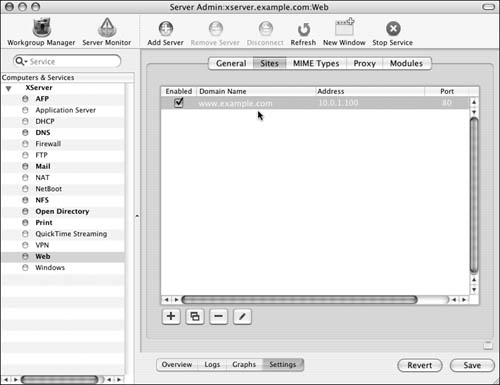
| 3. | Click the Settings button  and then the Sites tab and then the Sites tab  (Figure 9.40). (Figure 9.40).
| 4. | In the Sites list, double-click the Web site you wish to configure.
An editing window opens (Figure 9.41).

| 5. | If it isn't already selected, click the Realms tab  to see this Web site's realms settings (Figure 9.42). to see this Web site's realms settings (Figure 9.42).
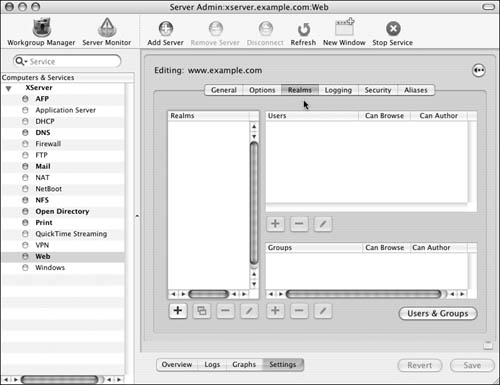
| 6. | Click the Add button  . .
An editing dialog drops down from the title bar.
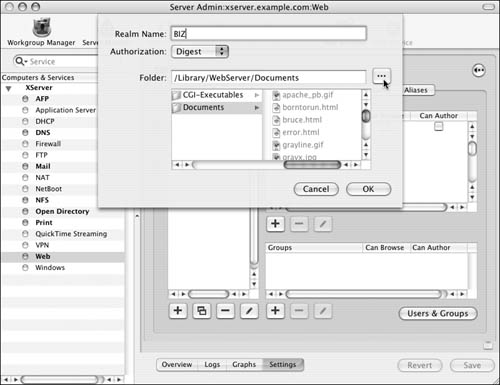
| 7. | Enter a name for the realm, and select an Authorization mode from the pop-up menu (Figure 9.43).
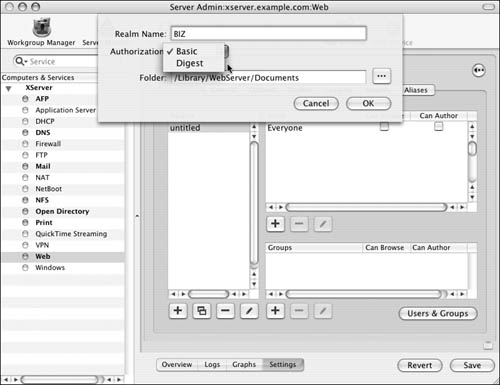
Digest authorization, although slightly more secure than Basic, requires that you enable the digest Apache module. (See "Configuring Web site options," earlier in this chapter, for more information about Apache modules.)
| 8. | Do one of the following:
This is the folder for which access can be restricted in some fashion.
| 9. | When you've finished making changes, click the OK button  and then the Save button and then the Save button  . .
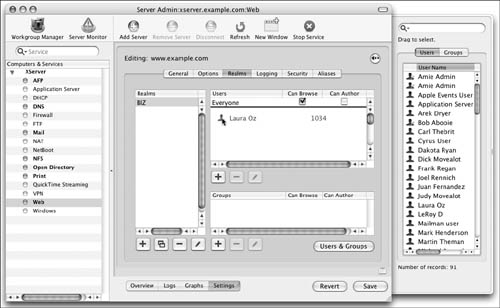
| 10. | Verify that the realm was created, select it from the Realms list, and select the Can Browse check box for Everyone (Figure 9.45).
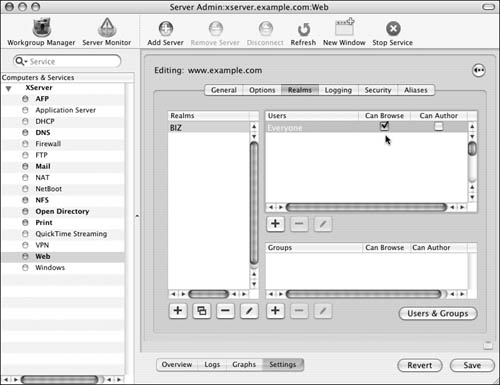
If you don't do this, then no one will be able to see the contents of the realm.
| 11. | Click the Save button .
If you aren't prompted by Server Admin, you may need to restart your server after making these changes.
|
 Tips Tips
You can configure as many realms as you want for each Web site, including realms inside of other realms. However, you can only define a realm using the Web site's folder or anything in of that folder. It's important to remember that realm settings are configured separately for each Web site you have. You can always use the edit buttons  below the realms list for further configuration. below the realms list for further configuration. The Server Admin tool should automatically restart the Web service when you click the Save button .
Adding users and groups to realms One of the many enhancements Apple made to the Apache Web server includes directory services integration. This means the Apache Web server grants authenticated Web site access via any user and/or group accounts known to directory services. For this reason, you must properly configure Directory Access on the server hosting your Web sites. (See Chapter 3, "Open Directory," for more information about directory services.) To add users and groups to a realm: 1. | Launch the Server Admin tool located in /Applications/Server, and authenticate as the administrator (Figure 9.46).

| 2. | Select the Web service for your server in the Computers & Services list (Figure 9.47).

| 3. | Click the Settings button and then the Sites tab (Figure 9.48).

| 4. | In the Sites list, double-click the Web site you wish to configure.
An editing window opens (Figure 9.49).

| 5. | If it isn't already selected, click the Realms tab to see this Web site's realms settings (Figure 9.50).

| 6. | Do one of the following:
If you haven't already configured the realms for your Web site, do so now by following the steps outlined in the task "To add a realm to a site." Select the realm you wish to configure from the Realms list (Figure 9.51). 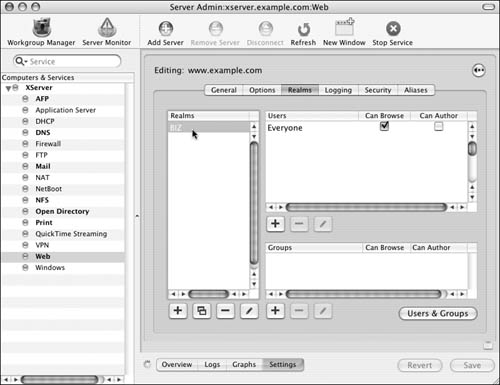
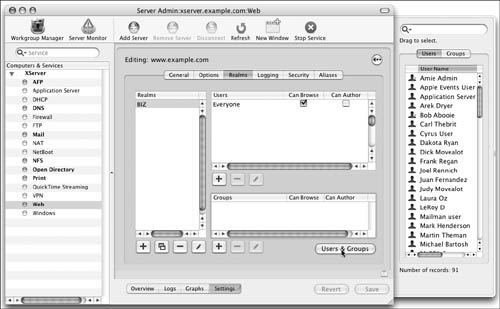
| 7. | Click the Users & Groups button  . .
The Users & Groups drawer appears (Figure 9.52).
| 8. | Do one/or both of the following to add a user and/or group account to the realm:
Users Click the Users tab  , and then click and drag user accounts to the realm's Users list (Figure 9.53). , and then click and drag user accounts to the realm's Users list (Figure 9.53).
Groups Click the Groups tab  , and then click and drag group accounts to the realm's Groups list (Figure 9.54). , and then click and drag group accounts to the realm's Groups list (Figure 9.54).
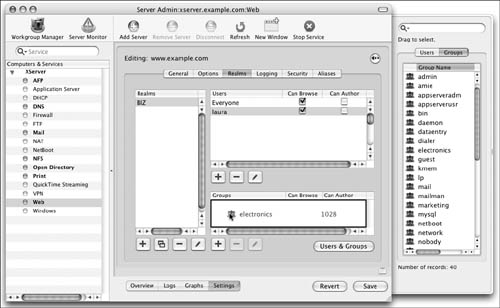
| 9. | Deselect the Can Browse option for Everyone, and select the Can Browse option only for user and group accounts that need access to the realm.
| 10. | When you've finished making changes, click the Save button .
If you aren't prompted by Server Admin, you may need to restart your server after making these changes.
|
Tips It's important to remember that realm settings are configured separately for each realm of each Web site you have. Make sure you thoroughly test authenticated access to your realms by accessing them from any Web browser. Mac OS X Server doesn't currently support very secure authentication for Web site access. If security is a concern, you should avoid using authenticated Web site access.
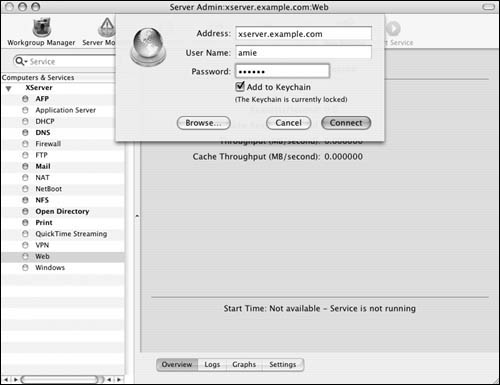
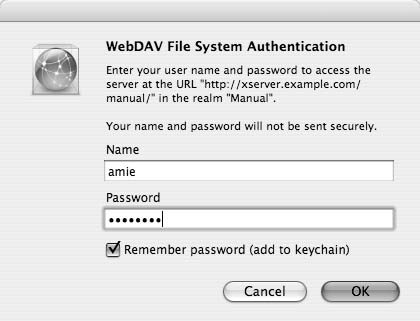
| Once you've configured authenticated realm access, navigate to one of the files in the realm as you would any other file in your Web site. An authentication dialog appears, in which you can enter your user name and password (Figure 9.55). Notice that you can save your password to a keychain. Once authenticated, the Web site files should appear as normal. 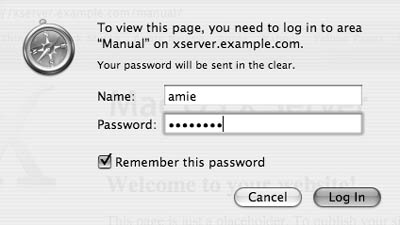
|
Configuring WebDAV access Many people think of Web servers as only providing read access to shared items. However, Apache supports a technology known as Web Distributed Authoring and Versioning (WebDAV) that essentially allows users to write changes back to Web site items. The ability to read and write to a shared destination on a file server obviously makes WebDAV an alternative to standard file-sharing services such as AFP and SMB. Furthermore, WebDAV is an easy protocol to support, because free clients are available for every major operating system and all the network traffic runs across the standard port for HTTP (port 80, which is open on most firewalls). WebDAV access is granted based on a Web site's realm configuration. In other words, you must already have realms configured for your Web site in order to use WebDAV. (See the previous two tasks for detailed instruction on configuring Web site realms.) In addition, when you're using WebDAV, you must set special file and folder permissions if you're going to allow users author, or write, access to Web site items. You must change the permissions so the group or user WWW has read and write access to the Web site items. This is necessary because, as a security measure, the Apache service only has access to items as the system user WWW and the system group WWW. (See Chapter 5, "File Sharing," for more information about permissions.) To configure WebDAV access: 1. | Launch the Server Admin tool located in /Applications/Server, and authenticate as the administrator (Figure 9.56).

| 2. | Select the Web service for your server in the Computers & Services list (Figure 9.57).
| 3. | Click the Settings button and then the Sites tab (Figure 9.58).

| 4. | In the Sites list, double-click the Web site you wish to configure.
An editing window opens (Figure 9.59).
| 5. | If it isn't already selected, click the Realms tab to see this Web site's realms settings (Figure 9.60).

| 6. | Do one of the following:
If you haven't already configured realm access for your Web site, do so now by following the steps outlined in the previous two tasks. Select the realm you wish to configure from the Realms list.
| 7. | Do one of the following:
If you want a user or group to have read access, select the Can Browse check box next to the desired account. If you want a user or group to have write access, select the Can Author check box next to the desired account (Figure 9.61). 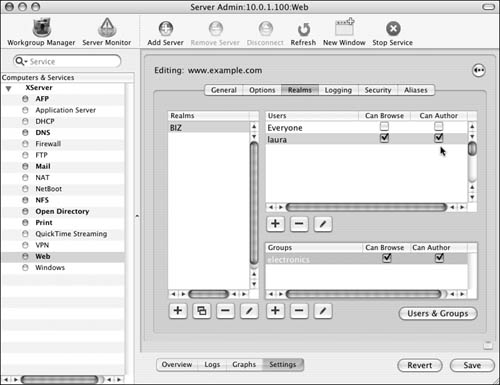
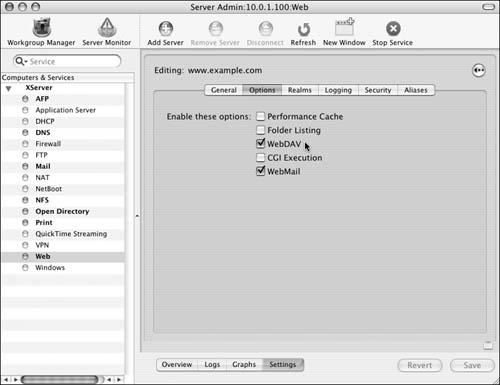
| 8. | Click the Options tab  to see this Web site's optional settings. to see this Web site's optional settings.
Select the WebDAV check box (Figure 9.62).
| 9. | When you've finished making changes, click the Save button .
If you aren't prompted by Server Admin, you may need to restart your server after making these changes.
|
Tips It's important to remember that realm settings are configured separately for each realm of each Web site you have. Make sure you thoroughly test authenticated access to your realms by accessing them from any Web browser. Mac OS X Server doesn't currently support very secure authentication for WebDAV access. If security is a concern, you should avoid using WebDAV access.
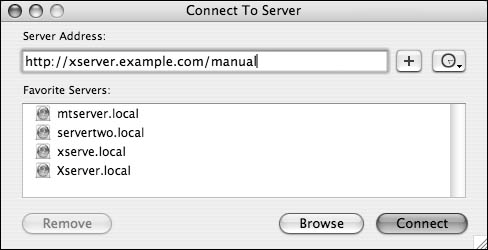
| Connecting to a WebDAV server from a Mac OS X client involves the following steps: 1. | In the Finder, select Go > Connect to Server, and enter a fully qualified HTTP address (Figure 9.63).
| 2. | Authenticate to the server (Figure 9.64). Notice that you can also save your password to a keychain.
|
Default settings dictate that the share point's icon will mount on the Finder's desktop  . . |
|