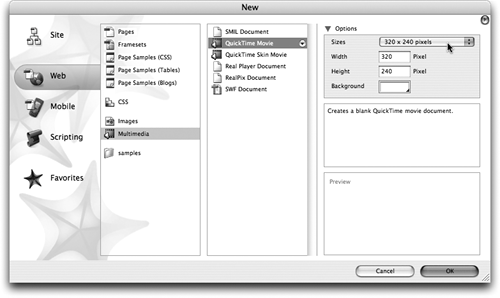
| GoLive includes an impressive QuickTime Web video editor, and one of its coolest features is the ability to easily create QuickTime slideshows. Follow the step-by-step instructions below and have fun! 1. | Select File > New > Web > Multimedia > QuickTime Movie and enter the dimensions of the QuickTime movie you want to create. Click OK (Figure 198a).
Figure 198a. Create a new movie and pick the dimensions. 
| 2. | Choose Movie > Show Timeline Editor to reveal the Timeline window.
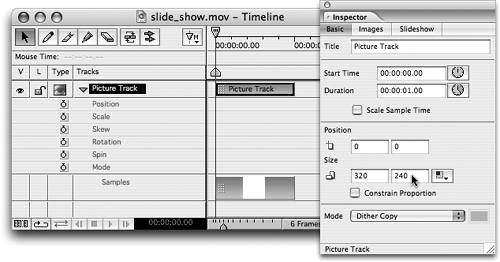
| 3. | Drag a Picture Track  from the QuickTime section of the Objects palette to the left side of the Timeline window. Change the dimensions of the Picture Track in the Inspector so that they match the dimensions of the movie (Figure 198b). from the QuickTime section of the Objects palette to the left side of the Timeline window. Change the dimensions of the Picture Track in the Inspector so that they match the dimensions of the movie (Figure 198b).
Figure 198b. Match the dimensions of the picture track with the dimensions of the movie. 
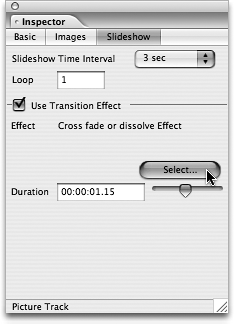
| 4. | With the Picture Track still selected, look at the Slideshow tab of the Inspector palette. Use these options to control how long each image is visible and which transition effect, if any, you want to use between each picture (Figure 198c).
Figure 198c. Adjust the slideshow delay, loop, and transition in the Inspector. 
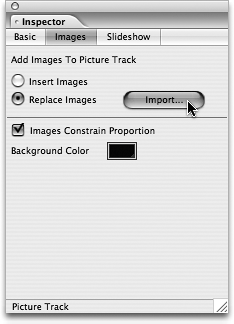
| 5. | Now switch to the Images tab of the Inspector and prepare to import your still images. Before you press the Import button, you have a few settings to check. GoLive will scale down images that are larger than your movie dimensions, so make sure the Images Constrain Proportion option is checked. If any of your images are not the same proportions or orientation as your movie, you'll get a matting effect which can be controlled by setting the Background Color option (Figure 198d).
Figure 198d. Adjust the image settings before you import the files. 
| 6. | Click the Import button and select the images you want in the slideshow. Hold down the Shift key to select multiple images. Because GoLive uses QuickTime technology, you can include images in many different formats (layered Photoshop, GIF, JPEG, PNG, Pict, BMP, Targa, TIFF, and so on), resolutions, and dimensions. You can even combine images from multiple sources. Click Choose when you're done.
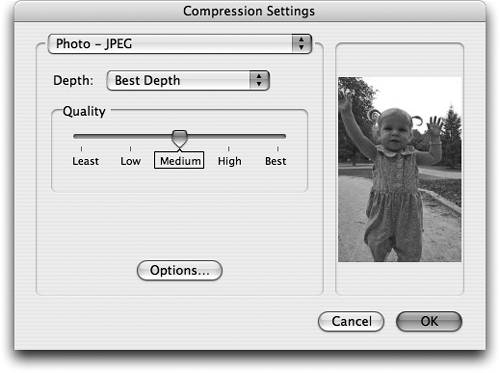
| 7. | The next dialog prompts you to compress the images for the movie (Figure 198e). Because the slideshow consists of still images, we suggest using the Photo JPEG compressor at your preferred quality setting. Click OK, and GoLive will import, compress, and sequence your images with a transition.
Figure 198e. Choose Photo JPEG to compress the pictures in the slideshow. 
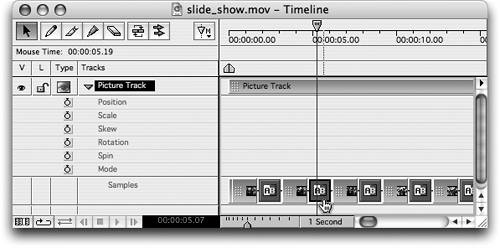
| 8. | When the slideshow is created, your Timeline window will be filled with all your still images, and a transition will be placed between each image (Figure 198f). To further customize your movie, double-click any of the A/B transition icons in the Timeline window to select a different transition.
Figure 198f. GoLive automatically sequences the still images and transitions for you. 
Let GoLive Do the Work Don't bother resizing your source images before importing them into your slideshow because you'll be doing unnecessary, extra work. GoLive will automatically resize the images for you based on the size you've chosen for the Picture Track. |
| 9. | When you're ready to save the movie, don't use the export commands because that would render each individual frame and cause the movie to have a much larger file size than necessary. Instead, choose Files > Save As and save the movie so it uses the native QuickTime transitions and minimizes the file size.
|
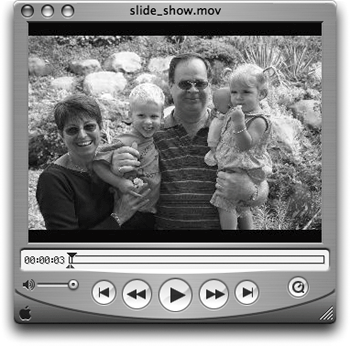
Now you can play the movie in the QuickTime Player or place it on a Web page (see Tip 194) for visitors to enjoy (Figure 198g). Figure 198g. Anybody can view your slideshow with the free QuickTime Player available at www.apple.com/quicktime. 
|
