Adding an Alternating Template
|
I mentioned earlier in the chapter that the DataList control allows you to create two types of templates for displaying data: the item template that you just finished, and an alternating item template. If you define an alternating item template, the DataList control uses it to display every other record from the result set. An alternating item template is often used to provide visual contrast in your page, which is how you ll use it in this section. However, the alternating item template is independent from the item template, and if it made sense for your application, you could display entirely different information with the item and alternating item templates.
You define an alternating item exactly as you did the item template, namely by using the template editor in Web Matrix. In this section, however, you ll work in HTML view for the following reasons:
-
If you ve already defined an item template, it s easy to create the alternating item template in HTML view, because you can just copy it.
-
Working in HTML view will familiarize you with the syntax of templates in the page. You ll need to know the HTML syntax for templates if you want to work with the Repeater control.
-
Due to a bug in Microsoft Internet Explorer (discussed in the following sidebar), you might need to use HTML view to edit an item template that you created earlier in the template editor.
If you re running Microsoft Windows 2000 or Windows XP, you might experience the side effect of a bug in Internet Explorer 6. Web Matrix uses the Internet Explorer engine to display your pages in Design view and your templates in the template editor. (That s how Web Matrix gets the near-WYSIWYG look in those windows.)
Under some obscure conditions, the Internet Explorer engine won t display controls correctly. For your purposes, the most obvious effect of this display problem is in the template editor. When you first create a template, you can drag controls into it and the template looks fine. However, if you close the template editor and then reopen it, the controls you had in your templates won t show up correctly. You ll see only the little glyph that indicates a Web control. The controls are still in the templates, but you can t see them and you therefore can t edit them in the template editor.
The template editor itself has no solution for this bug. If you need to edit the controls in an existing template, you need to edit them in HTML view. Working in HTML view isn t that hard, but having the WYSIWYG template editor as a starting point is a big help. I m taking some extra time in the discussion of alternating templates to explain the layout of templates in HTML view, just in case you have to edit templates in that view.
If you re working with Windows .NET Server 2003, you won t experience this bug, because it s been fixed. Moreover, you can cross your fingers and hope that a forthcoming service pack will fix Internet Explorer 6 in Windows 2000 and Windows XP. If so, Web Matrix will work as designed and you ll be able both to create and edit templates in the template editor.
Examining Templates in HTML View
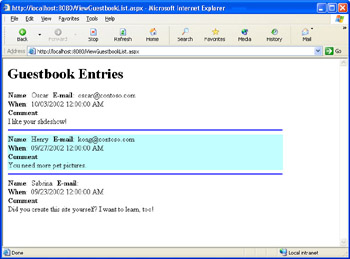
Before you create the alternating item template, let s take a tour of what you ve done with templates so far. Start by switching to HTML view for the ![]() ViewGuestbookList.aspx page.
ViewGuestbookList.aspx page.
In HTML view, find the tag for the DataList control, which begins with <asp:DataList>. Look down the page until you find the closing tag (</asp:DataList>). All the elements between these two tags constitute the DataList control and its templates. Spend a few moments studying the page to see how the DataList control is constructed. The opening <asp:DataList> tag contains the properties (attributes) that apply to the control as a whole. For example, when you created the DataList control, you set its DataSource property to point to SqlDataSourceControl1, which appears this way:
<asp:DataList runat="server" DataMember="Table" DataSource="<%# SqlDataSourceControl1 %>" >
The templates are elements unto themselves that are enclosed in (or children of) the DataList control. If you ve ever used HTML to create a bulleted list (<ul> element), numbered list (<ol> element), or a list box (<select> element), you ll recognize how template elements are children of the DataList control. The item template is an element named <ItemTemplate>, and the separator template is an element named <SeparatorTemplate>, and so on. In HTML view, the templates look like this:
<ItemTemplate> <p> <strong>Name</strong>: <asp:Label runat="server" Text= <%# DataBinder.Eval(Container, "DataItem.GuestName") %> > </asp:Label> ⋮ </ItemTemplate> <FooterTemplate> <strong>(End of listing)</strong> </FooterTemplate> <SeparatorTemplate> <hr align="left" color="blue" /> </SeparatorTemplate>I ve left out some of the contents of the item template to reduce the size of the listing, but you get the idea. Within each template, you can see the text and controls that you put there in the template editor.
Notice that the templates don t need to be in any particular order the <SeparatorTemplate> element doesn t have to follow the <ItemTemplate> element, for example. When the page runs, the DataList control reads the template elements and uses them appropriately no matter what order you ve used to define the templates.
Examining Data Binding
Let s look at one more feature of the templates, namely, the syntax of data binding. In the item template, take a close look at the individual Label controls (<asp:Label>). Earlier you created data-binding expressions, assigning data to the Text property of the Label controls. In HTML view, you can see that the data binding expression appears this way:
<asp:Label runat="server" Text= <%# DataBinder.Eval(Container, "DataItem.GuestName") %> >