Working with the Repeater Control
|
In this chapter, I ve mentioned the Repeater control a few times, but I haven t provided many details about it. In this section, I ll quickly show you an example of how the Repeater control works. The information I present here isn t essential it s strictly for those whose curiosity has been piqued about the Repeater control.
You ll use the Repeater control to create a bulleted list (a <ul> element in HTML terms). You ll use the same data source the Guestbook table and the same SqlDataSourceControl. However, you ll display fewer columns out of the database.
Make a copy of the ![]() ViewGuestbookList.aspx file you ve been working with in this chapter, and name it
ViewGuestbookList.aspx file you ve been working with in this chapter, and name it ![]() ViewGuestbookList_Repeater.aspx. (You can use the Save As command on the File menu.) With the
ViewGuestbookList_Repeater.aspx. (You can use the Save As command on the File menu.) With the ![]() ViewGuestbookList_Repeater.aspx page open in Web Matrix, switch to Code view. Change the line DataList1.DataBind() to
ViewGuestbookList_Repeater.aspx page open in Web Matrix, switch to Code view. Change the line DataList1.DataBind() to
Repeater1.DataBind()
Switch to HTML view. Change <asp:DataList> to <asp:Repeater> and do the same for the closing tag. Take all the attributes out of the opening tag except id, runat, and DataSource. Change the value of the id attribute to Repeater1. The tag will look like this:
<asp:Repeater runat="server" DataSource="<%# SqlDataSourceControl1 %>" >
Take out all the templates that you created for the DataList control except the ItemTemplate element. Create a header template and footer template that look like the following:
<asp:Repeater runat="server" DataSource="<%# SqlDataSourceControl1 %>" > <headerTemplate> <ul> </headerTemplate> ⋮ <footerTemplate> </ul> </footerTemplate> </asp:Repeater> Can you see how I m using the Repeater control templates to create a <ul> element? The header template contains the opening <ul> tag, and the footer template contains the closing </ul> tag.
You can use the item template to create the individual bullets, which are <li> elements in HTML. In the item template, delete all the existing static text and remove all the <asp:Label> controls except the two for the GuestName and Comment columns. Then, type in a <li> tag and if you like, put a colon between the two Label controls, as shown in the following listing.
<ItemTemplate> <li> <asp:Label runat="server Text= <%# DataBinder.Eval(Container, "DataItem.GuestName") %> > </asp:Label>: <asp:Label runat="server" Text= <%# DataBinder.Eval(Container, "DataItem.Comment") %> > </asp:Label> </ItemTemplate>
That s it. Run that page, and you ll see a bulleted list with data from the Guestbook table, as shown in Figure 11-4.
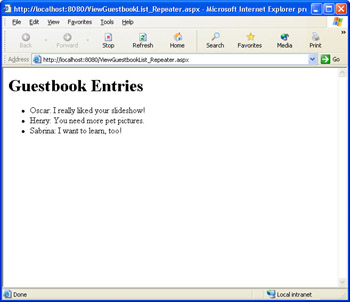
Figure 11-4: Guestbook data displayed in a bulleted list created by the Repeater control.
You can see that using the Repeater control isn t very hard, and the Repeater control provides some capabilities that not even the DataList control can match. Incidentally, your use of the Repeater control illustrates why the control doesn t have a WYSIWYG rendering in the designer. The header template contains an incomplete HTML element (a single <ul> tag) and the footer contains another one (</ul>). When the page runs, these tags are stitched together to create a complete, well-formed bulleted list element. However, while you re creating the page, the two templates contain HTML fragments, and Web Matrix can t handle HTML fragments in Design view very well. So to enjoy the benefits of the Repeater control, you need to work in HTML view.
|