| Now that you've used the Primatte RT filter to remove the original blue background in the Greece image, let's add some clouds to the project. These will become the new background for the image. To make sure that the new object goes to the background, we need to select the Background layer on the Layers tab. 1. | Press Cmd-4 to open the Layers tab.
| 2. | On the Layers tab, select the Background layer.
|
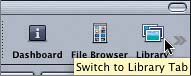
Switching to the Library from the Canvas You've become quite a master at using the keyboard shortcuts to move among the tabs in the Utility window and Project pane. Let's look at another way to switch the Utility window to the Library tab, without using the keyboard. If you look at the top-right corner of the Canvas window, you'll see a set of three icons: Dashboard, File Browser, and Library. These icons show or hide the corresponding tab or window. 1. | Click the Switch to Library Tab icon to switch the Utility window to the Library tab.
If you click the switch icon for a tab that is already open, the entire window will close.
| 2. | Click the Switch to Library Tab icon again to close the Utility window.
| 3. | Click the Switch to Library Tab icon again to open the Utility window with the Library tab active.
|
Applying a File from the Library to a Layer Now that you've opened and reopened the Library, let's look into the Library and find a shot of clouds in the Content folder. 1. | In the Library, click the Content folder to view the various content categories.
| 2. | Type clouds in the refine search field to narrow the search to files that include clouds in the name.
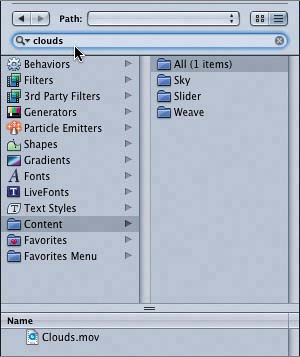
One file, named Clouds.mov, appears in the lower pane of the Library.
| 3. | Select the Clouds.mov file in the Library to see it in the Preview area.

| 4. | Click the Apply button to apply Clouds.mov to the selected layer in the project.

The Clouds.mov image appears in the Background layer on the Layers tab and in the background of the image in the Canvas.
| 5. | Press the spacebar to play the project in the Canvas.
The Greece image looks much more interesting with the moving clouds background.
|
Cleaning Up the Matte in the Dashboard You're almost finished with this project. The only thing you still need to do is clean up the matte. Did you notice the clouds on the rocks and on the left side of the pillars? Remember the image in the Canvas when you chose Matte in the Output Type pop-up menu? There were several areas that were gray instead of black or white. The gray areas in the matte are the same areas where you see the clouds spilling through the foreground. Let's make a few adjustments in the Dashboard to clean up the matte and the overall image. 1. | On the Layers tab, select the Primatte RT filter.
| 2. | In the Primatte RT Dashboard, select Matte from the Output Type pop-up menu.
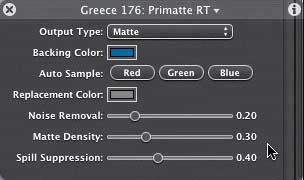
The Primatte RT parameters in the Dashboard are the same as the parameters in the Inspector and include three sliders: Noise Removal, Matte Density, and Spill Suppression.
Noise Removal and Matte Density work together to clean up any parts of the matte that are partially transparent. The Spill Suppression parameter introduces an opposite color to the edges of the matte to de-emphasize the edges of the matte. Since the original color was blue, the spill suppressor will introduce the opposite color: yellow.
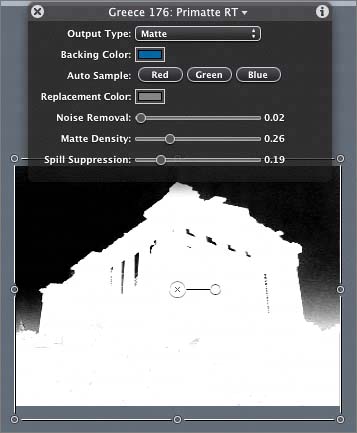
The goal is to remove as much of the gray area (partial transparency) from the matte as possible. A little gray in the sky area won't be a problem because both the image and the background have sky colors that will work.
The best way to learn how to use the parameters on this filter is to practice with them; however, it can take a long time to get the settings just right. For now, I'll give you a set of parameters to use to achieve a good result. You can experiment more with the various parameters after this lesson.
| 3. | Adjust the parameters in the Primatte RT Dashboard as follows:
Noise Removal: 0.02 Matte Density: 0.26 Spill Suppression: 0.19
| 4. | On the Primatte RT Dashboard, change the output type back to Processed Foreground.
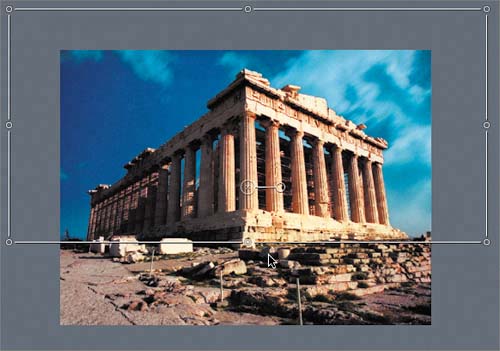
The image looks great, except for the clouds showing through the rock in the lower center of the frame.
|
Cropping an Image to Hide the Background To solve the problem of the clouds showing through the rock, you can simply crop the Clouds image. 1. | On the Layers tab, select the Clouds object.
| 2. | Press Cmd-3 to open the Inspector tab in the Utility window.
| 3. | On the Inspector tab, select the Crop check box to activate the Crop parameters for the Clouds object.
Next, let's crop the bottom of the Clouds object until the lower edge is just above the rock.
| 4. | Drag the Bottom Crop slider all the way to the right to crop the bottom of the Clouds object to a value of 200.
The slider is limited to a value of 200, which is not quite enough. You need to crop the bottom a little bit more than that amount to remove the entire rock. To crop a higher value, you can type a number in the value slider.
| 5. | Type 210 in the Bottom Crop value slider and press Return.
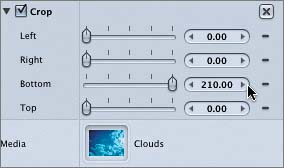
The Clouds image in the Canvas has been cropped so the clouds no longer show through the rock in the lower portion of the frame.
| 6. | Close the current project.
Congratulations. You just "pulled a key," which is shoptalk for keying an image. Keying an image means to remove a particular color, such as blue or green.
It takes years to master the art of keying, and most professional compositors spend hours combining various key filters and tweaking parameters to perfect an image.
|
MORE INFO You can read more specific information about working with the Keying filters in the Motion documentation that comes with the application.
|