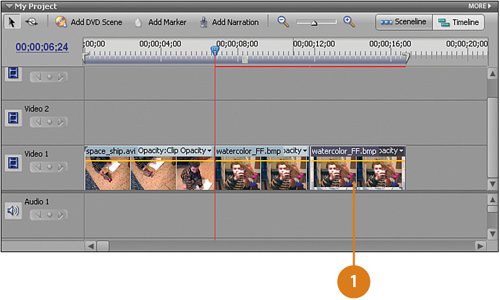
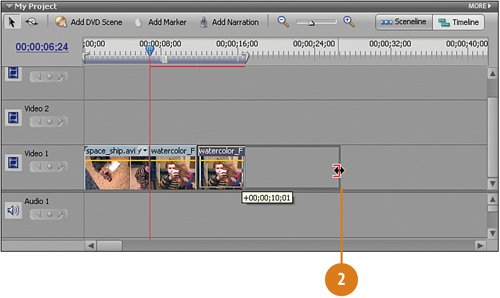
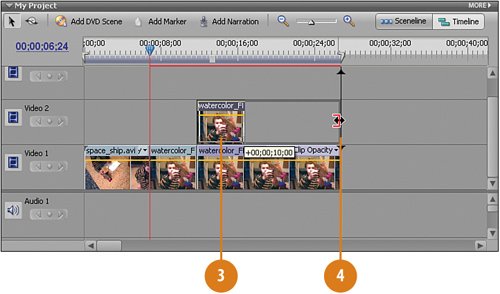
Adding the Still Image to the Timeline Twice


As explained in the introduction, you need two copies of the clip you want to use (in this case, the snapshot you just took). One to apply the "watercolor" effect to, and one to apply a "pen and ink" effect to. If you were to apply both effects to the same clip, it won't work because the two effects will combine in a muddy way (try it and see). We need to control the opacity of the two effects independently, and having copies of the clip lets us do that. In this case, we actually need three copies. The first is the original freeze frame "snap shot" already on the Timeline that will stop the action, and then appear to slowly transform into a watercolor painting.

Drag the "Snapshot" You Just Took to the Timeline onto Video 1 and Video 2

From the Media panel, drag the watercolor_FF.bmp clip directly next to the tail end of the watercolor_FF.bmp already on the Video 1 track on the Timeline.

Drag the tail end of this clip to extend its length to 15 seconds.

Tip

Watch the yellow popup next to the cursor as you stretch the clip and stop when it reads 00;00;10;00. This is because you are adding 10 seconds to the clip's original length of 5 seconds.

Tip

Alternatively, you can watch the clip's length as it displays on the lower right corner of the Monitor panel. Stop when it reaches 00;00;15;00.

Drag the watercolor_FF.bmp clip again from the Media panel to the Timeline, this time to the Video 2 track, directly on top of the second copy in the Video 1 track, which starts at 00;00;11;23.

Drag the tail end of this clip to extend its length to 15 seconds, as well.


Hollywood Special Effects with Adobe Premiere Elements 3
ISBN: 0789736128
EAN: 2147483647
Year: 2006
Pages: 274
Authors: Carl Plumer

flylib.com © 2008-2017.
If you may any questions please contact us: flylib@qtcs.net