You can use images purely for decoration, but they also have many practical uses on a Web page. Images can serve as links, backgrounds,
You can use an image as a link by placing the <img /> element between a set of anchor <a> tags. This will create a link in much the same way that text becomes a link when placed inside this element.
<a href="http://www.linksite.com"> < img src="image.gif" / ></a>
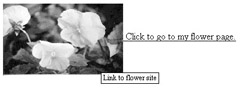
Those who come to your site through a nongraphical, nonvisual browser will need some other way to navigate. You can make things easier for them by including a text link with the image. Inserting the text between the <a> tags accomplishes this, as shown in the following illustration:
<a href="flowerpage.htm".> < img src="image.gif"alt="Link to flower site" /> Click to go to my flower page.</a>.
| Note |
If your image is a link, a border is automatically drawn around it. If you do not want a border around a linked image, you must specify border="0". |
You can insert a background image on your page by using the background=" " attribute inside the opening <body> tag. The browser will then “tile” the image to fill up the page. To use the background created earlier in this chapter as the wallpaper for a page, the opening body tag would look like this:
<body background="image.gif">
| Tip |
Don’t choose garish or
|
The image, whatever it is, will fill the page and scroll right along with the page’s content. But what if you would like to have your company’s logo
If you would like to create a
watermark
effect, you use an additional attribute in the <body> tag, called bgproperties
.
This attribute allows the background to remain stationary while the page’s content
<body background="image.gif" bgproperties="fixed" >
| Note |
Until recently, this attribute was supported only in Internet Explorer and Opera; Netscape 6 now supports the watermark effect. However, older Netscape browsers still ignore this attribute and scroll the background. |
If you have been working through this book chapter by chapter, hopefully you have already begun to appreciate the value and versatility of Cascading Style Sheets (CSS). By combining style sheets with graphics, you can create some wonderful effects for your Web pages. As always, you need to make sure that your pages are not dependent upon any of the effects you create, so that a person with a browser that does not fully support CSS can still enjoy your site.
Cascading Style Sheets enable you to control background images and do all the same things covered earlier in the chapter. However, CSS throw in some extras that are not available in HTML. As you have already read in this chapter, HTML allows you to specify a background image, which will be tiled to fill up the page. The style rules for CSS background images give you a much greater range of choices. For example:
To specify an image as a background image:
background-image: (url)picture.jpg
To tile an image to fill up the page:
background-repeat : repeat
To make an image repeat across the top of the page:
background-repeat: repeat-x
To make an image repeat straight down the page:
background-repeat: repeat-y
To cause an image to be used only once:
background-repeat: no-repeat
To allow an image to scroll with the page:
background-attachment : scroll
To fix the image in place, such as a watermark:
background-attachment: fixed
To position the background image on the page:
background-position: top (or center, bottom, left, right)
Thus far, you have primarily applied styles
inline
—that is, right inside the various element tags of your pages. However, you will find it much less cumbersome to add your styles as an embedded style sheet inside your page’s <head> element. The only difference is that because you are not placing the style inside the element itself, you have to specify the
<html> <head> <title>Page Title</title> <
style type="text/css"
>
elementName { cssProperty: value;
cssProperty: value;
cssProperty: value;}
elementName { cssProperty: value;
cssProperty: value;}
<
/style
> </head> <body> </body> </html>
| Tip |
For a quick reference on how to create CSS style rules, download Appendix B from www.jamespence.com or www.osborne.com. |
I might have positioned the CSS watermark section ahead of the deprecated watermark
<html> <head> <title>CSS Watermark Effect</title> <style type="text/css"> body { background-image: url(http://flylib.com/books/4/238/1/html/2/image.gif); background-position: left; background-repeat: repeat-y; background-attachment: fixed; } </style> </head> <body> (Cut and paste some text here) </body> </html>
Maybe you would like to put an attractive border around your images. HTML allows you to specify a border, its width, and sometimes its
img {
border-color
: red;
border-style
: inset;
border-width
: thick;}
To see how this looks, choose any image on your system and then copy the code here,
<html> <head> <title>CSS Image Border</title> <style type="text/css"> body {margin-left: .50in; margin-top: .50in} img {border-color: red; border-style: inset; border-width: thick;} </style> </head> <body> <img src="image.jpg" alt="A sample image and border" height="200" width="300" /> </body> </html>
This code creates a red “picture frame”–type border around any image that is placed on the page. It also specifies a 1/2" margin on the top and left sides of the page.
Try experimenting with some of the other CSS properties and see what varieties you can come up with. The best way to learn CSS (or HTML, for that matter) is to play with it. Go have some fun and see what you can do.