Insert Graphics on Your Page
|
HTML provides a number of ways to insert images and control their placement and appearance on a page. Although many of these have been deprecated in favor of Cascading Style Sheets, they still are the easiest tools to use for simple image placement and positioning. However, as you use them, keep in mind that you ultimately need to move in the direction of CSS. When you have learned how to insert images with HTML, you can expand your design control with Cascading Style Sheets. See Chapter 10 for more information on CSS.
Project: 8 Embed an Image with <img />
When you have found or created some images to work with, you’re ready to place them on a page. Inserting an image is easy. You simply use the image element <img /> to insert the image, along with the src attribute to tell the browser where to find the image. When you add a graphic to your page this way, it is known as an embedded image. To embed an image, follow these steps:
| Shortcut | If you want an easy way to locate image files to experiment with, try searching your system’s hard drive for files that end in .gif or .jpg. In Windows 95 or above, you can do this by simply clicking Start and then selecting the Find or Search option. From there, select the Files or Folders option and type *.gif or *.jpg. The computer will then search your hard drive and provide a list of files in these formats. |
-
Create a blank html document.
-
Between the <body> tags insert the image element: <img />.
Note <img /> is an empty element and has no closing tag. Don’t forget to put the slash at the end of the <img /> tag.
-
Identify the image’s location with the source attribute: src="/books/4/238/1/html/2/ ". The source attribute tells the browser where to find the image. If the graphic is in the same directory as the Web page, you need to include only the file name, as shown here:
<img src="/books/4/238/1/html/2/image.gif" />
-
However, if you have placed your pictures in a different directory, you will need to at least include the directory where the graphic file is located:
<img src="/books/4/238/1/html/2/images/image.gif" />
-
For more on relative and absolute file addressing, see Chapter 5.
-
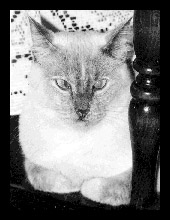
Add a description for nonvisual browsers with alt. The alt (alternate text) attribute provides a place for you to include a text description of the image. Similar to the title attribute covered in Chapter 5, alt creates a pop-up text box with your description in it when the cursor moves over it. But one of alt’s most important uses is to provide content for those who might have images turned off on their browsers or those few who might still be using text-only browsers. Wherever you have placed an image, visitors will see a display that tells them an image is present, and your description will be included. The same description appears when someone passes the mouse cursor over the image, as in the following illustration:
<img src="/books/4/238/1/html/2/boo.jpg" alt="My cat, Boo" />

Tip Although graphics, pictures, and images provide necessary visual interaction for your visitors, never forget that they make your page take longer to load. It’s simple mathematics. The more images you have, and the bigger they are, the longer your pages will take to load. To speed up your pages, keep graphics files small and limit the number you use per page. Imagine each of your Web pages as a small container that can hold only about 60K of material; then try to keep the sum of all your content on each page within that limit. Another alternative is to include a small thumbnail-size picture that links to a larger image. Many catalog or photo gallery sites use this technique. It can greatly reduce your page’s loading time.
Specify Graphic Size with the height and width Attributes
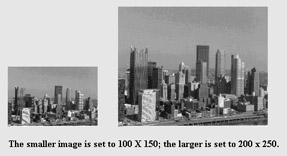
The height and width attributes enable you to specify the amount of space your image takes up on the page. With these attributes, you can scale an image up or down, depending on your needs. However, it’s important to keep in mind that the height and width attributes do not change the image file’s actual size. A 1MB image still takes up a full meg of space, even if you scale it down to a thumbnail size. So why should you bother using these attributes?
If you use the height and width attributes with each of your images, it enables a browser to load your pages much faster. As the browser scans through the code, it reads these attributes and then reserves the appropriate amount of space for the image as it lays out your page structure. Thus, it is able to skip over the images and display the text portions of your page first, leaving “place holders” for your pictures. After the text is displayed, it goes back and loads the graphics. This way, your visitors are able to read your content while they’re waiting for your images to download. If you don’t use the height and width attributes, the browser must load each picture as it comes to it, making the page-loading process much slower.
-
height=" " The height attribute specifies the height of the image in pixels.
-
width=" " The width attribute specifies the image’s width in pixels.
<img src="/books/4/238/1/html/2/image.jpg" alt="My Favorite Picture" height="100" width="150" />
Wrap Text and Align Images with align (Deprecated)
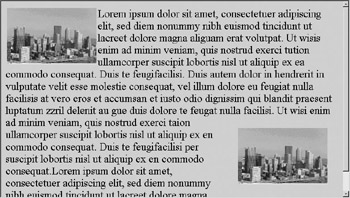
Suppose you want to have an image right aligned with the text wrapping around to the left. You can do this with HTML by using the align attribute. Although align has been deprecated in favor of style sheets, it is by far easiest to use when you are learning. However, if it is your goal to write “standards-compliant” Web pages with XHTML, you will eventually need to move away from the this method of positioning your images and develop your layouts using style sheets.
| Note | If you want to learn more about image placement using CSS, check out Chapter 11. |
Use align with "left" and "right" Values for Text Wrapping
To control text wrapping, use the align attribute with left or right as the value. The picture will appear on one side of the page, with the text on the other. If you choose align="left", any text will be wrapped around the right side of your image. Align="right" wraps the text around the left side of your graphic.
<img src="/books/4/238/1/html/2/pansy1.jpg" align="left" /> <img src="/books/4/238/1/html/2/pansy2.jpg" align="right" />

Use align with "top," "middle," and "bottom" Values for Vertical Positioning
To control the vertical alignment of an image relative to text, another image, or anything else on the page, specify the value as top, middle, or bottom, like this:
<img src="/books/4/238/1/html/2/image.gif" align="top" /> <img src="/books/4/238/1/html/2/image.gif" align="middle" /> <img src="/books/4/238/1/html/2/image.gif" align="bottom" />
Add White Space with hspace and vspace (Deprecated)
If you want to create a buffer zone of white space around your image, you can do it with the hspace and vspace attributes. hspace stands for horizontal space; vspace stands for vertical space. Adding hspace inserts space along the horizontal axis, and vspace inserts space along the vertical axis. In the following illustration, the image in the lower right corner has space added, while the image in the upper left corner does not.
<img src="/books/4/238/1/html/2/pansy3.jpg" hspace="50" vspace="50">
The values for hspace and vspace are specified in pixels; thus, in the preceding case, the browser adds a buffer zone of 50 pixels around the entire image. If you want to add space on only the sides or only above and below the image, simply use one of the attributes rather than both.
| Note | The hspace and vspace attributes have both been deprecated. As you will learn in Chapter 10, you can accomplish the same effects with the CSS padding property. |
Add a Border with the border Attribute (Deprecated)
To add a border around your image, you can include the deprecated border=" " attribute. You specify the size (thickness) of the border in pixels. So, border="5" will insert a border 5 pixels in width. Adding a border to an image is a nice way to give a picture a “large image” feel with a “small image” performance.
<img src="/books/4/238/1/html/2/boo.jpg" border="5" alt="My cat Boo" height="100" width="50" />
| Tip | The border attribute enables you to create only one kind of border. Style sheets are the better choice because they enable you to assign borders in as many as eight different styles, including dotted, dashed, solid, double, groove, ridge, inset, and outset. Also, different border styles may be used in combination with one another and can be placed around any element—not just images. |
|
EAN: 2147483647
Pages: 126