Use Cascading Style Sheets with Graphics
|
If you have been working through this book chapter by chapter, hopefully you have already begun to appreciate the value and versatility of Cascading Style Sheets (CSS). By combining style sheets with graphics, you can create some wonderful effects for your Web pages. As always, you need to make sure that your pages are not dependent upon any of the effects you create, so that a person with a browser that does not fully support CSS can still enjoy your site.
Project 9: Add a Watermark with CSS
Cascading Style Sheets enable you to control background images and do all the same things covered earlier in the chapter. However, CSS throw in some extras that are not available in HTML. As you have already read in this chapter, HTML allows you to specify a background image, which will be tiled to fill up the page. The style rules for CSS background images give you a much greater range of choices. For example:
-
To specify an image as a background image:
background-image: (url)picture.jpg
-
To tile an image to fill up the page:
background-repeat: repeat
-
To make an image repeat across the top of the page:
background-repeat: repeat-x
-
To make an image repeat straight down the page:
background-repeat: repeat-y
-
To cause an image to be used only once:
background-repeat: no-repeat
-
To allow an image to scroll with the page:
background-attachment: scroll
-
To fix the image in place, such as a watermark:
background-attachment: fixed
-
To position the background image on the page:
background-position: top (or center, bottom, left, right)
Thus far, you have primarily applied styles inline—that is, right inside the various element tags of your pages. However, you will find it much less cumbersome to add your styles as an embedded style sheet inside your page’s <head> element. The only difference is that because you are not placing the style inside the element itself, you have to specify the name of the element you want to modify. In CSS terminology this is called a selector, but don’t let the term confuse you. For now, just think in terms of the element’s name. For example, if you want to set styles that will affect all the other elements on the page, use the “body” selector. If you only want to affect first level headings, use the “h1” selector. A page with styles embedded in the <head> will look something like the following markup:
<html> <head> <title>Page Title</title> <style type="text/css"> elementName { cssProperty: value; cssProperty: value; cssProperty: value;} elementName { cssProperty: value; cssProperty: value;} </style> </head> <body> </body> </html> | Tip | For a quick reference on how to create CSS style rules, download Appendix B from www.jamespence.com or www.osborne.com. |
I might have positioned the CSS watermark section ahead of the deprecated watermark methods in the text. To use the <style> element to create an embedded style sheet that creates a background image down the left side of the page and allows it to remain fixed, copy the following HTML code and display it in your browser. (Don’t forget to replace image.gif with your own image.) It should resemble the illustration that follows:
<html> <head> <title>CSS Watermark Effect</title> <style type="text/css"> body { background-image: url(image.gif); background-position: left; background-repeat: repeat-y; background-attachment: fixed; } </style> </head> <body> (Cut and paste some text here) </body> </html> 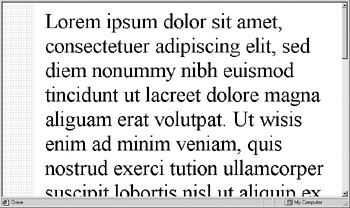
Project 10: Place a Decorative Border Around an Image
Maybe you would like to put an attractive border around your images. HTML allows you to specify a border, its width, and sometimes its color. However, with CSS, there are many more available options. A sample style rule that will give a decorative red border, with something of a 3-D effect, would look like this:
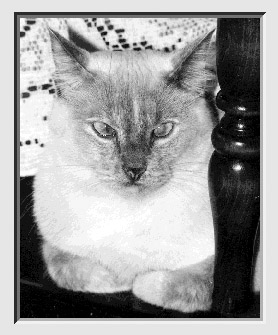
img {border-color: red; border-style: inset; border-width: thick;} To see how this looks, choose any image on your system and then copy the code here, putting the image filename in the <img /> element, and your own values in the height and width attributes:
<html> <head> <title>CSS Image Border</title> <style type="text/css"> body {margin-left: .50in; margin-top: .50in} img {border-color: red; border-style: inset; border-width: thick;} </style> </head> <body> <img src="/books/4/238/1/html/2/image.jpg" alt="A sample image and border" height="200" width="300" /> </body> </html> This code creates a red “picture frame”–type border around any image that is placed on the page. It also specifies a 1/2" margin on the top and left sides of the page.
Try experimenting with some of the other CSS properties and see what varieties you can come up with. The best way to learn CSS (or HTML, for that matter) is to play with it. Go have some fun and see what you can do.
|
EAN: 2147483647
Pages: 126