Uninstalling Check Point VPN-1FireWall-1 NG on Windows
Uninstalling Check Point VPN-1/FireWall-1 NG on Windows
When you uninstall VPN-1/FireWall-1, it is recommended that you make a full system backup before you begin. If you only need to back up the firewall configuration, then you should make a backup of the $FWDIR directory and all of its subdirectories. The default $FWDIR directory in Windows is C:\WINNT\FW1\NG. It is also advisable to back up the registry and the $CPDIR located by default at C:\Program Files\CheckPoint\CPShared\NG. Note that it is not necessary to uninstall the software to upgrade to a new version. The installation process will take care of upgrading the software.
| Warning | When you remove the Check Point VPN-1/FireWall-1 software from your system, you will lose all configuration data. The uninstall process deletes all the files, digital certificates, and directories associated with this package. |
Uninstalling VPN-1 & FireWall-1
When you uninstall the firewall, you should remove the Check Point installed components using Add/Remove Programs in your system s Control Panel. The components should be removed in the reverse order in which they were installed. The following is a hypothetical order of removal:
-
Any Hotfixed versions of packages dependent on VPN-1/FireWall-1 NG AI such as Backward Compatibility, FloodGate-1, and Policy Server.
-
Any packages dependent on VPN-1/FireWall-1 NG AI such as Backward Compatibility, FloodGate-1, and Policy Server.
-
Check Point VPN-1 & FireWall-1 NG AI Hotfixes
-
Check Point VPN-1 & FireWall-1 NG AI
-
Check Point SVN Foundation NG AI Hotfixes
-
Check Point SVN Foundation NG AI
You can remove the management clients package at any time, but the order in which you remove these two packages is important.
Follow the steps below to completely uninstall all Check Point products from your Windows platform.
-
Exit all GUI Client windows that you may have open .
-
Open the Control Panel by selecting Start Settings Control Panel .
-
Click the Add/Remove Programs icon. If you are on Windows 2000, you should see a window similar to the window displayed in Figure 2.37. Next, select Check Point VPN-1 & FireWall-1 4.1 Backward Compatibility and click Change/Remove to uninstall this program.

Figure 2.37: Add/Remove Check Point VPN-1/FireWall-1 4.1 Backward Compatibility -
You will receive a message asking if you are sure that you want to remove this program. Click OK to continue and remove the VPN-1/FireWall-1 components. You may receive messages alerting you about shared and read only files. You can safely choose Yes to delete them and continue.
-
You will come back to the screen shown in Figure 2.38 in the Add/Remove Programs window. Select Check Point VPN-1 & FireWall-1 NG_AI and click Change/Remove to uninstall this program.
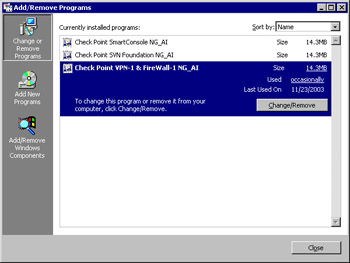
Figure 2.38: Add/Remove Check Point VPN-1/FireWall-1 NG AI -
You will receive a message asking if you are sure that you want to remove this program. Click OK to continue and remove the VPN-1/FireWall-1 components. You may receive messages alerting you about shared and read only files. You can safely choose Yes to delete them and continue.
-
You will receive a Question/Warning message from Check Point (see Figure 2.39) asking if it is OK to continue with the uninstall of your primary management server. Click Yes to continue. This is your last chance to change your mind. After you have confirmed that you really do wish to remove the management server VPN-1/FireWall-1 component, the uninstall process will then stop any running Check Point services before starting to remove files. You will see the message displayed in Figure 2.40.
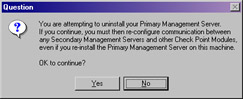
Figure 2.39: Check Point Warning
Figure 2.40: Stopping Services -
Next, a window will be displayed to show you the progress of the uninstall process (Figure 2.41). Once the process has finished, select Yes, I want to restart my computer now and click Finish to reboot your computer (Figure 2.42). If you are planning on removing the SVN Foundation, you may select No, I will restart my computer later , remove the SVN Foundation, and then reboot.
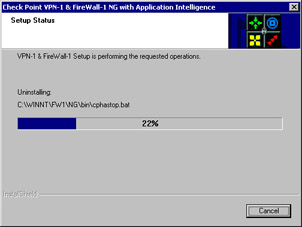
Figure 2.41: Removing VPN-1/FireWall-1 Files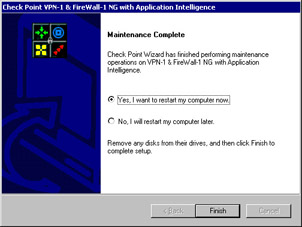
Figure 2.42: VPN-1/FireWall-1 Uninstall Complete
Uninstalling SVN Foundation
You have already uninstalled the VPN-1/FireWall-1 software, but now you must remove the SVN Foundation. This should always be removed after all other Check Point components, which are built on top of this foundation. If you had installed UserAuthority or the Policy Server, for example, these should be removed prior to removing the SVN program files.
-
Log into your computer
-
Choose Start Settings Control Panel .
-
Click the Add/Remove Programs Icon. You should see a window similar to the one illustrated in Figure 2.43. Select Check Point SVN Foundation NG_AI and click Change/Remove to completely remove the SVN Foundation from your system.
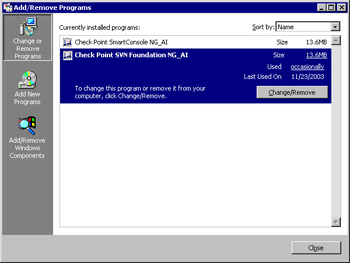
Figure 2.43: Add/Remove Check Point SVN Foundation NG AI -
You will receive a notification stating that this is the only existing version of SVN foundation. After this package has been removed, the system will no longer be able to receive software updates through SmartUpdate. Click Yes to continue.
-
Click OK to confirm the removal of the selected application (see Figure 2.44). The InstallShield Wizard will then start up and begin uninstalling the SVN Foundation.
-
Click Finish when you receive the message Maintenance Complete as illustrated in Figure 2.44. You may be prompted to reboot instead. If so, select Yes, I want to restart my computer now and click Finish to reboot your computer. Once the machine reboots, log in again and open the Control Panel to remove the GUI clients.
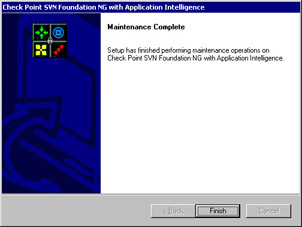
Figure 2.44: SVN Foundation Maintenance Complete
Uninstalling Management Clients
The management clients do not really depend on the SVN foundation installation; therefore, you could actually remove them at any time without any difficulty.
-
Access the Add/Remove Programs window after removing the SVN Foundation, and you should see a screen similar to that in Figure 2.45. Highlight Check Point SmartConsole NG_AI and click Change/Remove to uninstall all of the NG management clients (e.g. Policy Editor, Log Viewer, etc).
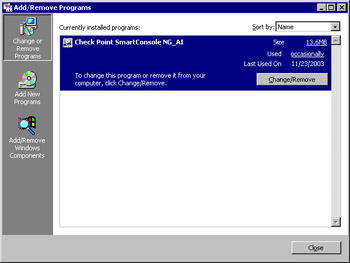
Figure 2.45: Add/Remove Management Clients NG -
Choose to remove the GUI clients.
-
Click OK when you see the Maintenance Finished window displayed in Figure 2.46.
-
Click Close to exit the Control Panel, and you are done uninstalling all Check Point components.