Installing Check Point VPN-1FireWall-1 NG AI on Windows
Installing Check Point VPN-1/FireWall-1 NG AI on Windows
Finally, all of your hard work at preparing for the firewall installation is about to pay off. This section is dedicated to installing the Check Point VPN-1/FireWall-1 NG on Windows. Hopefully you have read the previous section Before you Begin and are prepared to start with the Check Point software installation. If you did not read the Before you Begin section above, then you should go back and read it before you continue.
Although this section focuses on standalone installations, it will point out the different options you would make if you wanted to install the firewall on Windows in a distributed environment. In other words, you will be installing the management and enforcement modules as well as the GUI all on one machine; however, you could install each piece on separate machines (and use different operating systems) if that is what your network design calls for. You would typically use a distributed installation if you will be managing multiple firewalls, if you will be installing a cluster of firewalls, or if you are installing an appliance with limited disk space so the logging would go to a server with ample disk space. The distributed installation is not much different from the standalone installation, and the goal is for you to feel just as comfortable with the former as you do with the latter.
Installing from CD
This section will walk you through the Check Point VPN-1/FireWall-1 installation on Windows using the Check Point Next Generation CD. You can obtain a copy of this CD from Check Point by going to www.checkpoint.com/getsecure.html and requesting an evaluation of the software. If you have a login setup with Check Point, then you can download the software and updates from Check Point here: www.checkpoint.com/techsupport/downloadsng/ngfp1.html.
The following screenshots are taken from a new installation via CD to a Windows 2000 Server. If you are installing on Windows NT, the procedure is the same.
-
Insert the Check Point Next Generation CD into the CD-ROM drive on your firewall system. The Check Point NG Welcome Screen appears (Figure 2.3). If the Welcome screen does not appear after inserting the CD, then you may start it manually from the CD s wrappers\windows folder by running demo32.exe. From this screen you may choose to read the important information regarding evaluation licenses, purchased products, and the contents of the CD.
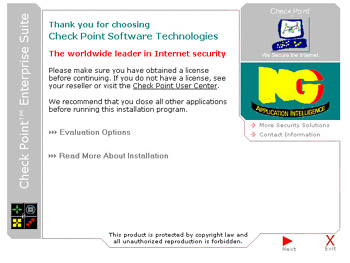
Figure 2.3: Welcome Screen -
If you are ready to continue the installation, then select Next to start the Installation Wizard. You will be presented with the License Agreement as illustrated in Figure 2.4.
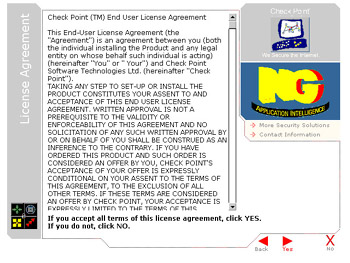
Figure 2.4: License Agreement -
You must accept the license agreement in order to continue with installation. Select Yes when you are ready to continue. Otherwise , select No to exit the installation wizard.
-
The next screen, displayed in Figure 2.5, provides you with the Product Menu so that you can choose which Check Point products you want to install. You have three options:
-
Demo Installation Choose this option to only install the GUI clients to evaluate the user interface to the software. This option is also useful for installing only the software necessary for the administrator to work from his/her desktop system.
-
New Installation Choose this option if you wish to install the Next Generation with Application Intelligence Suite.
-
Installation Using Imported Configuration This option is for users who have used the installation CD to export their existing pre-NG AI configuration and wish to upgrade it during the installation process.
-
-
Make sure that New Installation is selected, and click Next .
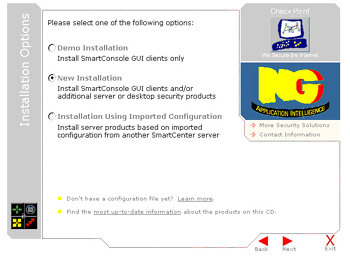
Figure 2.5: Product MenuNote During the installation process, use the Back button at any time to move to the previous screen, use the Next button to advance to the next screen, use the Exit option to exit at any time, and use the elevator buttons along the side of the page to scroll up and down.
-
The next screen is the Software Components (see Figure 2.6), which allows you to select the individual Check Point components to install. We will select VPN-1 & FireWall-1 , SmartCenter , and Management Clients to install the management and enforcement modules as well as the Graphical User Interface. If you hold your mouse pointer over each item (without clicking), you will see a detailed description displayed on the right-hand side.
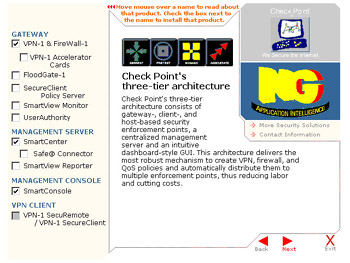
Figure 2.6: Server/Gateway ComponentsNote If you wish to install the management module only, your selections here will not include VPN-1 & FireWall-1. If you wish to install the enforcement module only, then you will only select VPN-1 & FireWall-1.
-
Click Next when you are ready to begin the installation process.
-
The Check Point Installation Wizard will start the InstallShield Wizard program to begin the installation based on the options you ve chosen thus far. Figure 2.7 illustrates the screen that you should see next. Click Next when you are ready to continue. A progress window will pop up as shown in Figure 2.8. You should see the window displayed in Figure 2.9 when the SVN installation begins. You should note that this is the first piece that is always installed on a Next Generation system. It will also be the last piece if you uninstall. The reason for this is that the SVN foundation contains the shared libraries which all Check Point applications use as well as it provides the secured communications layer for all communications between Check Point enabled systems.

Figure 2.7: Selected Products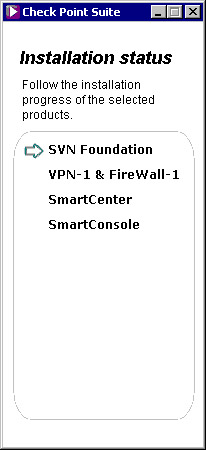
Figure 2.8: Progress Window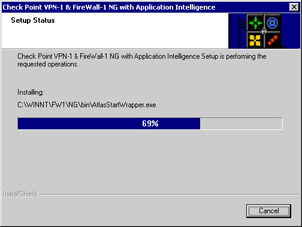
Figure 2.9: VPN-1 & FireWall-1 Installation -
Following SVN installation, another window will pop up asking you for the specific components of VPN-1/FireWall-1 to install (see Figure 2.10). Of the following options, select Primary SmartCenter and click Next .
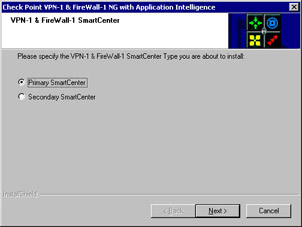
Figure 2.10: VPN-1 & FireWall-1 Product Specification-
Primary SmartCenter To install a management server only that will act in a primary capacity.
-
Secondary SmartCenter To install a management server that will act in a backup capacity.
-
-
Next, Check Point will ask you where you want to install the product files. The default folder location in Windows is C:\WINNT\FW1\NG (actually %SystemRoot%\FW1\NG). If you wish to install to a different folder, click Browse and select the desired location; otherwise, click Next to accept the default location and continue. Whatever value you choose for the firewall s installation directory will be the value of the $FWDIR environment variable, which will be used throughout this book when referencing this directory. This is the last screen before VPN-1/FireWall-1 files are copied to your hard drive (Figure 2.11). Now the system copies files and installs the software. You should see a screen similar to the one in Figure 2.12 as the installation program shows you its progress. You may click the Cancel button on the bottom right-hand side of this screen if you wish to stop the installation at this point. However, remember that the installation program is modifying the operating system at a very low level (installing kernel modules and such) so it is preferred that you allow the installation to finish and uninstall it, rather than interrupting the installation and risk leaving the system in an uncertain state.
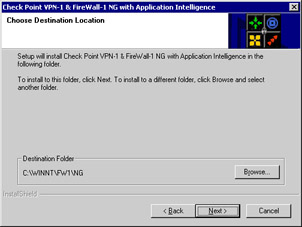
Figure 2.11: Choose Destination Location
Figure 2.12: Copying Files -
Once the system has finished copying files, you may see some messages pop up. This is normal to let the administrator that the installation program is hardening the Operating System as well as other operations as part of the installation process. The installation wizard will then display a final popup window from VPN-1/FireWall-1 explaining that the installation was completed (as shown in Figure 2.13). Click OK .
Figure 2.13: Setup Information -
The installation process will next install backward compatibility in case you require. It will then move to the next package to install, which is the SmartConsole (management clients). You will see a window like the one in Figure 2.14 asking if you wish to install the Check Point SmartConsole NG with Application Intelligence in the default folder C:\Program Files\CheckPoint\SmartConsole\NG_AI. You can either accept the default location or click Browse to choose a new target for the files. Accept the default folder location and click Next to continue.
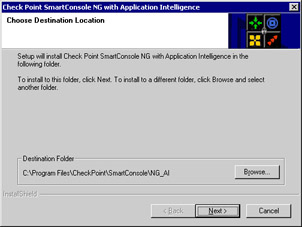
Figure 2.14: Management Client Location -
Now you will need to choose which of the SmartConsole components to install. Figure 2.15 displays the window you will see with the following options: Accept the default values to install all the clients and click Next . This is the last screen before the Check Point installation wizard begins copying files to your system (Figure 2.16).
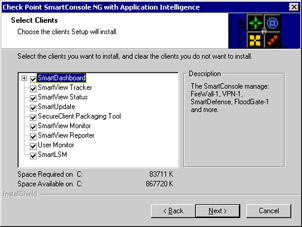
Figure 2.15: Select Management Clients to Install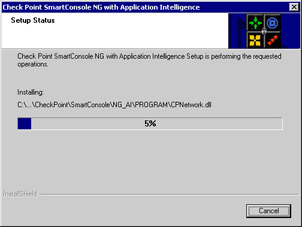
Figure 2.16: Management Clients Copying Files-
SmartDashboard Used to connect to your management server to configure the rulebase, Network Address Translation, VPN, FloodGate-1 QoS policy, WebAccess, and SecureClient Desktop Security Policies. There are a number of options below SmartDashboard, but they are all either selected or not selected based on whether or not you are installing the SmartDashboard application. They are shown, but are integral to the operation of the SmartDashboard GUI, so they are always selected. For reference, these are SmartDefense, SmartMap, VPN Manager, Policy Manager, Users Manager, and Objects Manager.
-
SmartView Tracker Used to view the VPN-1/FireWall-1 security logs, accounting logs, and audit logs on the management server.
-
SmartView Status Used to view the status of the remote enforcement points connected to the management server.
-
SmartUpdate Used for managing licenses and remotely upgrading software and operating systems of the remote enforcement points connected to the management server.
-
SecureClient Packaging Tool Used to create custom packages for SecuRemote/SecureClient mobile users.
-
SmartView Monitor Used to monitor an interface, QoS rule, or virtual link in real time. The display is in the form of a line or bar graph.
-
Reporting Tool Used to generate historical reports with graphs and pie charts from the data in the VPN-1/FireWall-1 logs.
-
User Monitor Used to monitor which users are logged into policy servers throughout the infrastructure.
-
SmartLSM Used to manage hundreds or thousands of like-configured firewalls in a profile- or template-based method.
-
-
When the system has finished copying files, the installation process is nearly complete. You can now click on any of the icons in the Check Point management clients folder. You can also open the management clients by selecting Start Programs Check Point Management Clients .
-
The installation procedure will next ask if you want shortcuts to the most commonly used clients placed on your desktop (Figure 2.17). Select Yes or No . Click OK to finish the installation (Figure 2.18) and begin the configuration process.
Figure 2.17: Desktop Shortcuts
Figure 2.18: Management Client Setup Finished
Configuring Check Point VPN-1/FireWall-1 NG AI on Windows
Once the system has finished copying files during the installation procedure, it will begin to go through the configuration screens. If you read the first section of this chapter, then you should be prepared to configure the firewall. After this initial configuration, you can always come back to any of these screens by opening the Check Point Configuration window via Start Programs Check Point SmartConsole R54 Check Point Configuration .
The initial configuration will take you through the following screens:
-
Licenses
-
Administrators
-
GUI Clients
-
Certificate Authority Configuration
Licenses
You should have obtained all of your licenses before you get to this step. If you didn t, don t worry. There is a link to the Check Point User Center, where you can get your licenses, right in the Licenses window. If you need help with your license, read the first part of this chapter titled Before you Begin. If you don t have any permanent licenses to install at this time, you can use the built-in 15-day evaluation license that will be created at the end of the configuration. And, of course, you can always request an evaluation license from either Check Point or your Check Point reseller.
Since you have installed a primary management module, you should be installing a local license that was registered with the local management station s IP address. Follow this step-by-step procedure for adding your license(s).
-
Click Add in the Licenses configuration window (Figure 2.19).
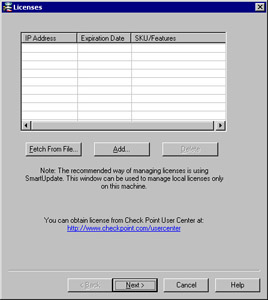
Figure 2.19: Licenses -
A window similar to the one in Figure 2.20 will be displayed. In this window you can either select Paste License or enter the license details into the appropriate fields. The figure below shows the following license installed: cplic putlic 192.168.0.1 never aoMJFd63k-pLdmKQMwZ-aELBqjeVX-pJxZJJCAy CPMP-EVAL-1-3DES-NG CK-CP. In addition, you will see the following fields:
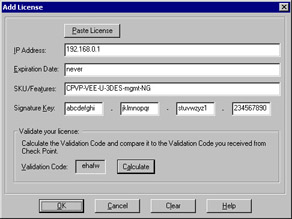
Figure 2.20: Adding a License-
IP Address The IP address associated with this license or eval if you are utilizing an evaluation license.
-
Expiration Date The date that the license expires , which is never for purchased products.
-
SKU/Features These are the features that this license will enable (e.g. Management or 3DES).
-
Signature Key The license string provided by Check Point to validate the license. This key will be unique for each license and IP Address.
Enter your license details in the Add License window, and click Calculate to verify that the information you entered is correct. Match the Validation Code that you receive in this cell to the Validation Code on the license obtained from the Check Point User Center. You can also copy the entire cplic putlic command into your clipboard, and then click the Paste License button at the top of the screen to fill in all the fields. Click OK to continue, and if you entered everything correctly you should see the license entered into the main Licenses window (Figure 2.21).

Figure 2.21: License Added SuccessfullyNote The license configuration window will be displayed whether you are installing just the management or the enforcement module in a distributed installation. If you are utilizing centralized licensing for your remote enforcement modules, continue without a license and use SmartUpdate to license the module through the GUI.
-
-
Click Next to continue. The next screen deals with the Check Point configuration of the Management module.
Administrators
After installing your licenses, you will be presented with another configuration window (see Figure 2.22) in which you need to configure your firewall administrators. You will need to define at least one administrator during this time. You can always come back to this window later to add, edit, or delete your administrative logins. If you utilize the management of administrative logins inside the SmartDashboard GUI, you should remove the administrative users defined here after they have been defined and applied.
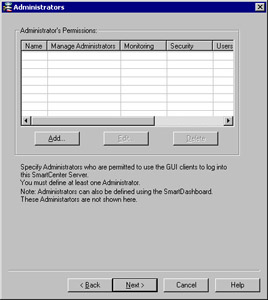
Figure 2.22: Configuring Administrators
| |
Fetching Licenses
If you have saved your license(s) to a file with a .lic extension (e.g. licenses.lic), then you could alternatively use the Fetch from File button, which would enable you to browse your file system for the license file. Once you ve located the *.lic file, select Open , and the license details will be imported into the Licenses configuration window.
| |
-
The first step to configuring your administrators is to click Add
-
You will be presented with a window similar to the one in Figure 2.23 where you can define the attributes for one administrator. It is best to use individual administrator usernames instead of a generic username like fwadmin. The problem with using a generic login ID is that you cannot properly audit the activities of the firewall administrators. It may be important for you to know who installed the last security policy when you are troubleshooting a problem. This becomes more and more important when there are several people administering a firewall system. The fields that you need to fill in are listed below. Enter the required fields in the Add Administrator Window and select Read/Write All for the permissions. Click OK to finish adding the administrator.
-
Administrator Name Choose a login name for your administrator. This field is case-sensitive.
-
Password Choose a good alphanumeric password. It must be at least four characters long and is also case-sensitive.
-
Confirm Password Repeat the same password entered above.
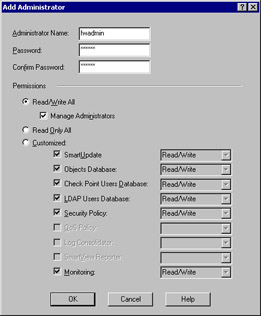
Figure 2.23: Adding an Administrator
The section labeled Permissions enables you to define the access level that you will require on an individual basis for each administrator. If you select Read/Write All or Read Only All , then your administrator will have access to all the available GUI client features with the ability to either make changes and updates or view the configuration and logs (perhaps for troubleshooting purposes), respectively. Notice that only Read/Write All administrators have the ability to manage administrative user accounts through the GUI. Any user with administrative privileges to the operating system of the management server can manage the Check Point administrators. You may also choose to customize their access so that they may be able to update some things and not others. To do this, select Customized and configure each of these options:
-
SmartUpdate This GUI tool enables you to manage licenses and update remote modules.
-
Objects Database This tool is used to create new objects to be used in the Security Policy rulebases . Objects will be covered in the next chapter.
-
Check Point Users Database This tool is used to manage users for firewall authentication purposes.
-
LDAP Users Database This tool is used to manage LDAP users.
-
Security Policy This tool is used to create and manage rulebases using the SmartDashboard GUI.
-
QoS Policy This tool is used to create and manage the bandwidth management rulebases.
-
Log Consolidator This tool is used to create and manage rulebases regarding which logs will be consolidated from the log server into the SmartView Reporter database to run reports on.
-
SmartView Reporter This tool is used to create reports based on information consolidated into its internal database from the logs stored on the management server.
-
Monitoring This option enables access to the Log Viewer, System Status, and Traffic Monitoring GUI clients.
-
-
When you finish adding your administrator, you will be brought back to the main Administrators configuration window. Your administrator should now be listed in the Administrator s Permissions window. From here you may choose to Add , Edit , or Delete administrators from this list (see Figure 2.24). When you are finished adding your administrators, click Next to continue with the configuration of the Check Point Management Module.
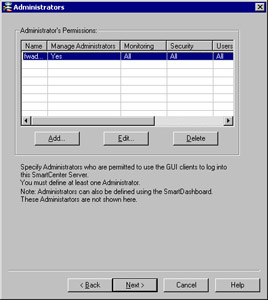
Figure 2.24: Administrators
GUI Clients
The GUI clients are the SmartConsole programs we installed earlier. These clients could also be installed on as many desktops as you wish, but before they can connect to the management server, you need to enter their IP addresses into the GUI clients configuration window shown in Figure 2.25. You can use this feature, for example, if you install the GUI clients on your own workstation to enable you to control the management server from your PC. This will enable you to connect remotely to manage the Security Policy and view your logs and system status. You do not need to configure any clients at all during the installation (localhost is always allowed), but if you are already prepared for this step, you may enter as many clients into this window as necessary. This client information will be saved in a file on your firewall under $FWDIR/conf and will be named gui-clients. This file can be edited directly, or you can bring up this GUI Clients window at any time in the future. It is recommended, however, that you use the GUI to make all changes.
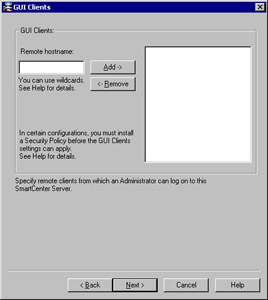
Figure 2.25: Adding GUI Clients
| Note | If you have installed an enforcement module only, then you will not configure GUI clients or administrators. |
-
For the example installation in this chapter, we are not going to enter any GUI clients. Select Next to continue on with the Check Point Management Module installation and read the next section. When you enter GUI clients, you type their hostname or IP address into the Remote hostname: field, and click Add to insert the clients to the window on the right. You are allowed to use wildcards as follows :
-
Any If you enter the word Any , this will allow anyone to connect without restriction (not recommended).
-
Asterisks You may use asterisks in the hostname. For example, 10.10.20.* means any host in the 10.10.20.0/24 network, or *.domainname.com means any hostname within the domainname.com domain.
-
Ranges You may use a dash (-) to represent a range of IP addresses. For example, 1.1.1.3-1.1.1.7 means the 5 hosts including 1.1.1.3 and 1.1.1.7 and every one in between.
-
DNS or WINS resolvable hostnames
Figure 2.26 displays an example of the configured GUI cClients window with various options that you can use for your GUI client entries. It is recommended that you avoid using hostnames or domain names, however, since that requires DNS to be configured and working on the firewall. Using IP addresses are the best method since it doesn t rely on resolving, and will continue to work even if you cannot reach your name servers from the firewall. If, however, you have a very dynamic network with system names staying the same but addresses changing, or if you have many systems to add, hostnames may be the easiest solution.
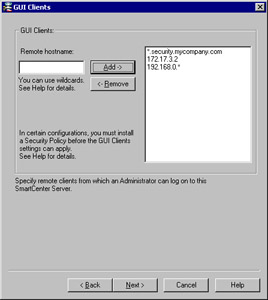
Figure 2.26: GUI Clients Added -
Certificate Authority Initialization
Check Point provides the highest level of security between its components using a PKI implementation. Your management server will be a Certificate Authority for your firewall enforcement modules, and will use certificates for Secure Internal Communication (SIC). This is the step in the installation process where the management server s certificate authority (CA) is configured, and a certificate is generated for the server itself.
You will be presented with a Key Hit Session window where you will be asked to input random text until you hear a beep. The data you enter will be used to generate the certificate, and it is recommended that you also enter the data at a random pace; some keystrokes may be close together and others could have a longer pause between them. The more random the data, the less likely that the input could be duplicated . If the system determines that the keystrokes are not random enough, it will not take them as input, and will display a bomb icon under Random Characters. If the input is good, the system will display a yellow light bulb. This is always a fun exercise in the classroom because of the sounds that are created when you frantically tap away at the keyboard.
| Note | The Key Hit Session screen will also be presented to you if you have installed an enforcement module only so that you can generate a random number used to create an internal certificate for SIC. |
-
Type random characters at random intervals into the Key Hit Session window until the progress bar is full, and the message Thank you! appears at the bottom of the window as seen in Figure 2.27. Click Next to continue with the CA configuration.
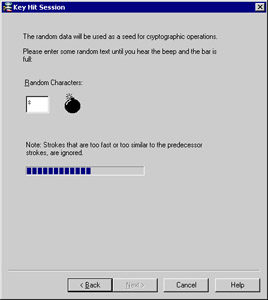
Figure 2.27: Key Hit Session -
You will be presented with a window titled Certificate Authority (Figure 2.28). This window simply informs you that the CA is not yet configured and that it will be initialized when you select Next . Click Next to initialize the management module s Certificate Authority. The system will also prompt you for a name for the Internal Certificate Authority. This should be a Fully Qualified Domain Name (FQDN) due to the fact that it will be resolved by other devices to check the Certificate Revocation Lists (CRLs) for expired certificates, so this means it should be resolvable inside and outside your organization. If you did not install a license, you will be notified that your trial period will expire in 15 day. You should then receive a message that the initialization completed successfully, as shown in Figure 2.29.
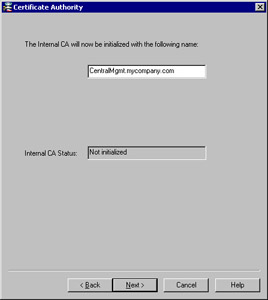
Figure 2.28: Certificate Authority Initialization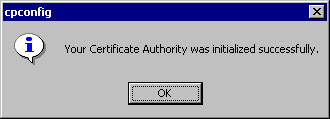
Figure 2.29: CA Initialized Successfully -
Click OK .
-
Click Finish from the Fingerprint window (shown in Figure 2.30) to exit the configuration. This window will be the last one in the set of configuration screens during the installation process. This window displays the fingerprint of the management server s CA. You will be able to bring this window up again after the installation through the Check Point Configuration Tool, which is shown in the section titled Getting Back to Configuration. When GUI clients first connect to the management server, they will be asked to verify the cryptographic fingerprint to ensure that they are connecting to the right machine. After that, the client software will compare the management server s fingerprints at each connect. If the fingerprints do not match, the client will be warned and asked if they wish to continue. The fingerprint could be exported to a file also, which the GUI clients would have access to.
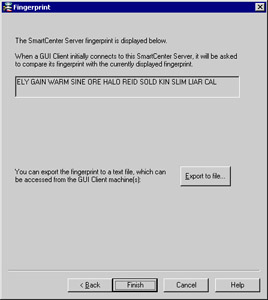
Figure 2.30: Management Server Fingerprint -
If installing a firewall module, you will also receive a notice stating that a default firewalling policy will be installed when the Check Point services start. This will protect the system from attack until the first policy is applied to it.
Installation Complete
Congratulations. You have now successfully installed and configured a Check Point VPN-1/FireWall-1 firewall on a Windows system. All you need to do now is navigate your way out of the Check Point Installation program and reboot your system. Check Point will thank you for installing Check Point Software (see Figure 2.31) and ask you if you wish to reboot now or reboot later (Figure 2.32).
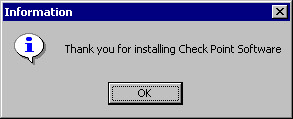
Figure 2.31: NG AI Configuration Complete
-
To finish the installation process, click OK .
-
From the InstallShield Wizard dialog box illustrated in Figure 2.32, choose Yes, I want to restart my computer now and click Finish . Your computer will be shut down and restarted.
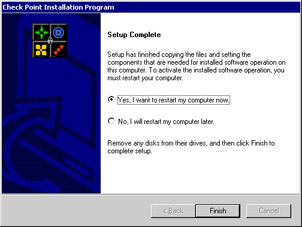
Figure 2.32: Reboot Computer
Getting Back to Configuration
Now that installation is complete, you may need to get back into the Configuration screens that you ran through at the end of the installation. You can add, modify, or delete any of the previous configuration settings by running the Check Point Configuration application.
-
Select Start Programs Check Point SmartConsole R54 Check Point Configuration . This will bring up the Configuration Tool displayed in Figure 2.33. As you can see, all of the configuration options that we went through during the initial installation are available through the various tabs at the top of the Configuration Tool window. The tabs you can configure from this tool are listed below.
-
Licenses
-
Administrators
-
GUI Clients
-
PKCS#11 Token ”Used to configure an add-on card, like a VPN accelerator card, for example.
-
Key Hit Session
-
Fingerprint
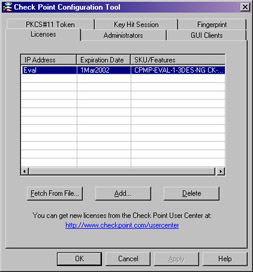
Figure 2.33: Check Point Configuration Tool
Each of the options in Figure 2.33 is described previously in the chapter. If you are just starting to read the chapter at this point, jump to the top of this section Configuring the Management Module to get a walk-through of each of these screens and your options.
-
-
When satisfied with your firewall configuration, click on OK to exit the tool.
Note If you had installed the primary management module only, then the tabs on the Configuration Tool NG will be exactly the same as in Figure 2.33 without the tab for PKCS#11 Token.
If you installed an enforcement module only, the Configuration Tool screens will be a little different (see Figure 2.34). The two new tabs are as follows:
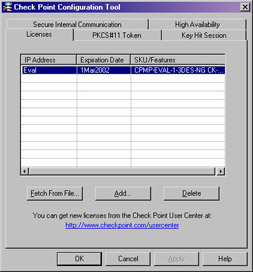
Figure 2.34: Enforcement Module Configuration Tool
-
Secure Internal Communication Enables you to initialize an enforcement module for communication. You must enter the same password here as you enter in the SmartDashboard GUI (Figure 2.35).
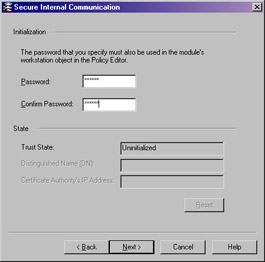
Figure 2.35: Secure Internal Communication -
High Availability Enables this enforcement module to participate in a Check Point high availability (CPHA) or load sharing (CPLS) configuration with one or more other enforcement modules. This tab, illustrated in Figure 2.36, will not show up in your installation. The management module installed on an enforcement module participating in a cluster is not a supported configuration. State Synchronization is used to synchronize multiple firewalls together when using a 3 rd party High Availability or Load Sharing solution.
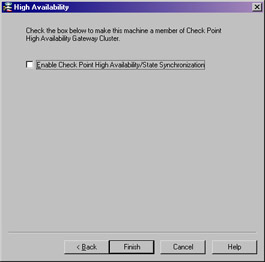
Figure 2.36: High Availability