Before You Begin
This section will prepare you to install the Next Generation product. There are several things that you need to consider prior to installing a firewall. We will discuss each step so that you understand its importance, and guide you in your endeavor to secure your network. The list of minimum system requirements as defined by Check Point is outlined in Table 2.1. You will need to ensure that your hardware meets these requirements at the very least. You can find these online at www.checkpoint.com/products/security/firewall-1_sysreq.html.
| System Requirement | Primary Management & Enforcement Module | SmartConsole Clients |
|---|---|---|
| Operating Systems | Microsoft Win2k Server (SP1, SP2, SP3) Microsoft Win2k Advanced Server (SP1 and SP2) Windows NT 4.0 SP6a Sun Solaris 8 (32- or 64-bit mode)* Sun Solaris 9 (64-bit only)** RedHat Linux 7.0, 7.2*** and 7.3**** Nokia IPSO 3.7***** Check Point SecurePlatform IBM AIX 5.2 | Microsoft Win2k Professional(SP1, SP2, SP3) Microsoft Win2k Server (SP1, SP2) MicrosoftWindows 98SE/ME Mcrosoft Windows XP Home/Professional Windows NT 4.0 SP6a Sun Solaris 8******* |
| Disk Space | 40 MB | 55 MB (100 MB for Solaris) |
| CPU | 300+ MHz Pentium II (UltraSparc II for Solaris) | 300+ MHz Pentium II |
| Memory | 128 MB (130 MB for Windows and Linux) | 128 MB |
| Network Interfaces | ATM, Ethernet, Fast Ethernet, Gigabit Ethernet, FDDI, Token Ring | Any supported by the operating system |
| Media | CD-ROM | CD-ROM |
* You must have patches 108528-17, 113652-01, 109147-18, 109326-07, 108434-01 (32-bit) and 108435-01 (64-bit) or newer on Solaris 8
** You must have patch 112902-07 or newer applied to Solaris 9
*** Requires Kernel version 2.4.9-31
**** Requires Kernel version 2.4.18-5
****** See Nokia website for latest release for each specific IPSO platform
******* The following SmartConsole clients are not supported on Solaris 8 UltraSPARC: SmartView Reporter, SmartView Monitor, SmartLSM, and SecureClient Packaging Tool
Performance of your firewall will rely on the hardware you choose. It is highly recommended that you increase your hardware requirements above the minimum listed in Table 2.1 in real-world environments. Keep in mind that your management station will be handling logs from each module it controls, so you will want to ensure that you have adequate disk space, memory, and CPU to handle these connections. Check Point provides a Platform Selection Guide on its website to assist in sizing your solution. The Platform Selection Guide is based on the system being dedicated to only running the Check Point software on the operating system (OS). If you are running other software, you may degrade performance or require more resources. It is highly recommended, though, that your systems be dedicated to their tasks as management stations and firewalls.
| |
Solaris 32-bit vs. 64-bit
To check whether your Solaris machine is in 32- or 64-bit mode, use the following commands:
isainfo b isainfo vk
To change from 64- to 32-bit mode in Solaris 8 or 9, perform the following actions:
-
Enter EEPROM mode using the STOP-A keyboard combo.
-
Type setenv boot-file kernel/unix and press Return .
-
Reboot.
-
If the machine has difficulty booting, use the set-defaults command to return to 64-bit mode.
To change from 32- to 64-bit mode, do the following:
-
Enter EEPROM mode using the STOP-A keyboard combo.
-
Type setenv boot-file /platform/sun4u/kernel/sparcv9/unix .
-
Reboot.
| |
Before you start your installation, make sure that you complete the items listed below:
-
Get your licenses.
-
Secure the Host.
-
Configure routing and test network interface cards.
-
Enable IP forwarding.
-
Configure DNS (domain name system).
-
Prepare for Check Point Installation and Configuration Screens.
Obtaining Licenses
Check Point licenses have changed with the Next Generation release. In order to obtain a license, you can either get them through your Check Point Value Added Reseller (VAR) or use the Check Point User Center to license your products at http://usercenter.checkpoint.com (see Figure 2.1). You have two options when it comes to licensing your firewall modules. You can either have them tied to their individual IP addresses (external interface recommended by Check Point) as with previous versions, or you can tie them all to the management station s IP address. These licenses are called either local or central , respectively. All licenses are maintained on the management console, and administrators can add or remove licenses using the SecureUpdate management tool.
The management module itself must have a local license based on its own IP address. The nice thing about using central licenses for the enforcement modules is that you can change their IP addresses without needing to replace the license, and you can easily move a license from one module to another.
Starting with Check Point NG Feature Pack 3, the software comes with a built-in 15-day evaluation license. It is always best to obtain your permanent licenses before you install the firewall software. The program will ask you for your license details during the installation procedure. If you cannot obtain your permanent license prior to the installation, then you can use the built-in evaluation license. Check Point s evaluation licenses have full functionality for all features. If your evaluation lasts longer than 15 days, or if you need to test new features at any time, you can receive evaluation licenses from Check Point via your reseller or local Check Point office. These licenses show up in your UserCenter account at http://usercenter.checkpoint.com. Evaluation licenses downloaded from Check Point s UserCenter are valid for one month, and the product is not compromised in any way while running on evaluation licenses.
Check Point changed its small to medium business licensing after the release of Application Intelligence, calling it Check Point Express. The new licenses integrate more functionality at a lower cost. If you purchased a Check Point Express license and you are installing NG with Application Intelligence (R54), you will need to download and install the Check Point Express Supplement Hotfix for the license to work correctly. Later versions will have the updated files included to recognize the new software keys.
Securing the Host
With any firewall installation it is important to consider the security of the host computer on which you are installing the firewall software. There are some guidelines available on the Internet for securing the various operating systems. Below is a list of URLs to some good guides:
-
WinNT http://support.checkpoint.com/kb/docs/public/os/winnt/_pdf/Securing_NT.pdf (SecureKnowledge Solution ID: 55.0.4232373.2607295)
-
WinNT www.spitzner.net/nt.html
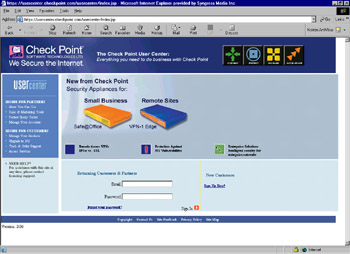
Figure 2.1: Check Point s User Center -
Solaris http://support.checkpoint.com/kb/docs/public/os/_solaris/pdf/strip-sunserver.pdf (SecureKnowledge Solution ID: 55.0.4232382.2607295)
-
Solaris www.spitzner.net/armoring2.html
-
Solaris http://support.checkpoint.com/kb/docs/public/os/_solaris/pdf/solaris8_pkgs_fp3_rev2.pdf
-
Linux www.spitzner.net/linux.html
-
Linux http://support.checkpoint.com/kb/docs/public/os/linux/_pdf/linux_minimal_ng_fp2.pdf
You should start out by installing the base operating system without any bells or whistles, and then apply any necessary OS patches. You should not install any additional Internet servers on your firewall host. For example, you do not want to have an Internet Information Server (IIS) or an FTP (File Transfer Protocol) server running on your firewall, since these services could be vulnerable to attack.
Disabling Services
Probably the most important step in any of these guides is the process of disabling services on the firewall host. Almost any OS installation enables various services out-of-the-box, which are not needed for the operation of a firewall. Your firewall should have as few services running as possible. If you are installing on a Windows machine, you should disable NETBEUI and any other non-IP protocols. The kernel processes of the NG product do not inspect traffic on non-IP protocols, so your NETBEUI and IPX traffic would not be protected, therefore it should not be installed on the firewall.
| Note | By default, the Nokia hardware platform comes with a hardened FreeBSD operating system out-of-the-box. There is nothing that needs to be done to secure a Nokia platform prior to installing the NG product when starting with a default installation. Because Nokia has done the work of hardening the OS, it is important to keep up to date with the version of IPSO installed. Security fixes are routinely distributed as new updates to the OS. |
If you are installing the firewall on a Unix system, the most common method of disabling services is through the /etc/inetd.conf file. This file tells the system which services/protocols are enabled, and therefore which ports the system will be listening to. Illustration 2.1 shows the beginning of a typical inetd.conf file as installed in Solaris 2.7. As you can see, there are several services running that do not have to be enabled. Pretty much everything in the inetd.conf file can be disabled. If you want to leave FTP or telnet open temporarily, then that is your option. Also note that certain services are not spawned through the inetd process. These include secure shell (SSH), sendmail, and usually web servers.
| |
# more inetd.conf # #ident "@(#)inetd.conf 1.33 98/06/02 SMI" /* SVr4.0 1.5 */ # # # Configuration file for inetd(1M). See inetd.conf(4). # # To reconfigure the running inetd process, edit this file, then # send the inetd process a SIGHUP. # # Syntax for socket-based Internet services: # <service_name> <socket_type> <proto> <flags> <user> <server_pathname> <args> # # Syntax for TLI-based Internet services: # # <service_name> tli <proto> <flags> <user> <server_pathname> <args> # # Ftp and telnet are standard Internet services. # ftp stream tcp nowait root /usr/sbin/in.ftpd in.ftpd telnet stream tcp nowait root /usr/sbin/in.telnetd in.telnetd # # Tnamed serves the obsolete IEN-116 name server protocol. # #
| |
| |
name dgram udp wait root /usr/sbin/in.tnamed in.tnamed # # Shell, login, exec, comsat and talk are BSD protocols. # shell stream tcp nowait root /usr/sbin/in.rshd in.rshd login stream tcp nowait root /usr/sbin/in.rlogind in.rlogind exec stream tcp nowait root /usr/sbin/in.rexecd in.rexecd comsat dgram udp wait root /usr/sbin/in.comsat in.comsat talk dgram udp wait root /usr/sbin/in.talkd in.talkd
| |
To disable services in this file, simply edit the file and insert a pound sign or hash mark in front of the line that you wish to disable. When completed, send a HUP signal to the inetd process running on the system as shown in Illustration 2.2.
| |
# ps -ef grep inet root 229 1 0 Nov 06 ? 0:00 /usr/sbin/inetd -s # kill -HUP 229
| |
You can verify that the processes are no longer listening on the system by running the netstat “an command. Because there are fewer services running on the firewall, there are fewer avenues of attack, and the system is more secure. You can think of each of those listening ports as holes into your operating system. Although the firewall software will protect the operating system from direct attack if you have the security policy defined properly, it is better to stay on the safe side and reduce the number of possible ingresses.
Routing and Network Interfaces
It is recommended that before you install the Check Point product, you first configure and test the networks that the firewall will be communicating on. When you install VPN-1/FireWall-1, the product binds to the interface adapters, and even begins configuring the firewall at this early stage. Regardless of the platform you are installing on, it is recommended that you configure the first interface on your firewall as the external interface, and that this IP address resolves to the name of the host computer in the hosts files. On Windows systems, that means the external
IP address of the enforcement firewall should go on the network interface that is displayed first in the interface pull-down list under the IP Address tab of the Microsoft TCP/IP Properties window. If this is not defined properly, then several problems may occur with SIC and virtual private network (VPN) configurations.
Prior to installation, configure your firewall interfaces with the correct IP addresses and subnet masks. See the Netmask Cheat Sheet available in Appendix A for a quick method of discerning subnet boundaries. Ideally, you can plug your system into a test network so that you are not putting your unprotected system on the live network before installing the firewall software. It is always best to install a firewall in an isolated environment so that it cannot be compromised before it has been protected. You will want to test routing and IP forwarding first. Check Point VPN-1/FireWall-1 NG will control IP forwarding once it is installed, but you must first enable it in the OS and test that your network adapters and routing are functioning properly. Just imagine if you didn t perform this test before installing the software, and then found that you had a faulty Network Interface Card (NIC). It would have saved you a lot of blood, sweat, and tears if you had determined this first. In addition, with Microsoft Windows 2000, if the network is down (link status), it can remove the interface altogether, which can cause many problems.
| Note | When you are configuring your interfaces on a Windows system, be sure that you only configure one interface with a default gateway. This is a common mistake since each interface gives you the option of filling in a gateway, but you should never have more than one default gateway configured on your firewall. |
Next, make sure you understand the wide area network (WAN) connections that will be coming into your firewall, and configure routing accordingly . You may decide to set up a dynamic routing protocol on your firewall to maintain its routing table, or you may decide that static routes are the way to go. If you add a route on a Windows system, then you should provide the “p switch so that the route will still be there after a reboot. This switch permanently adds the route into the system registry. For example, the following command will route the 172.17.2.0/24 network to the next hop router of 172.17.0.1 on a WinNT system:
route add p 172.17.2.0 mask 255.255.255.0 172.17.0.1
In Solaris, you need to set up the route statements in a file that will be run at startup. A common location is the /etc/rc2.d directory. The file name has to begin with a capital S for the system to run it (e.g. S99local), and you should set the file modes to allow execution. The same route command above can be written in Solaris as follows :
route add 172.17.2.0 -netmask 255.255.255.0 172.17.0.1
If your firewall will be on the border of your network, connecting your local area networks (LANs) and WANs to the Internet, then you will need to ensure that default routes are configured throughout on all your workstations and routers so that they are routed to the next hop closest to the Internet. It may prove helpful if you create a network diagram that shows how your network looks prior to having a firewall, and another to show the network after the firewall is in place. This will help you to visualize which connections will be changing so that you can prepare accordingly. SmartMap can also help you visualize this as you define your objects in the SmartDashboard graphical user interface (GUI).
When using a firewall inside the network, you may be required to use dynamic routing protocols. Adding routing protocols to your firewall can add complexity to the configuration. To simplify your installation, leave the routing to the routers as much as possible.
Enabling IP Forwarding
To test your routing and interfaces you must enable IP forwarding in your OS._ IP Forwarding allows traffic arriving at one interface to be routed to another and sent out that interface ” essentially turning your server into a router. To do this on WinNT, access the TCP/IP properties window and select Enable IP Forwarding from the Routing tab as shown in Figure 2.2. To enable IP forwarding in Win2k, you must edit the registry as outlined in Microsoft s KB article Q230082 as follows:
-
Open the registry by running regedt32.exe.
-
Find the following registry key: HKEY_LOCAL_MACHINE\SYSTEM\CurrentControlSet\Services\Tcpip\Parameters
-
Add the following value to this key:
-
Value Name: IPEnableRouter
-
Value type: REG_DWORD
-
Value Data: 1

Figure 2.2: Enable IP Forwarding in WinNT 4.0
-
In Solaris, IP forwarding is usually enabled by default. You can switch it off and on with the following command: ndd -set /dev/ip ip_forwarding 1 . The settings for this command are as follows:
-
0 disables IP forwarding
-
1 enables IP forwarding
You can also read the information from the operating system using the command: ndd “get /dev/ip ip_forwarding .
Configuring DNS
Since it is suggested that you install your firewall while it is not plugged into any untrusted networks, it will be best to start with DNS disabled on the firewall. If you have DNS enabled and the system cannot reach its name servers, then the system may become sluggish and system performance will be affected. It is important that once you do configure DNS that you configure it properly. The firewall should be able to resolve its own external IP address to the name of the host computer. This could be set up in advance by creating an A record in your domain for the firewall, and you should enter it into the firewall s hosts file. In Unix, this file is located in /etc/hosts, and in Windows it is located in c:\winnt\system32\drivers\etc\hosts. The Nokia platform also needs to have the host name associated with its external IP address, and this is done through the Host Address Assignment link found under the System Configuration heading in the Voyager GUI. You can use this interface to configure host entries instead of editing a host s file.
You should also include IP addresses in the host s file that your firewall may communicate with frequently, like a management server and/or enforcement module. Policy installation performance can be increased on a management server by having all network objects (which are defined in the next chapter) resolvable.
Another DNS record that you should create is a pointer (PTR) record for your firewall s external IP address or any other address(es) that you will be using for Network Address Translation (NAT). Some websites and FTP servers require that you have a reverse resolvable IP address before they will grant you or your users access to download their files. If you have obtained a block of IP addresses from your Internet service provider (ISP), then chances are that they control the PTR records for your addresses. Sometimes they will provide you with a Web site where you can administer these yourself. Other times, you will need to find the right person who can make the changes for you. If you have your own ASN, you can set up your own in-addr.arpa domain and create your own PTR records.
Preparing for VPN-1/FireWall-1 NG
During the installation process, you will be asked which components you want to install and then you will need to be prepared to fill in the configuration screens at the end of the installation procedure. The Check Point Next Generation with Application Intelligence CD gives you the following options for installation:
-
Demo Installation Choose this option to only install the GUI clients in order to evaluate the user interface to the software. This option is also useful for installing only the software necessary for the administrator to work from his/her desktop system.
-
New Installation Choose this option if you wish to install the Next Generation with Application Intelligence Suite.
-
Installation Using Imported Configuration This option is for users who have used the installation CD to export their existing pre-NG AI configuration and wish to upgrade it during the installation process.
If you choose New Installation , you will be presented with a number of software packages to install. These should be reviewed carefully to ensure the correct packages are installed on your gateway and nonessential packages are not.
-
Gateway These options are primarily used when the device you are installing will also be functioning as a security gateway.
-
VPN-1 & FireWall-1 This includes FireWall-1 Management module and enforcement point software along with the VPN-1 encryption component.
-
-
VPN-1 Accelerator Cards Install the appropriate drivers if you are utilizing hardware VPN acceleration devices.
-
FloodGate-1 Provides an integrated Quality of Service (QoS) solution for VPN-1/FireWall-1.
-
SecureClient Policy Server Allows an enforcement module to install Granular Desktop Policies on mobile users SecureClient personal firewalls.
-
SmartView Monitor Allows an organization to monitor their VPN connections, Internet connections, etc.
-
UserAuthority A user authentication tool that integrates with FireWall-1, FloodGate-1, and other e-business applications.
-
-
Management Server In the event that this system will function as a management server (primary or secondary), you will utilize the following options.
-
SmartCenter Allows the software on this system to function as a management server for other enforcement points. It will also install the Internal Certificate Authority (ICA) which is necessary for Secure Internal Communications (SIC)
-
Safe@ Connector Provides management capabilities for SofaWare Safe@ Appliances such as the SofaWare S-Box and Nokia IP30.
-
Reporting Module An integrated reporting tool that can generate reports , graphs and pie charts to display information obtained from the VPN-1/FireWall-1 logs.
-
-
Management Console Management of the Check Point infrastructure requires Check Point s management clients. This will likely be installed anywhere one wishes to perform administrative functions related to the Check Point products.
-
SmartConsole The GUI for Check Point including the SmartDashboard, SmartView Tracker and SmartView Status GUI.
-
-
VPN Client If you just want to install client software on your mobile users or desktops in the office as described below, then choose this option.
-
VPN-1 SecuRemote/SecureClient Client encryption software loaded on your mobile clients with or without the extended security features such as desktop firewalling and Secure Configuration Verification.
-
If you are installing from files, be sure that you download and install the Check Point SVN Foundation first. This package is the base of the entire Check Point Next Generation with Application Intelligence software suite as its name suggests. It s this program that allows the easy integration of all other NG components. The only VPN-1/FireWall-1 applications that don t rely on the SVN Foundation are the SmartConsole clients and VPN clients.
By far the simplest way to install the suite when using downloaded files is to download the installation wrapper (also known as the installation bundle) for your operating system. This package contains all the files and an installation program to guide you through setup of the software.
The next important question that the installation process will ask you (if you are installing a management server on your firewall) is whether you are installing a Primary or Secondary management server. The management servers can function in an active/standby relationship with each other for redundancy and disaster recovery. A secondary management station is only useful when paired with a primary. In earlier versions, the installation process would ask if you wish to configure backwards compatibility. In the NG AI installation wrapper, it automatically installs backwards compatibility for managing version 4.1 firewalls. The backward compatibility is also necessary for the Safe@ Connector, as it uses some of the same libraries.
The default folder installation in Windows is C:\WINNT\FW1\NG and Check Point installs files on Solaris in /opt and /var/opt. Make sure that you have partitioned your disk properly to accept the default installation folder, or be prepared to give a custom location for the installation (Windows only). If you don t accept the defaults, you should verify that the installation program configures the firewall s environment variables properly.
Next the installation program will install the SmartConsole software. The SmartConsole options are as follows:
-
SmartDashboard Used to connect to your management server to configure your rulebase, NAT, VPN, FloodGate-1 QoS policy, WebAccess, and SecureClient Desktop Security Policies. There are a number of options below SmartDashboard, but they are all selected or not selected based on whether or not you are installing the SmartDashboard application. They are shown, but are integral to the operation of the SmartDashboard GUI, so they are always selected. For reference, these are SmartDefense, SmartMap, VPN Manager, Policy Manager, Users Manager, and Objects Manager.
-
SmartView Tracker Used to view your VPN-1/FireWall-1 security logs, accounting logs, and audit logs on the management server.
-
SmartView Status Used to view the status of your remote enforcement points connected to your management server.
-
SmartUpdate Used for managing licenses and remotely upgrading software and Operating Systems of your remote enforcement points connected to your management server.
-
SecureClient Packaging Tool Used to create custom packages for SecuRemote/SecureClient mobile users.
-
SmartView Monitor Used to monitor an interface, QoS rule, or virtual link in real time. The display is in the form of a line or bar graph.
-
Reporting Tool Used to generate historical reports with graphs and pie charts from the data in the VPN-1/FireWall-1 logs.
-
User Monitor Used to monitor which users are logged into policy servers throughout the infrastructure.
-
SmartLSM Used to manage hundreds or thousands of like-configured firewalls in a profile- or template-based method.
| |
FW-1 Environment Variables
You will see the use of the $FWDIR environment variable throughout this book. It is the nature of an environment variable to contain some value (similar to a variable used to represent a number in algebra). The $FWDIR variable contains the value of your firewall s installation directory, and it is configured upon installation. If you install on Windows, this variable is set to C:\WINNT\FW1\NG. In Solaris the $FWDIR environment variable is set to /opt/CPfw1-54.
There is also a $CPDIR variable, which contains the installation directory of the CPShared (SVN) components. In Windows, the $CPDIR variable is set to C:\Program Files\CheckPoint\CPShared\NG, and in Solaris it is set to /opt/CPshrd-54/.
So, whenever you see these terms used, $FWDIR or $CPDIR, then just substitute the appropriate directory for your firewall installation in their place. On a Unix system, you can type echo $FWDIR to see the value of the variable, or type set to see a list of all environment variables and their associated values. To be technically accurate, we should probably use %FWDIR% when talking about the Windows environment, but we are going to stick to the Unix method of describing variables in this book since it is the terminology that Check Point itself uses.
| |
After the Check Point installation wizard copies files, it will run through a number of configuration screens. These will be identical if you are installing a management module with or without an enforcement module with the exception of the Simple Network Management Protocol (SNMP) option in Solaris, which is only configured if you are installing an enforcement module. The screens that you can prepare for in advance are the following:
-
Licenses You should read the previous section on licenses above if you need help getting licenses. If you do not have your license(s), simply click Next and a 15-day evaluation license will be installed at the end of the installation. If you have your license(s), you will fill in the following fields:
-
Host/IP Address The IP address associated with this license or eval.
-
Expiration Date The date that the license expires , which may be never.
-
SKU/Features These are the features that this license will enable (e.g. Management or 3DES).
-
String/Signature Key The license string provided by Check Point to validate the license. This key will be unique for each license and IP Address.
-
-
Administrators You will need to configure at least one administrator during installation. See below for more on adding Administrators. This administrator can be removed after you configure an alternate administrator through the SmartDashboard GUI.
-
Administrator Name Choose a login name for your administrator. This field is case-sensitive.
-
Password Choose a good alphanumeric password. It must be at least four characters long.
-
Confirm Password Repeat the same password entered above.
-
-
GUI Clients These are the IP addresses of the management clients that your administrators will use when connecting to this management module. You may need to configure static IP addresses for your administrators. You may add as many GUI clients as you d like or you may enter none (localhost is always allowed); it s up to you. See below for your GUI client options.
-
SNMP extension (UNIX only) If you wish to utilize external network management tools such as HP OpenView, then you can install the Check Point FireWall-1 SNMP daemon. With the daemon installed and activated, you will be able to query the firewall status. You could use a network management tool to monitor the firewall s health and generate alerts based on certain criteria.
Security Alert Around mid-February 2002 a CERT Advisory was posted warning about various vulnerabilities that have been found and exploited in many SNMP implementations . These vulnerabilities could lead to Denial of Service attacks or unauthorized access. Please ensure that you have applied any applicable security patches to your systems prior to accepting SNMP through your firewall. For more information, and links to patches visit the CERT Web site: www.cert.org/advisories/CA-2002-03.html. Nokia IPSO 3.4.2 and above already have the SNMP fix integrated.
Administrators
It is best to use individual administrator usernames instead of a generic username like admin or fwadmin . The problem with using a generic login ID is that you cannot properly audit the activities of the firewall administrators. It may be important for you to know who installed the last security policy when you are troubleshooting a problem. This becomes more and more important when there are several people administering a firewall system. But most important, it is a security risk to use a generic username as it is more easily guessed, especially by ex- employees . You will have to complete the following fields:
-
Administrator Name Choose a login name for your administrator. This field is case-sensitive.
-
Password Choose a good alphanumeric password. It must be at least four characters long.
Note If you are installing just an enforcement module, then you will not have any administrators or GUI clients to configure.
There is a section labeled Permissions that enables you to define the access level you will require on an individual basis for each administrator. If you select Read/Write All or Read Only All , then your administrator will have access to all the available GUI client features with the ability to either make changes and updates or view the configuration and logs (perhaps for troubleshooting purposes) accordingly. You may also choose to customize their access so that they may be able to update some things and not others. To do this, select Customized and configure each of these options:
-
SmartUpdate This GUI tool enables you to manage licenses and update remote modules.
-
Objects Database This tool is used to create new objects to be used in the Security Policy rulebases . Objects will be covered in the next chapter.
-
Check Point Users Database This tool is used to manage users for firewall authentication purposes.
-
LDAP Users Database This tool is used to manage Lightweight Directory Access Protocol (LDAP) users.
-
Security Policy This tool is used to create and manage rulebases using the SmartDashboard GUI.
-
QoS Policy This tool is used to create and manage the bandwidth management rulebases.
-
Log Consolidator This tool is used to create and manage rulebases regarding which logs will be consolidated from the log server into the SmartView Reporter database to run reports on.
-
Monitoring This option enables access to the Log Viewer, System Status, and Traffic Monitoring GUI clients.
-
Web Policy This tool allows administrators to create and manage the WebAccess rulebase in the SmartDashboard GUI.
-
ROBO Gateways Database This allows an administrator to manage the Remote Office/Branch Office gateways defined in SmartLSM.
GUI Clients
When you enter GUI clients, you type their hostname or IP address into the Remote hostname: field, and then add them to the list of clients allowed to connect to your Management Module. You are allowed to use wildcards as follows:
-
Any If you type in the word Any , this will allow anyone to connect without restriction (not recommended).
-
Asterisks You may use asterisks in the hostname. For example, 10.10.20.* means any host in the 10.10.20.0/24 network, and *.domainname.com means any hostname within the domainname.com domain.
-
Ranges You may use a dash (-) to represent a range of IP addresses. For example, 1.1.1.3-1.1.1.7 means the 5 hosts including 1.1.1.3 and 1.1.1.7 and every one in between.
-
DNS or WINS resolvable hostnames It is recommend that you stay away from using hostnames or domain names , however, since it requires DNS to be configured and working on the firewall. Using IP addresses is the best method since it doesn t rely on resolving, and will continue to work even if you cannot reach your name servers from the firewall.
Upgrading from a Previous Version
Although this chapter will walk you through a fresh installation of NG in this chapter, some readers may be interested in upgrading from existing versions of FireWall-1. You can install or upgrade to NG from version 4.1, and it can manage v4.1 firewalls with the Backward Compatibility option. Although NG utilizes Secure Internal Communication (SIC) for other NG modules, it can also use the legacy fw putkey command to communicate with previous versions of the product. FireWall-1 NG with Application Intelligence is not compatible with versions earlier than 4.1.
It s very important that you upgrade your management console prior to upgrading any of your firewall enforcement modules to NG. A 4.1 management station cannot control an NG module. When you do upgrade your enforcement points, you will need to edit their workstation objects in the Policy Editor, and change their version to NG before you will be able to push or fetch a policy.
Read the release notes and utilize the upgrade tools (especially the pre-upgrade verifier) before you begin. This is very important since there is a list of limitations in the NG release notes that you will need to consider ahead of time. Some of these include, but are not limited to, your resources, VPNs, and external interface settings. NG does not support more than one resource in a rule. If you have rules configured with multiple resources, then NG will copy this rule into the new format with only one resource, and will not create new rules for the others. NG does not support Manual IPSec, FWZ, or SKIP VPNs any longer. If you have these types of VPNs in your rulebase before the upgrade, then they will be converted to IKE VPNs without notification during the upgrade to NG. If you have a limited license on your VPN-1/FireWall-1 v4. x firewall, your $FWDIR\conf\external.if settings will not be preserved during the upgrade. You will need to define your firewall s external interface in the workstation properties window under the Topology tab after the upgrade. You may also need to run the confmerge command to manually merge your objects.C file with the new objects in NG. These things and more are laid out for you in the product release notes.
It is also highly recommended that you have a back-out plan in place if your upgrade to NG does not go as smoothly as planned. Check Point recommends upgrading on a new piece of hardware; that way you will minimize downtime as well (even though the firewalls can run on their own without the management station). If you do it this way, remember that you may need to redo SIC or putkeys, and your Internet router or any routers directly connected to the firewall may need to have their ARP cache cleared after putting the new hardware in place.
Last but certainly not least, make sure that you have a backup of the entire system prior to an upgrade. It is especially important to save the $FWDIR/conf directory and any files that may have been edited from $FWDIR/state (like local.arp in Windows), $FWDIR/database, and $FWDIR/lib (for files like base.def and table.def that may have been modified). Also, always make sure to backup the registry on Windows systems as Check Point does utilize the registry to store numerous values and settings.
- Article 334 Nonmetallic-Sheathed Cable Types NM, NMC, and NMS
- Notes for Tables 11(A) and 11(B)
- Example No. D5(b) Optional Calculation for Multifamily Dwelling Served at 208Y/120 Volts, Three Phase
- Example No. D6 Maximum Demand for Range Loads
- Example No. D10 Feeder Ampacity Determination for Adjustable-Speed Drive Control [See 215.2, 430.24, 620.13, 620.14, 620.61, Tables 430.22(E), and 620.14]