Connecting to Your Project Server
After your project server administrator adds you as a user with project manager permissions in Project Server, you can configure your installation of Project Professional to connect to your project server. Then you have all the allowed enterprise and team collaboration features at your disposal.
Setting Up Project Professional for Your Server
To connect your installation of Project Professional to your organization's project server, follow these steps:
-
Start Project Professional.
At this point, it doesn't matter whether or not a project plan is open .
-
Click Tools, Enterprise Options, Microsoft Office Project Server Accounts.
The Project Server Accounts dialog box appears (see Figure 22-1).
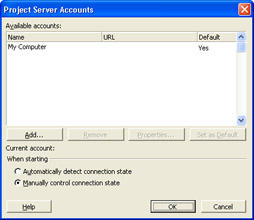
Figure 22-1: Add your project server location as an account for your installation of Project Professional. -
In the Project Server Accounts dialog box, click Add.
The Account Properties dialog box appears (see Figure 22-2).
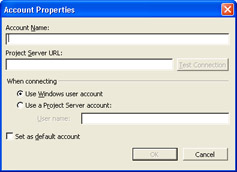
Figure 22-2: Enter the new account name and the project server URL. -
In the Account Name box, enter the "friendly" name by which you want to identify the project server.
-
In the Project Server URL box, enter the address of your organization's project server, in the format of http:// servername /projectserver .
Obtain this address from your project server administrator.
-
Click the Test Connection button to verify the connection to the server running Project Server and ensure that the address is correct and actually points to a functioning project server.
A message appears that indicates whether or not the connection was successful. If there is a problem with the connection, verify that you have entered the correct information, or notify your project server administrator.
-
Under When Connecting, specify whether you will be using a Windows or Project Server account.
This account needs to match the way your project server administrator has already set up your user information. If you will be using a Project Server account, enter your user name for that account.
Tip Windows user account or Project Server account? A Windows user account is generally more versatile and convenient than a Microsoft Project Server account. You use the same user ID and password as you do to log on to your Windows network, which saves time when logging on to the project server and enhances security while maintaining convenience for you.
In addition, several features of Project Server perform better when accessed with a Windows user account, in particular, Portfolio Analyzer and Windows SharePoint Services.
-
Select the Set Default Account check box if you want this account to be automatically selected for connection whenever you start up Project Professional.
Setting the default account does not necessarily log you into this account when you start up Project Professional; it's simply the account that's selected for logon.
-
Click OK.
The Project Server Accounts dialog box appears again, listing your new account in the Available Accounts box.
-
Under When Starting, specify whether or not you want to automatically connect to the server running Project Server as soon as you start up Project Professional.
If you select Automatically Detect Connect State, upon startup Project Professional will connect to the account you set as the default, which can be very convenient if you know that you will always want to connect to a single project server and will rarely work offline.
If you select Manually Control Connection State, a dialog box will appear upon startup that gives you the choice of which account you want to use for this Project Professional session. This might the most appropriate choice if you sometimes expect to work offline. It is also the right choice if this computer is a shared network computer used by multiple users who have different user names and permissions.
-
When finished, click OK.
At this point, you are set up to log on to your project server through Project Professional. If you want to log on immediately, exit Project Professional and then start it up again.
Logging On via Project Professional
The first time you log on to your project server from Project Professional, you need to add the project server URL as a trusted site in Internet Explorer. When you restart Project Professional, the Microsoft Project Server Security Login dialog box appears. Follow these steps to make the URL a trusted site in Microsoft Internet Explorer:
-
Start up Project Professional.
The Microsoft Project Server Security Login dialog box appears, which says you cannot log on to the project server because you have not identified the URL as a trusted site in Internet Explorer.
-
Click the Make Server Trusted button.
A prompt appears, asking you to confirm the addition of the URL to the list of trusted sites.
-
Click Yes to add the URL to the list of trusted sites.
The Microsoft Project Server URL is added to the list of trusted sites in Internet Explorer. You need to do this only once.
| |
If you added an incorrect URL to the list of trusted sites, you can remove it. In Internet Explorer, click Tools, Internet Options. In the Internet Options dialog box, click the Security tab. Click the Trusted Sites icon; then click Sites. The Trusted Sites dialog box appears (see Figure 22-3). Under Web Sites, highlight the incorrect URL and then click Remove.
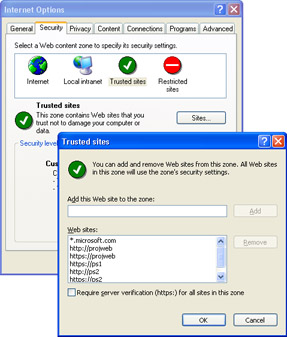
Figure 22-3: Make any changes needed to your list of trusted Web sites.
| |
After the project server URL is listed as a trusted site in Internet Explorer, you can log on. If you specified in the Project Server Accounts dialog box that you want to automatically connect to your project server, all you need to do is start Project Professional. The specified project server location is found, and Project Professional logs you on immediately.
Your user account must be set up by the project server administrator before you can successfully log on to the project server. If you have problems logging on, check with your administrator.
| Cross-References | For more information about adding server accounts, see "Establishing User Accounts and Permissions". |
If you specified that you want to manually connect to the project server, follow these steps:
-
Start up Project Professional.
The Project Server Accounts dialog box appears (see Figure 22-4).
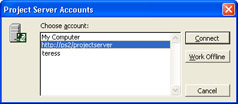
Figure 22-4: Select the project server account, and then click Connect. -
Click the project server account if necessary and then click Connect.
If you ever want to work offline, or if there's a problem logging on to the project server, click the My Computer account and then click Work Offline.
If you specified in the Account Properties dialog box that you want to use your Windows account to log on, as soon as you open Project Professional, you are immediately authenticated and connected to the server.
If you specified that you want to use a Project Server account to log on, another dialog box appears, asking for your user name and password. Enter them and then click Go.
Tip Connect across a wide area network If you're connecting across a wide area network (WAN) rather than a local area network (LAN), you might need to improve system performance. Select the Connecting Across A WAN check box at the bottom of the Project Server Accounts dialog box.
However, note that you might sacrifice some functionality in the Build Team dialog box.
Logging On via Project Web Access
As the project manager, you can review most of the information stored on your project server having to do with enterprise projects, enterprise resources, and team collaboration from the familiar Project Professional window. However, if you prefer, you can log on to Project Web Access and review the same information there. There are also certain pages of information that you can review only from Project Web Access.
To log on to Project Web Access, follow these steps:
-
Start up Internet Explorer.
-
In the Address box, enter the URL for your project server and then click Go.
This is the same URL you entered in the Account Properties dialog box in Project Professional. However, you do not need to have the account set up in Project Professional to log on to Project Web Access directly using Internet Explorer.
The Project Web Access logon page appears (see Figure 22-5).
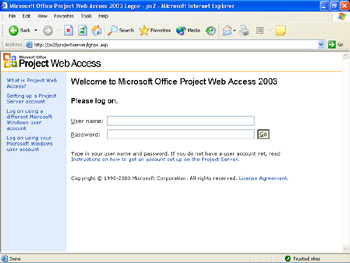
Figure 22-5: Enter your user name and password as set up by the project server administrator. -
Enter your user name and password and then click Go.
This is the Windows or Project Server account information as specified by the project server administrator.
Your Project Web Access Home page appears (see Figure 22-6). You can carry out many project management activities using Project Web Access features, and they are described throughout the rest of this chapter.
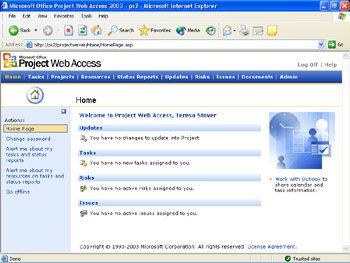
Figure 22-6: After a successful logon, the Project Web Access Home page appears.Tip Add Project Web Access as a favorite You probably will be checking Project Web Access from Internet Explorer often enough, so it's a great idea to add the project server URL as a favorite Web site. When the logon page appears in Internet Explorer, click Favorites, Add To Favorites. Enter a name in the Name box and then click OK.
EAN: 2147483647
Pages: 268