Requesting and Responding to Status Reports
Selecting Status Reports from the main menu in Project Web Access takes you to the “Status reports overview” page shown in Figure 15-37. Team members don’t see the “Request a status report” section by default. This selection is dependent on permissions granted in groups and categories.
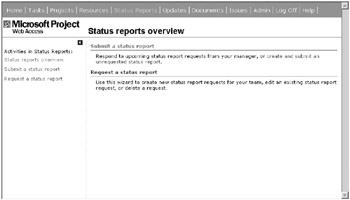
Figure 15-37. The “Status reports overview” page
Requesting a Status Report
Use the “Request a status report” feature to create periodic status reports that will be due on a regular basis. Clicking the “Request a status report” link displays the “Request a status report” page shown in Figure 15-38. Here you must select your action before selecting a status report. Assuming this is the first time you’re encountering this feature, I’ll begin with creating a new status report.
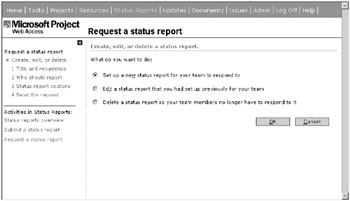
Figure 15-38. Selecting a status report action
In step 1, as shown in Figure 15-39, you give the status report a name and determine its recurrence rate and due date. As shown in the figure, these selections determine that this will be a weekly status report due every Thursday beginning March 20, 2003.
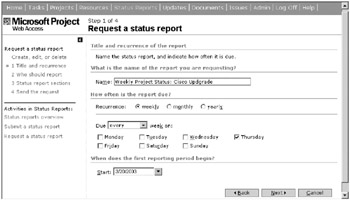
Figure 15-39. Step 1 involves entering a title and determining recurrence.
Click Next to advance to step 2, as shown in Figure 15-40. In this step, you choose the resources that are to report. Note the check box that appears next to each name on the right as you add names to the selection. The Merge box indicates that the system will merge the responses into a consolidated status report. You’ll see the effect of this later in this section.
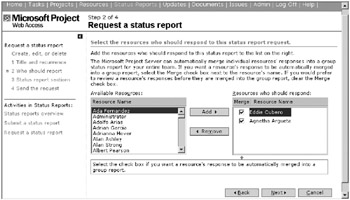
Figure 15-40. In step 2 you select the resources that must respond to the status report.
In step 3, shown in Figure 15-41, you configure the status report sections. By default, the system inserts the sections shown in the figure. You can delete them, reorder them, rename them, accept them as they are, or add to them. I’ll leave the defaults.
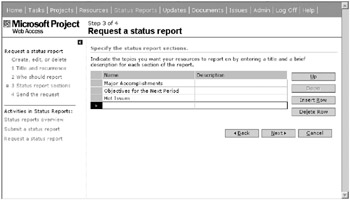
Figure 15-41. You determine status report sections in step 3.
Step 4 is simply an opportunity to go back through your selections or confirm the status report creation, as shown in Figure 15-42. Click Save to confirm and create the status report record in the system. Click Send to send the status report to the respondents immediately without waiting for the next periodic cycle.
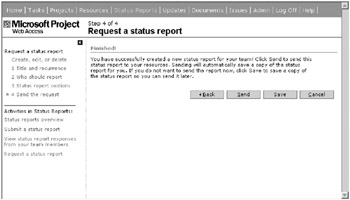
Figure 15-42. In step 4 you confirm the status report creation.
Responding to a Status Report
Users that you selected to respond to your status report will now see the status report on their home page, as shown in Figure 15-43. They may have multiple status reports created by multiple managers. Users may elect to send a status report at any time without a requirement that a request precede the status report. Creating a nonrequested status report follows the same workflow as submitting a requested status report.
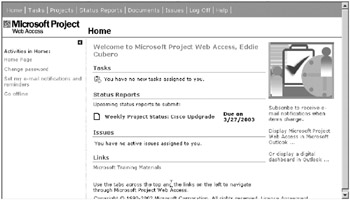
Figure 15-43. A user’s home page showing an upcoming status report
Clicking Status Reports in the main menu takes the user to his or her personal status reports page, as shown in Figure 15-44. All upcoming status reports show here as well as the home page.
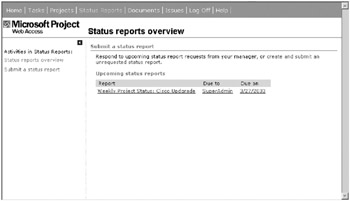
Figure 15-44. The status reports home page for a resource
Clicking the link for a specific status report takes the user to the “Submit a status report” page shown in Figure 15-45. Notice that the default sections I accepted when creating the status report now display as entry areas for the user to input data. Clicking into an area causes the editing toolbar to display for that section. In the figure, I’ve selected major accomplishments. Use the toolbar to apply rich text formatting to your entries. Select other users to cc: the status report to using the drop-down list at the top.
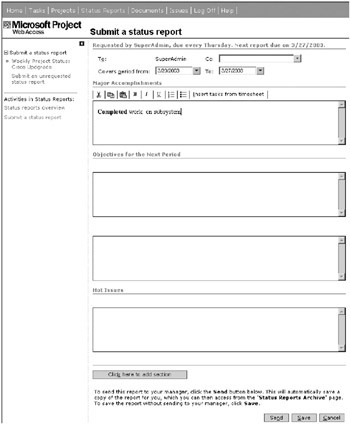
Figure 15-45. The “Submit a status report” page
Use the “Insert tasks from timesheet” link to link to timesheet tasks. Selecting tasks in the resulting display allows you to bring the task names into the status report. Click Send when you’re through. Click the Save button if you prefer to save the status report and send it later.
Viewing Status Report Responses
Like other important activities, the availability of new status report responses is announced on a manager’s home page, as shown in Figure 15-46.

Figure 15-46. The home page section displaying status report responses
Click the link on the home page or first navigate to the status reports home page and select the specific status report to view the responses. Selecting a status report opens the “View status report responses from your team members” page shown in Figure 15-47. As weeks accrue, you see more columns in the display representing additional weeks. You can scroll through the weeks to view previously submitted reports. Note that the title of the report displays at the top of the page.
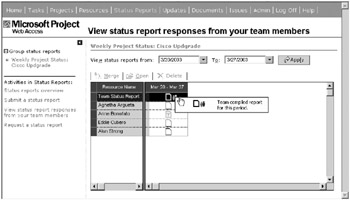
Figure 15-47. The “View status report responses from your team members” page
Click the status report icon in the date range column to open the specific report. In the display, the team status report is the automatically merged report relative to having set the option to merge the reports. Click either an individual icon or the team status icon to open the respective report. Clicking the icon for the team status report opens the report, as shown in Figure 15-48. Each section of the report displays each team member’s response by name and date. Scroll down the page to read responses in all sections.
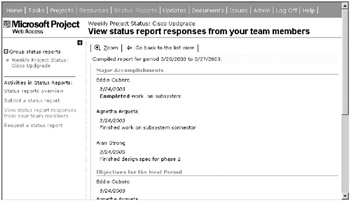
Figure 15-48. A compiled status report
Use the Zoom button at the top of the compiled status report to open the report in a new window, as shown in Figure 15-49. From here, select File ![]() Save As to save the status report in HTML format. Open this file in Word or FrontPage to edit it.
Save As to save the status report in HTML format. Open this file in Word or FrontPage to edit it.
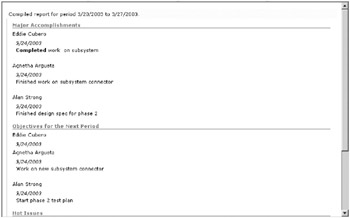
Figure 15-49. A status report displayed in a new window after clicking Zoom
| Tip | Upload the saved copies of the consolidated status reports to the project document library to share them with the team and stakeholders. Distribute these by e-mail as well. |
Editing and Deleting Status Reports
When you select either the “Edit a status report” or “Delete a status report” radio button on the “Request a status report” page, the display changes to allow you to select an existing status report, as shown in Figure 15-50. If you select “Edit a status report,” the system takes you through the status report screens and allows you to make changes. If you choose “Delete a status report,” the system asks you for confirmation before deleting the status report and all responses to it in the system.
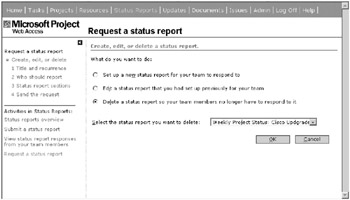
Figure 15-50. Request a status report.
EAN: 2147483647
Pages: 185