Working Within the Visio Environment
When you start a diagram, the Visio window opens. The Visio window contains the Visio menus and toolbars. It also contains the Shapes window, drawing page, pasteboard, and rulers in a drawing window. The stencils that contain the shapes you need are located in the Shapes window to the left of the drawing page. Visio also includes special-purpose windows, menus, and toolbars for creating particular types of diagrams.
The main elements of the Visio environment that most people typically work with are the following:
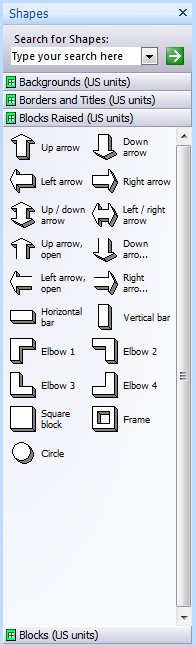
- Shapes window The Shapes window contains the stencils and Search For Shapes box that makes it easy for you to find any shape you need for your drawing.
- Drawing page The Visio drawing page resembles graph paper with a grid that helps you position shapes.
- Rulers The horizontal and vertical rulers also help you position shapes and show you the size of the drawing page.
- Menus and toolbars Above the drawing page are the Visio menus and the Standard and Formatting toolbars (shown by default), which contain the most commonly used tools for creating, modifying, and formatting text, shapes, and diagrams.
- Toolbar drop-down lists Many of the buttons on these toolbars have drop-down lists that include options or other tools you can select. To view the list for a specific button, click the down arrow on the button. If you are not familiar with a toolbar button, you can pause the pointer over it to display a ScreenTip that tells you which tool or command the button represents.
- Shortcut menu Visio also includes easy access to frequently used commands on a shortcut menu that appears when you right-click an item. For example, right-click the drawing page, the toolbar area, a page tab, or a shape to view its shortcut menu.
- Page tabs Below the drawing page, page tabs help you move between pages in multiple-page drawings, and the status bar displays information about shapes that are selected on the drawing page.
- Task pane To the right of the drawing page, you can display task panes from which you can quickly access task-specific and diagram-specific information.
- Pasteboard The light-blue area surrounding the drawing page is the pasteboard, which you can use as a temporary holding area for shapes and other drawing elements. Shapes on the pasteboard aren't printed.

When you start a diagram, Visio displays the entire drawing page. As you add shapes to the diagram, you can zoom in to an area for a closer view of that area or zoom out for a broader view of the diagram. Visio includes several ways to zoom in and out, including a toolbar button and keyboard shortcuts. One method isn't necessarily better than anotheryou can use the one that works best for you. However, when you zoom in using keyboard shortcuts, you can draw a selection net around the shapes or area that you want to zoom in on or out of, which gives you greater zooming control.
You can also pan large diagrams, which means that you can "grab" the drawing page with the pointer and move the page to see another area of it. Zooming and panning help you move quickly around the drawing page so that you can work efficiently in the Visio environment.
When it's time to print your diagram, you can preview it first to see how it will look when you print it by using the Print Preview command on the File menu. Then, you can print the page shown in the drawing window by clicking the Print Page button on the Standard toolbar. For more printing options, such as printing all of the pages in a diagram or multiple copies of a diagram, you can use the Print command on the File menu.

Finally, saving a Visio diagram is just as easy as saving a file in any other program. Just click the Save button on the Standard toolbar or click Save on the File menu. The first time you save a diagram, the Save As dialog box appears so that you can name the file and choose the location where you want to save it. By default, the diagram is saved as a Visio drawing file with a .vsd file extension.
In this exercise, you explore the fundamental parts of the Visio drawing window. You display stencils in the Shapes window, zoom and pan the drawing page, add a drawing page, view a task pane, and then preview, print, and save your drawing.
|
1. |
Start Visio. In the Getting Started window, on the Template Categories list, click General. |
|
2. |
Under All Templates, double-click Block Diagram. |
|
3. |
In the Shapes window, click the title bar of the Blocks Raised stencil.
Troubleshooting When you click Blocks Raised, if Visio displays a stencil menu, you clicked the green icon on the stencil's title bar by mistake. Click the stencil name directly to display the stencil. You'll learn more about the stencil menu later in this chapter and in Chapter 12, "Creating Shapes, Stencils, and Templates." |
|
4. |
Click the title bar of the Blocks stencil to display the Blocks stencil. |
|
5. |
Drag the scroll bar on the Blocks stencil down to see all of the stencil's shapes. Troubleshooting Your monitor's resolution and the size of your Visio window determine whether a scroll bar appears on the Blocks stencil. Because of these factors, your screen might not exactly match the images in this book. If you don't see a scroll bar on the stencil, all of the shapes are already visible. |
|
6. |
Scroll up to the top of the Blocks stencil. |
|
7. |
From the Blocks stencil, drag the Box shape anywhere on the drawing page. As you drag, watch the status bar at the bottom of the Visio window. |
|
8. |
Release the mouse button when you've positioned the Box shape where you want it. 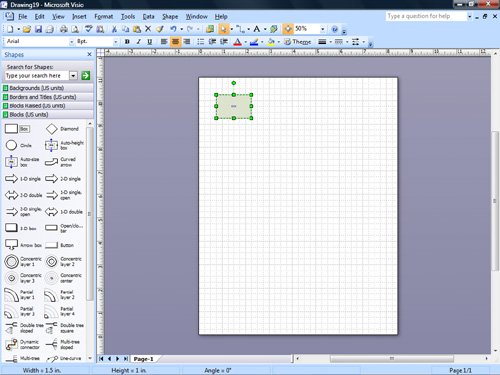
Tip When you pause the pointer over some shapes on the drawing page, Visio displays blue arrows around the shape. These arrows are used to connect the shape to other shapes. You'll learn more about connecting shapes later in Chapter 4, "Connecting Shapes." |
|
9. |
Right-click the Box shape to see its shortcut menu, which gives you quick access to frequently used commands. 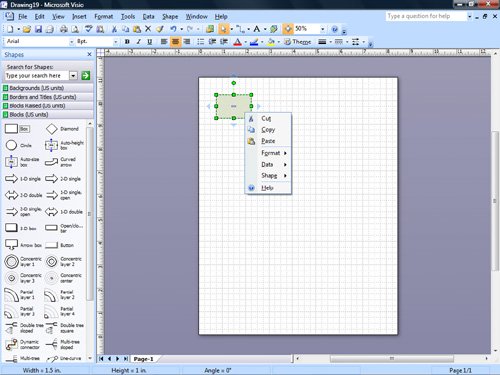
|
|
10. |
On the Standard toolbar, click the Zoom down arrow to display a list of magnification levels, and then click 100%. Zoom
Tip All Visio toolbar buttons, window buttons, shapes, and even rulers have ScreenTips that explain what you can do with them. If you don't know how to use one of these elements, just pause the pointer over it to view a ScreenTip. |
|
11. |
Hold down |
|
12. |
Hold down Tip When you press |
|
13. |
Hold down |
|
14. |
Press |
|
15. |
Hold down |
|
16. |
Press |
|
17. |
Right-click the Page-1 page tab at the bottom of the drawing window.
|
|
18. |
On the shortcut menu, click Insert Page. 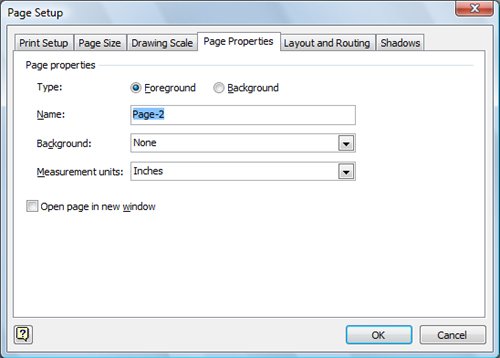
Tip You can change the size of a drawing page and choose the size of your printer paper in the Page Setup dialog box. The Page Setup dialog box includes a preview area that displays the effect of various page settings. Use the preview area in the Page Setup dialog box to verify that the printer paper setting and drawing page match in size and orientation. You can also open the Page Setup dialog box by clicking Page Setup on the File menu. |
|
19. |
In the Page Setup dialog box, click OK to add a new drawing page to the diagram that uses the default name, Page-2. |
|
20. |
Click the Page-1 page tab to go back to the first page of the diagram. Tip You can easily rename pages in your diagrams. First, double-click the page tab for the page you want to rename. Or, right-click the page tab, and then click Rename Page. Both actions select the page name. Then, simply type the new page name to replace the old one. |
|
21. |
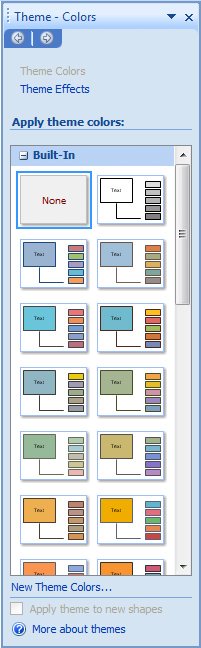
On the View menu, click Task Pane to open a task pane.
|
|
22. |
In the Theme - Colors task pane, pause the pointer over the thumbnail right below the None thumbnail. |
|
23. |
Click the Office theme. |
|
24. |
Click the task pane title bar to see other available task panes. 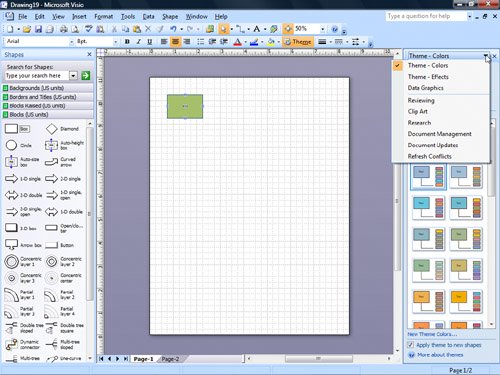
|
|
25. |
On the View menu, click Task Pane to close the task pane. |
|
26. |
On the File menu, click Print Preview. 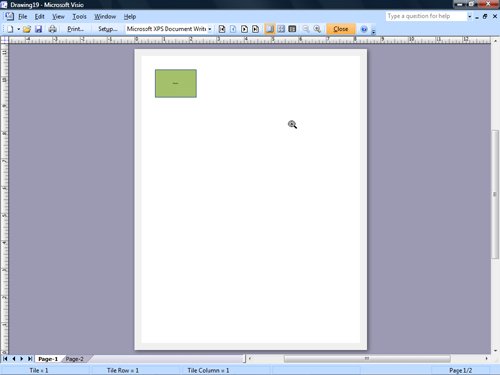
Important You can't modify any of the shapes in the drawing in the Print Preview window. If you want to reposition shapes, on the Print Preview toolbar, click Close to return to the Visio drawing window. However, you can change page settings in the Print Preview window by clicking Setup on the Print Preview toolbar. |
|
27. |
On the Print Preview toolbar, click Close. Close
Tip You can print drawings directly from the Print Preview window by clicking the Print button on the Print Preview toolbar. You can also print by clicking Print on the File menu or the Print button on the Standard toolbar. If you want to print only the page currently shown in the drawing window, you can click the Print Page button on the Standard toolbar.
|
|
28. |
On the File menu, click Save. Tip You can also add file properties to your drawing, such as title, author, company, and so on. On the File menu, click Properties, enter the information you want, and then click OK. |
|
29. |
In the File name box, type BasicSave, and then click Save. Tip If you want to use a Visio diagram in another program or as an image on the Web, you can save the diagram in the appropriate file format. In the Save As dialog box, in the Save As Type box, scroll the file list to see the available file formats, such as JPEG File Interchange Format (*.jpg). You can also save a Visio 2007 diagram in the Visio 2003 file format so that people with Visio 2003 can work with the diagram. |
|
30. |
On the File menu, click Exit. |

 while you right-click once on the drawing page.
 to zoom out to the whole-page view.
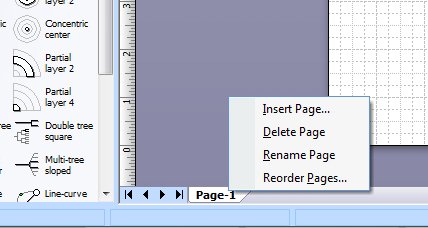


Quick Reference
Getting Started with Visio 2007
- Getting Started with Visio 2007
- Starting Diagrams by Using Templates
- Working Within the Visio Environment
- Customizing the Visio Environment
- Getting Visio and Diagram Help
- Key Points
Adding Shapes to Diagrams
- Adding Shapes to Diagrams
- Working with 1-D and 2-D Shapes
- Adding Text to Shapes and the Drawing Page
- Moving, Sizing, Rotating, and Copying Shapes
- Working with Groups
- Finding Shapes for Diagrams
- Inserting Pictures into Diagrams
- Key Points
Formatting Shapes and Diagrams
- Formatting Shapes and Diagrams
- Formatting Individual Shapes
- Adding Decorative Elements to Diagrams
- Applying Themes to Entire Diagrams
- Key Points
Connecting Shapes
- Connecting Shapes
- Connecting Shapes in Flowcharts
- Modifying Shape Connections
- Changing the Layout of Connected Shapes
- Key Points
Creating Project Schedules
- Creating Project Schedules
- Creating Timelines to View Projects at a Glance
- Exporting Timelines to Create Gantt Charts
- Tracking Project Details with Gantt Charts
- Key Points
Creating Organization Charts
- Creating Organization Charts
- Importing Data to Create Organization Charts
- Storing and Displaying Employee Information in Organization Charts
- Customizing the Layout of Organization Charts
- Key Points
Laying Out Office Spaces
- Laying Out Office Spaces
- Creating Scaled Office Spaces
- Adding Door, Window, and Furniture Shapes to Office Layouts
- Organizing Shapes in Office Layouts by Using Layers
- Key Points
Creating Network Diagrams
- Creating Network Diagrams
- Connecting Shapes in Network Diagrams
- Storing Information with Network Shapes
- Creating Network Reports
- Key Points
Glossary
About the Authors
Choose the Right Book for You
EAN: 2147483647
Pages: 81
