Extracting the Data
To write a script to extract data from Oracle and place it in a flat file, follow these steps:
- Formulate the query.
- Format the data.
- Spool the extract to a file.
- Make the script user -friendly.
The last step, making the script user-friendly, isn't necessary for a one-off effort. However, if it's an extraction you are going to perform often, it's worth taking a bit of time to make it easy and convenient to use.
9.3.1 Formulate the Query
The first step in extracting data is to figure out what data you need to extract. You need to develop a SQL query that will return the data you need. To extract data for current employees , you could use a query such as in Example 9-1.
Example 9-1. A query to extract current employee data
SELECT employee_id,

 employee_billing_rate

 employee_hire_date,

 employee_name

FROM employee

WHERE employee_termination_date IS NULL;
You can write queries that are more complicated than shown here. If necessary, you can join several tables together, or you can UNION several SELECT statements together.
9.3.2 Format the Data
The next step, once you have your query worked out, is to format the data to be extracted. The best way I've found to do this is to modify your query so it returns a single, long expression that combines the columns together in the format that you want in your output file. It's often necessary to include text literals in the SELECT statement as part of this expression. For example, if you want to produce a comma-delimited file, you will need to include those commas in your SELECT statement.
Be sure to keep in mind the ultimate destination of the data. If your purpose is to pull data for someone to load into a spreadsheet, you will probably want to use a comma-delimited format. If you are passing data to another application, you may find it easier to format the data in fixed-width columns. Dates require some extra thought. With Oracle's built-in TO_CHAR function, you can format a date any way you want. Be sure, however, to use a format easily recognized by the application that needs to read that date.
9.3.2.1 Comma-delimited
To produce a comma-delimited text file, you need to do two things. First, you need to add commas between each field. Second, you need to enclose text fields within quotes. Example 9-2 does both of these things, returning a single column of data that is derived from an expression combining the four columns being extracted.
Example 9-2. A SELECT statement that creates comma-delimited data
SELECT TO_CHAR(employee_id) ','

 TO_CHAR(employee_billing_rate) ','

 TO_CHAR(employee_hire_date,'MM/DD/YYYY') ','

 '"' employee_name '"'

FROM employee

WHERE employee_termination_date IS NULL;
Here I use Oracle's TO_CHAR function to explicitly convert numeric fields to text strings. I also use TO_CHAR to convert date fields to text and include a date format string to get the dates into MM/DD/YYYY format. SQL's concatenation operator ( ) concatenates all the fields together into one long string, and you can see that commas are included between fields. The output from Example 9-2 looks like this:
101,169,11/15/1961,"Marusia Churai"

105,121,06/15/2004,"Mykola Leontovych"

107,45,01/02/2004,"Lesia Ukrainka"

111,100,08/23/1976,"Taras Shevchenko"

114,,07/05/2004,"Marusia Bohuslavka"

116,,07/05/2004,"Roxolana Lisovsky"
In addition to the commas, the employee_name field has been enclosed in quotes. This is done to accommodate the possibility that someone's name will contain a comma. Most commercial programs that load comma-delimited data will allow text strings to be optionally enclosed in quotes.
You can use the same technique to generate tab-delimited data. Instead of a comma, use CHR(9) to put a tab character between fields. CHR is an Oracle SQL function that converts an ASCII code into a character. ASCII uses the value 9 to represent a tab character.
9.3.2.2 Fixed-width
The easiest way to produce an output file with fixed-width columns is to use the SQL*Plus COLUMN command to format the output from a standard SQL query. Example 9-3 shows one way to dump the employee data in a fixed-width column format.
Example 9-3. A fixed-width data extract formatted via COLUMN commands
COLUMN employee_id FORMAT 099 HEADING ''

COLUMN employee_billing_rate FORMAT 099.99 HEADING ''

COLUMN employee_hire_date FORMAT A10 HEADING ''

COLUMN employee_name FORMAT A20 HEADING '' TRUNCATED

SELECT employee_id,

 employee_billing_rate,

 TO_CHAR(employee_hire_date, 'MM/DD/YYYY'),

 employee_name

FROM employee

WHERE employee_termination_date IS NULL;
Notice some things about the example:
- The heading for each column is explicitly set to a null string. This is important in the case of numeric columns because SQL*Plus implicitly makes the column wide enough to accommodate their heading. You don't want that behavior when unloading data. You want the format specification to control the column width.
- Both numeric fields have been formatted to show leading zeros. Most programs that read fixed-width data, such as COBOL programs, will expect this.
- The TRUNCATED option is used to format the employee_name field because employee_name can be up to 40 characters long in the database. If TRUNCATED were not specified, any names that happened to be longer than 20 characters would wrap to a second line, which is not what you want to happen in a flat file.

Of course, you may prefer to allow for the entire 40 characters of the employee_name in your extract file. However, you won't always have control over the format of your extract files. Sometimes you'll be trying to match an existing format expected by some other system. If that's the case, you'll have to make compromises.
Here's how the output from Example 9-3 will look:
101 169.00 11/15/1961 Marusia Churai

 105 121.00 06/15/2004 Mykola Leontovych

 107 045.00 01/02/2004 Lesia Ukrainka

 111 100.00 08/23/1976 Taras Shevchenko

 114 07/05/2004 Marusia Bohuslavka

 116 07/05/2004 Roxolana Lisovsky
Each column in the output is separated by one space because that's the SQL*Plus default. If you like, you can use the SET COLSEP command to change the number of spaces or eliminate them entirely. To run the columns together, you can eliminate the space between columns by setting the column separator to a null string:
SET COLSEP ""
Now the output will look like this:
101 169.0011/15/1961Marusia Churai

 105 121.0006/15/2004Mykola Leontovych

 107 045.0001/02/2004Lesia Ukrainka

 111 100.0008/23/1976Taras Shevchenko

 114 07/05/2004Marusia Bohuslavka

 116 07/05/2004Roxolana Lisovsky
You can use any column separation string that you like, and you aren't limited to one character.
|
Example 9-4 dodges around the leading-space-for-a-sign problem by converting numbers to character strings in the SELECT statement (using TO_CHAR), and then by trimming any leading or trailing spaces (using TRIM). Column aliases in the SELECT statement specify names for the computed columns, which are seen by SQL*Plus as text columns. Thus, the corresponding COLUMN commands use the A format element.
Example 9-4. TO_CHAR and TRIM being used to generate "numbers" with no leading or trailing spaces
COLUMN employee_id FORMAT A3 HEADING ''

COLUMN employee_billing_rate FORMAT A6 HEADING ''

COLUMN employee_hire_date FORMAT A10 HEADING ''

COLUMN employee_name FORMAT A20 HEADING '' TRUNCATED

SELECT TRIM(TO_CHAR(employee_id,'099')) employee_id,

 TRIM(TO_CHAR(employee_billing_rate,'099.99')) employee_billing_rate,

 TO_CHAR(employee_hire_date, 'MM/DD/YYYY'),

 employee_name

FROM employee

WHERE employee_termination_date IS NULL;
Using SQL*Plus to format fixed-width output works best when you have some control over the format expected by the destination of those data. If you are writing the program to load the data somewhere else, of course you can code the data to match what you can produce with SQL*Plus. Sometimes, though, you need to match an existing format required by the destination, which is one you cannot change. Depending on your exact requirements, it may be easier to code one large expression in your SQL statement and use Oracle's built-in functions to gain more control over the output. Example 9-5 produces the same output as Example 9-4 through an expression that returns each line as a single, large text value.
Example 9-5. A single expression to return a line of columnar data
SELECT TRIM(TO_CHAR(employee_id,'099'))

 NVL(TRIM(TO_CHAR(employee_billing_rate,'099.99')),' ')

 NVL(TO_CHAR(employee_hire_date, 'MM/DD/YYYY'),' ')

 NVL(SUBSTR(RPAD(employee_name,20,' '),1,20),' ')

FROM employee

WHERE employee_termination_date IS NULL;
The output from Examples Example 9-4 and Example 9-5 appears as follows :
101169.0011/15/1961Marusia Churai

105121.0006/15/2004Mykola Leontovych

107045.0001/02/2004Lesia Ukrainka

111100.0008/23/1976Taras Shevchenko

114 07/05/2004Marusia Bohuslavka

116 07/05/2004Roxolana Lisovsky
Following are some key points about the SELECT statement in Example 9-5:
- The employee_billing_rate can be null, which would be treated as a zero-length string. When that's the case, NVL supplies an alternative value consisting of six spaces. This keeps the columns in proper alignment. Otherwise a null billing rate would cause the hire date to immediately follow the employee ID.
- Employee hire dates should never be null, but the table definition does allow them to be, so the same NVL technique is applied to the employee_hire_date column.
- To ensure a constant 20-character-wide employee_name column, a three-step process is used. Employee names are first right-padded (using RPAD) with enough spaces to create a 20-character-wide column. At that point, any name longer than 20 characters to begin with will still be longer than 20 characters. The SUBSTR function then returns only the first 20 characters of the padded name. Finally, the same NVL technique used for other columns protects against null employee names.
- A combination of TO_CHAR and TRIM is used to eliminate spaces on either side of numeric values, even those spaces reserved for negative signs. TO_CHAR converts numbers to strings, and TRIM removes any unwanted spaces.
- The format strings 099 and 099.99 are used to convert employee_id and employee_billing_rate to ensure that the resulting values are three and six characters wide respectively.
Many built-in Oracle functions are available. Add to that the ability to write your own, and you should be able to generate output in any conceivable format.
9.3.2.3 DML
If you are extracting data from Oracle to move it to another database, and if the volume of data isn't too high, you can use SQL*Plus to generate a file of INSERT statements. Example Example 9-6 shows a query to generate INSERT statements to recreate the same data you've seen extracted by Examples Example 9-1 through Example 9-5.
Example 9-6. A query to generate INSERT statements to recreate existing data
SELECT 'INSERT INTO employee' chr(10)

 ' (employee_id, employee_billing_rate,' chr(10)

 ' employee_hire_date, employee_name)' chr(10)

 'VALUES (' TO_CHAR(employee_id) ',' chr(10)

 ' ' NVL(TO_CHAR(employee_billing_rate),'NULL')

 ',' chr(10)

 CASE WHEN employee_hire_date IS NOT NULL then

 ' TO_DATE(''' TO_CHAR(employee_hire_date,'MM/DD/YYYY')

 ', ''MM/DD/YYYY'')' chr(10)

 ELSE

 ' NULL' chr(10)

 END

 ' ''' employee_name ''');'

FROM employee

WHERE employee_termination_date IS NULL;
As you can see, this type of query can get a bit hairy. You have to deal with nested, quoted strings; you have to concatenate everything together; and you have to place line breaks so the output at least looks decent. The doubled -up quotation marks you see in the previous statement are there because single quotes are required in the final output. So, for example, the string ' 'MM/DD/YYYY' ' resolves to ' MM/DD/YYYY ' when the SELECT statement is executed.
The SELECT statement from Example 9-6 produces INSERT statements such as the following:
. . .

INSERT INTO employee

 (employee_id, employee_billing_rate,

 employee_hire_date, employee_name)

VALUES (114,

 NULL,

 TO_DATE('07/05/2004, 'MM/DD/YYYY')

 'Marusia Bohuslavka');


INSERT INTO employee

 (employee_id, employee_billing_rate,

 employee_hire_date, employee_name)

VALUES (116,

 NULL,

 TO_DATE('07/05/2004, 'MM/DD/YYYY')

 'Roxolana Lisovsky');
Example 9-6 is further complicated by the need to deal with potential nulls. The example generates an NVL expression to deal with the potential null employee_billing_rate column. The employee_name column is easy because a null employee name will result in an empty string (i.e., '') in the resulting INSERT, and Oracle SQL treats an empty string as a null. Hardest to deal with is the employee_hire_date . For that column, Example 9-6 uses a CASE expression to detect whether the hire date is null and to write out a TO_DATE expression or the keyword NULL.
The technique in Example 9-6 is not one I use often because it can be frustrating to get the SQL just right. I use it most often on code tables and other small tables with two or three columns. I use it sometimes when I'm sending data to a client. That way I send only one file, and my client doesn't have to mess with SQL*Loader or Oracle's Import utility.
9.3.2.4 DDL
Another twist on using SQL to write SQL is to generate DDL statements that help you maintain your database. Using SQL*Plus to generate DDL scripts can help in automating many database administration tasks and is often well worth the effort. Example 9-7 shows a SELECT statement to generate CREATE PUBLIC SYNONYM statements for each table in the GENNICK schema.
Example 9-7. A script to query the data dictionary and generate DDL statements
SELECT 'CREATE PUBLIC SYNONYM ' table_name

 ' for ' user '.' table_name ';'

FROM DBA_TABLES

WHERE owner = 'GENNICK'

AND dropped = 'NO';
The two WHERE conditions in Example 9-7 have the following purposes:
WHERE owner = 'GENNICK '
Historically, Oracle has treated schemas and users synonymously. In many, if not in all, data dictionary views, the owner column indicates the schema in which an object resides.
AND dropped = 'NO '
Oracle Database 10 g introduces a recycle bin feature. The recycle bin holds the definitions and data for dropped tables in case you later want to undrop them. It's the same concept as the recycle bin in Windows. This condition excludes recycle bin tables.
|
Needing public synonyms is common, and if you have a large number of tables, you can save yourself a lot of typing by letting SQL*Plus do the work for you. The output from the previous statement looks like this:
CREATE PUBLIC SYNONYM EMPLOYEE for GENNICK.EMPLOYEE;

CREATE PUBLIC SYNONYM PROJECT for GENNICK.PROJECT;

CREATE PUBLIC SYNONYM PROJECT_HOURS for GENNICK.PROJECT_HOURS;
Once you have spooled these statements to a file, you can execute that file to create the synonyms. In addition to one-off tasks like creating synonyms, you can use SQL*Plus to generate DDL statements for use by ongoing maintenance tasks. Going beyond that, you can even use SQL*Plus to generate operating system script files.
9.3.3 Spool the Extract to a File
Once you have your query worked out and the data formatted as you require, it's time to spool your output to a file. To get a clean file, you must do four things.
- Set the line size large enough to accommodate the longest possible line. Pay close attention to this if you are generating comma-delimited data. You need to allow for the case where each field is at its maximum size . Use the SET LINESIZE command for this.
- Turn off all pagination features. You can use SET PAGESIZE 0 for this purpose. It turns off all column headings, page headings, page footers, page breaks, and so on.
- Turn feedback off with the SET FEEDBACK OFF command.
- Use the SET TRIMSPOOL ON command to eliminate trailing spaces in the output datafile. Use this for comma-delimited output and when you generate a file of SQL statements. Don't use this command if you are generating a file with fixed-width columns.
The script in Example 9-8 generates a clean, comma-delimited file containing employee information. You'll see two SELECT statements. The first generates a line of comma-delimited column headings, and the second produces the comma-delimited data that follows.
Example 9-8. A script to generate a comma-separated-values file
--

--This script extracts data from the employee

--table and writes it to a text file in

--a comma-delimited format.

--


--Set the linesize large enough to accommodate the longest possible line.

SET LINESIZE 80


--Turn off all page headings, column headings, etc.

SET PAGESIZE 0


--Turn off feedback

SET FEEDBACK OFF


--Eliminate trailing blanks at the end of a line.

SET TRIMSPOOL ON


SET TERMOUT OFF

SPOOL current_employees.csv

SELECT '"ID","Billing Rate","Hire Date","Name"'

FROM dual;


SELECT TO_CHAR(employee_id) ','

 TO_CHAR(employee_billing_rate) ','

 TO_CHAR(employee_hire_date,'MM/DD/YYYY') ','

 '"' employee_name '"'

FROM employee

WHERE employee_termination_date IS NULL;

SPOOL OFF


EXIT
The SPOOL command in Example 9-8 sends the output to current_employees.csv , and SET TERMOUT OFF disables the display while the data are being written to the file. Run the script as follows:
SQL>

@ex9-8
Following is an example of the comma-delimited output:
"ID","Billing Rate","Hire Date","Name"

101,169,11/15/1961,"Marusia Churai"

105,121,06/15/2004,"Mykola Leontovych"

107,45,01/02/2004,"Lesia Ukrainka"

111,100,08/23/1976,"Taras Shevchenko"

114,,07/05/2004,"Marusia Bohuslavka"

116,,07/05/2004,"Roxolana Lisovsky"
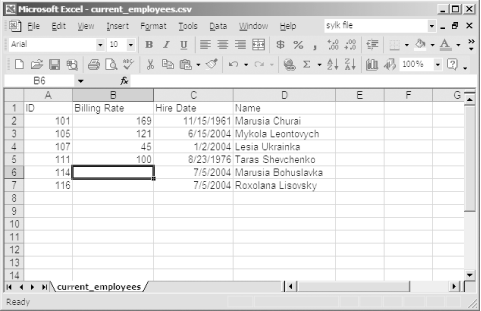
The initial row of column headings that you see in these data comes in handy if your ultimate target is a spreadsheet. Open current_employees.csv in Microsoft Excel, adjust the column widths a bit, and you'll see results resembling Figure 9-1.
Figure 9-1. A CSV file opened in Microsoft Excel
Of course, if your target is not a spreadsheet program, you may prefer to omit the first SELECT from Example 9-8 to write only the data to the current_employees.csv file.
9.3.4 Make Your Extract Script User-Friendly
You can do at least two things to improve the extract script shown in the previous section. First, it might be nice to display a brief message to remind the user of what the script does. This will serve to give the user confidence that he has indeed started the correct script. The following PROMPT commands, added at the beginning of the script, should serve the purpose:
PROMPT

PROMPT This script creates a comma-delimited text file containing

PROMPT employee data. Only current employees, those without a

PROMPT termination date, will be included in the output file.

PROMPT
It may not be much, but it always makes me feel better to have some indication that the script I am executing does what I believe it to do. For scripts that change data or do something difficult to reverse, you might include a PAUSE command:
PAUSE Press ENTER to continue, or ctrl-C to abort.
You can even prompt for the output filename rather than hardcoding it:
ACCEPT output_file CHAR PROMPT 'Enter the output filename >'
Now, you can replace the filename in the SPOOL command with the substitution variable &output_file . Example 9-9 shows the modified, more user-friendly version of the extract script.
Example 9-9. A more user-friendly version of the extract script
PROMPT

PROMPT This script creates a comma-delimited text file containing

PROMPT employee data. Only current employees, those without a

PROMPT termination date, will be included in the output file.

PROMPT


PAUSE Press ENTER to continue, or ctrl-C to abort.


ACCEPT output_file CHAR PROMPT 'Enter the output filename >'


--Set the linesize large enough to accommodate the longest possible line.

SET LINESIZE 80


--Turn off all page headings, column headings, etc.

SET PAGESIZE 0


--Turn off feedback

SET FEEDBACK OFF


--Eliminate trailing blanks at the end of a line.

SET TRIMSPOOL ON


SET TERMOUT OFF

SPOOL &output_file

SELECT '"ID","Billing Rate","Hire Date","Name"'

FROM dual;


SELECT TO_CHAR(employee_id) ','

 TO_CHAR(employee_billing_rate) ','

 TO_CHAR(employee_hire_date,'MM/DD/YYYY') ','

 '"' employee_name '"'

FROM employee

WHERE employee_termination_date IS NULL;

SPOOL OFF


EXIT
When you run the modified script in Example 9-9, it's much more obvious what is going to happen; you have a chance to abort, and you can specify whatever filename you like for the output:
oracle@gennick02:~/sqlplus/ExampleScripts>

sqlplus gennick/secret @ex9-9

SQL*Plus: Release 10.1.0.2.0 - Production on Tue Jul 6 20:54:13 2004


Copyright (c) 1982, 2004, Oracle. All rights reserved.


Connected to:

Oracle Database 10g Enterprise Edition Release 10.1.0.2.0 - Production

With the Partitioning, OLAP and Data Mining options


This script creates a comma-delimited text file containing

employee data. Only current employees, those without a

termination date, will be included in the output file.


Press ENTER to continue, or ctrl-C to abort.


Enter the output filename >

current_employees.csv

Disconnected from Oracle Database 10g Enterprise Edition Release

10.1.0.2.0 - Production

With the Partitioning, OLAP and Data Mining options

oracle@gennick02:~/sqlplus/ExampleScripts>
Depending on your needs, you can go further and allow the user to enter some selection criteria to specify which employee records to extract. But validating such input is difficult, so a mistake on the part of the person running the script may well result in a syntactically incorrect SELECT statement.
