Adding a Graphic to a Document
An important part of establishing a strong business is creating a memorable corporate identity. Setting aside the obvious need for sound management, two important physical attributes of a strong retail business are a well-conceived shop space and an eye- catching, easy-to-remember logo. Once you or your graphic artist has created a logo, you should add the logo to all of your documents, especially any that might be seen by your customers. Not only does the logo mark the documents as coming from your company, it also serves as an advertisement, encouraging anyone who sees your worksheets to call or visit your company.
One way to add a picture to a worksheet is to go through the Insert menu and click the Picture item. Clicking Picture shows a submenu that lists several sources from which you can choose a picture to add; in this case, where you re adding a logo you ve saved as a graphics file, you can click the From File item to open a dialog box that lets you locate the picture you want to add from your hard disk.
| Tip | When you insert a picture, the Picture toolbar might appear. The Picture toolbar contains buttons that let you change the picture s contrast, brightness, and so on. You can use those buttons to change your picture s appearance, but you don t get as much control as when you use the Format Picture dialog box, presented later in this section. |
Once you ve added the picture to your worksheet, you can change the picture s location on the worksheet by dragging it to the desired spot. You can also change the appearance of the picture by opening the Format menu and choosing Picture. Then, in the Format Picture dialog box, you can modify the image s size or brightness, rotate the image on the page, or crop away any portion of the image that you don t want to show.
You can also resize a picture by clicking it and then dragging one of the handles that appears on the graphic. Using the Format Picture dialog box helps ensure that the aspect ratio , or relationship between the picture s height and width, doesn t change. If you do accidentally resize a graphic by dragging a handle, just click the Undo button to remove your change.
If you d like to generate a repeating image in the background of a worksheet, forming a tiled pattern behind your worksheet s data, you can open the Format menu, point to Sheet, and click Background. In the Sheet Background dialog box, click the image that you want to serve as the background pattern for your worksheet, and click OK.
| Tip | To remove a background image from a worksheet, open the Format menu, point to Sheet, and click Delete Background. |
In this exercise, you add the new logo for The Garden Company to an existing worksheet, change the graphic s location on the worksheet, reduce the size of the graphic, change the image s brightness and contrast, rotate and crop the image, delete the image, and then set the image as a repeating background for the worksheet.
USE the ![]() AddPicture.xls document in the practice file folder for this topic. This practice file is located in the
AddPicture.xls document in the practice file folder for this topic. This practice file is located in the ![]() My Documents\Microsoft Press\Office 2003 SBS\SettingUpWorkbook folder, and can also be accessedby clicking Start/All Programs/Microsoft Press/Microsoft Office System 2003 Step by Step .
My Documents\Microsoft Press\Office 2003 SBS\SettingUpWorkbook folder, and can also be accessedby clicking Start/All Programs/Microsoft Press/Microsoft Office System 2003 Step by Step .
OPEN the ![]() AddPicture.xls document.
AddPicture.xls document.
-
Click cell A1.
-
On the Insert menu, point to Picture , and then click From File .
The Insert Picture dialog box appears.
-
If necessary, navigate to the SettingUpWorkbook folder and then double-click
 tgc_logo.gif .
 The chosen graphic appears in the
AddPicture.xls file. 
-
Right-click the graphic, and from the shortcut menu that appears, click Format Picture .
The Format Picture dialog box appears.
-
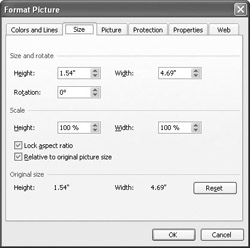
Click the Size tab.
The Size tab page appears. Notice that the Lock aspect ratio check box is selected.
-
In the Scale section of the tab page, clear the contents of the Height box, and type 50% .
-
In the Size and Rotate section of the tab page, clear the contents of the Rotation box, type 180 , and click OK .
The picture is resized, maintaining the original aspect ratio, and rotated .
-
Click the center of the graphic, and drag it so that it is centered horizontally on the screen and the top of the graphic is just below row 1.
The graphic moves with your mouse pointer.
Troubleshooting Remember that dragging one of the handles at the edge of the graphic will resize the graphic. If you accidentally resize the logo instead of moving it, click the Undo button.
-
On the Format menu, click Picture .
The Format Picture dialog box appears.
-
Click the Picture tab.
The Picture tab page appears.
-
In the Image Control section of the dialog box, clear the contents of the Brightness box, and type 40 .
-
In the Image Control section of the dialog box, clear the contents of the Contrast box, and type 40 .
-
In the Crop From section of the dialog box, clear the contents of the Top box, type .5 , and click OK .
The image changes to reflect the properties you set.
-
If necessary, select the image, and, on the Standard toolbar, click the Cut button.
The image disappears.
-
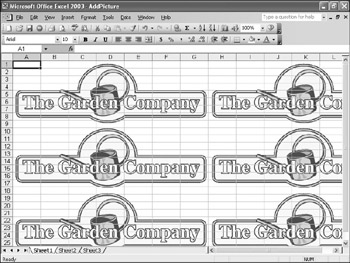
On the Format menu, point to Sheet , and click Background .
The Sheet Background dialog box appears.
-
If necessary, navigate to the SettingUpWorkbook folder and then double-click
tgc_logo.gif . The image repeats in the background of the active worksheet.
-
On the Standard toolbar, click the Save button.
Excel saves your changes.
CLOSE the ![]() AddPicture.xls document.
AddPicture.xls document.
EAN: 2147483647
Pages: 350