2.8. First Boot
| | ||
| | ||
| | ||
2.8. First Boot
When the newly-installed system boots for the first time, a few more things need to be set up at this stage: The license agreement must be accepted, the date and time must be set, a system user must be created, and so on (Fig. 2.11).
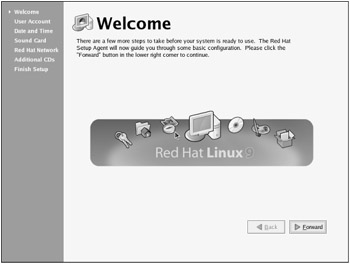
Figure 2.11: The first-boot Welcome dialog window
The most important of these is creating a system user. This is done in the User Account dialog window (Fig. 2.12). You can use the root account for working with the system, but this is not recommended. It is advisable that even the administrator enters the system as a regular user (perhaps, with slightly higher privileges to access the necessary functions). The root account should be used only for the most extreme needs.
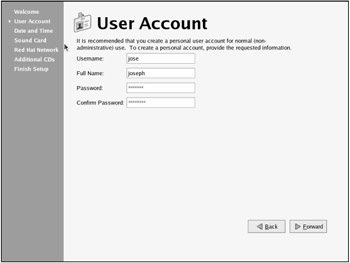
Figure 2.12: The User Account dialog window
After finishing the first boot setup, the system boots.
The first stage of the boot process in Linux is the same as in Windows: The memory is tested , disks are determined, and information about the hardware system is displayed. When this process is over, the dialog window of the boot loader selected in Section 2.4 is displayed (Fig. 2.13).
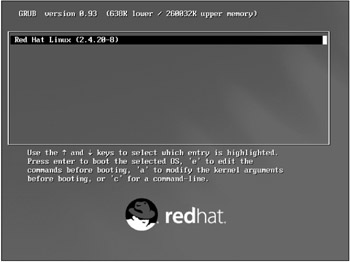
Figure 2.13: The boot loader dialog window
Because I have only Linux installed, the only option is to boot into this system. If you had other operating systems or Linux kernels installed, they would also be offered for booting in the boot loader menu. Windows and Linux can peacefully coexist on the same computer. I must note, however, that Windows XP and older Linux boot loaders, such as LILO, do not get along with each other. It looks like Windows XP would brook no competition and kill LILO. Modern Linux loaders are more capable and can stand up for themselves .
Boot loaders in some Linux distributions, including Red Hat, may use the command prompt instead of a graphical menu to select the operating system. After the computer starts, a command line prompt to enter the necessary operating system is displayed as follows :
LILO boot:
The default operating system is loaded by simply pressing the <Enter> key; alternative operating systems are loaded by entering its name from the keyboard and then pressing the <Enter> key. Instead of typing the operating system into which to boot, you can use the keyboard arrow keys or the <Tab> key to navigate through the available choices.
After the selected operating system (Linux in this case) starts booting, information about devices detected , versions of various modules, and so on, is displayed on the black background as white text (Fig. 2.14).
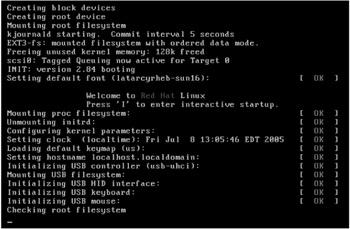
Figure 2.14: The Linux booting process
At one point you will see the message saying "Welcome to Red Hat Linux. Press 'I' to enter interactive startup." (See Fig. 2.14.) Pressing the <I> key will make the system ask your confirmation before loading another service. This is a handy feature in case the system becomes corrupted and some service causes the system to hang. For example, in my experience, installing the sendmail daemon often causes problems. When this happens, the operating system cannot boot. The situation is resolved by simply rebooting the computer, entering the interactive mode, and refusing to load the sendmail service.
Linux is a multiuser operating system. This means that several people can work on the same machine at the same time. The operating system needs to know the current user, so after it boots the system will ask you to enter your login and password. The login identifies you, and the password prevents someone else from entering the system under your name.
The user identification process in the text mode starts with the prompt to enter your login:
localhost login:
Then you have to enter the password to prove to the operating system that you are who you say you are.
If you prefer to use the graphical interface to enter the system, you can do this in the dialog window like the one shown in Fig. 2.15. I say "like the one" because the login window may differ in different Linux distributions.
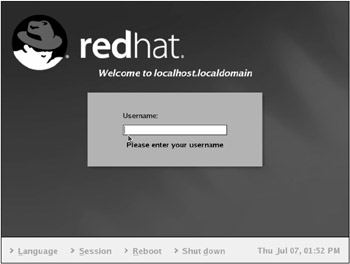
Figure 2.15: The login window
Before entering your login, take a good look around the window. There is menu in it containing the following four items:
-
Language The default language is English, but you can choose any other available language. Linux supports an extensive choice of languages that is constantly expanding.
-
Session This allows you to select the graphical interface. In this book, I will mostly use the KDE and GNOME interfaces because they are the most commonly used. Which graphical interface you select is up to you.
-
Reboot
-
Shut down
The Session menu item has an interesting subitem: Failsafe. Select this item if there are errors in the system configuration and the graphical interface cannot launch. This will open the command line console before the graphical interface launches, and in it you can correct the problem.
After setting the necessary parameters, enter your login and password. Thus you can enter the graphical world of Linux. But which account should you log in under? During the installation you set the system administrator (root) password and added a user during the first-boot configuration. I strongly recommend entering the system under the user account, because the root account allows the highest rank of privileges. This totalitarian control often caused grief when administrators inadvertently deleted some important data when conducting some system testing.
Working under the root account makes it easier to break into the computer through seemingly the simplest applications. Suppose you logged in as root and then decided to do some Web surfing. The browser that you launch for this will have the root privileges. If there is a vulnerability in the browser allowing hard disk access, miscreants can take advantage of this loophole to break into your computer and have access to whatever the root user does.
If, on the contrary, you logged in as a regular user, only the areas and functions available to this user account can be accessed. The system files in this case are more secure. Should it become necessary to raise your privileges to root, for example, to perform some system task requiring root privileges, you can always do this from a user account as long as you know the administrator password. This is done by executing the su (switch user) command with the name of the user whose privileges you want to obtain as the parameter.
To obtain administrator privileges, enter the command as follows:
su root
or
su -
When you enter the command, the system will ask you to supply the appropriate password. If you enter the password of the user whose privileges you want to obtain, you will obtain the privileges requested . Having obtained the necessary privileges, you can do with the system what the new privileges allow. With administrator privileges, you are allowed to do everything.
Again, Linux is a multiuser operating system, and it supports several consoles. By default, you enter the first console. To switch to another console, press the <Alt> key and one of the <F1> through <F6> keys. This will open another console with the login screen, in which you can log into the system as the same or another user.
The multiple console feature is a handy one. For example, in one console you can start a program that takes a long time to execute, then you can switch to another console and continue with other tasks in it. You can return to the first console at any moment to check the program's execution.
If, at installation, you selected the option to boot into the graphical mode, at the first boot a window will open, in which the system will offer to let you use the selected default graphical shell. In the successive boots, unless you specify otherwise , the system will boot into this graphical shell.
You can switch into the graphical mode from the text mode at any time by entering the startx command in the command line. In this case, the graphical shell will be loaded without asking you to provide the password because you have already identified yourself (when logging into the system in the text mode).
You may have to log into the system in the text mode if the graphical login window cannot be displayed for some reason, for example, because of configuration errors. In this case, executing the startx command will have no effect, because the graphical shell will not be able to load, and you will have to configure the display settings anew. Most Linux configuration information is stored in text files, which often have to be edited manually. Graphics configuration information is also stored in text files, but it is not necessary to edit them manually. You configure the system with the help of the special setup utility with the graphical interface. Enter the setup command in the command line. This will open the window shown in Fig. 2.16. Select the X configuration item in the list. The system will, most likely, determine the video card and the drivers necessary; however, it may have problems properly identifying the monitor and selecting the video modes it supports. In most cases, this task requires human intervention.
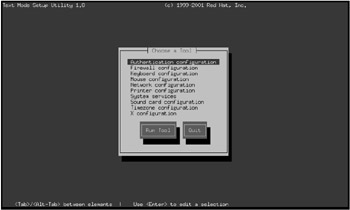
Figure 2.16: The main window of the setup utility
All possible monitor modes will be listed, and you can specify any number of them. However, I recommend selecting only the mode that you feel most comfortable working with. Make sure to test the selected graphical mode to ensure that it works properly. If the configuration settings selected are acceptable, the program will offer to let you enter the system using the graphical mode.
The configuration can be performed using the mouse, but, if for some reason the mouse is unavailable, it can be done using the keyboard. Use the <Tab> key to move from one button to another, the space bar to select menu items, and the <