Formatting Reports
3 4
Reports generally don’t need as much formatting as forms do (that is, if you prefer—as I do—a clean, spare report style), but the Report Wizard does offer you a number of formatting choices. As you can with forms, you can apply a selection of styles to reports by using the AutoFormat selection on the Format menu. You can also create a report template with controls and other features set up the way you want them to be when you create a report in Design view.
Using Report Templates
New reports in Design view are based on the Normal report template, which has a white background and uses the Arial 8-point font for controls. For simple data-checking or review reports, this look might be fine. But in some cases, you might want to customize the report template to go along with the look and feel of other publications in your department. For example, you might want to
- Include your company logo on the report.
- Establish standard formatting for controls in different sections of the report, much as you use different styles for various heading levels in a Microsoft Word template.
- Put controls displaying the page number, report name, or date and time printed in the page footer.
- Use color (sparingly) for emphasis (if you have a color printer)—for example, in a control displaying the report caption or on lines used to separate groups of data.
- Add a line identifying your department name, Web site, phone number, and other information.
You can make your own report templates to use when creating reports by following these steps (remember to substitute colors, fonts, and other formatting elements according to your own preferences):
- Click the Reports tab of the Database window, and click New at the top of the Database window. In the New Report dialog box, select Design View forthe report type, and then click OK. This creates a blank report that you’ll use as the basis of your report template.
- Although leaving the report background white makes it easier to read and quicker to print, you can select a background color if you want (and if you have a color printer), by using the Build button to the right of the BackColor property of the report’s detail section or other section.
- Place the controls you plan to use on the report, format them as desired, select them all, and choose Format, Set Control Defaults. This ensures that controls placed on a report made from the template will have the same formatting.
- Save the blank report with a name such as rtmpReport.
- Open the Options dialog box (Tools, Options), click the Forms/Reports tab, and enter the new template’s name in the Report Template box, as shown in Figure 7-49.
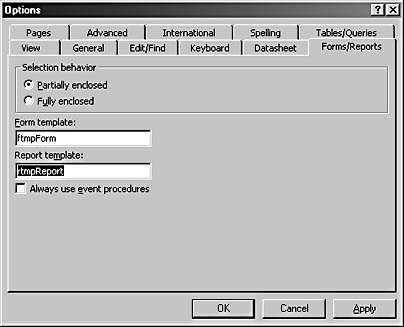
Figure 7-49. Enter the name of a report template on the Forms/Reports tab in the Options dialog box to use that template when creating new reports.
Ways to Use Report Templates
If you enter the name of a report template in the Report template box on the Forms/Reports page of the Options dialog box, new reports will use the properties you set for the controls on the report template and will have the same background color. However, the reports you create won’t have any controls on them, nor will they have any code you may have written for the report template.
Design elements such as text boxes, labels, lines, rectangles, and different fonts or sizes for titles won’t appear on new reports created from the template. Unlike using a Word template, where text and field codes are carried over to any new document created from the template, when an Access report is created from a template, you get a report with the section background colors you selected for the template—and no controls at all. When you place controls on the new report, they’ll have the properties you set with the Format, Set Control Defaults command when you created the report template.
If you want to create new reports already filled with formatted text boxes and controls, perhaps with different fonts and sizes for different report groups, simply copy the report template manually; your new report will then have all the controls and code that you put on the report template.
caution
Whichever way you intend to use a report template, you must import it into any database in which you want to use it. If the report template listed in the Options dialog box isn’t present in the current database, the default template will be used instead.
Troubleshooting - My report has gaps in its data
Say you created a name and address report with text boxes bound to the fields containing the name and address data, but when the report is printed, big gaps appear between the first name and the last name and between the address components. What can be done to prevent these types of gaps?
To prevent gaps in data, you can create controls with expressions that concatenate components (such as those that compose names and addresses) into a single expression used as the text box’s control source. A typical Control Source expression to print a name without gaps is shown here:
=[FirstName] & " " & Iif([MiddleName], [MiddleName] & " ", "") & [LastName] & " " & [Suffix]
To print the City, State, and ZIP line of the address without gaps, use an expression such as the following:
=[City] & ", " & [State] & " " & [Zip]
Using AutoFormat
You can use the AutoFormat dialog box (opened by choosing Format, AutoFormat in Design view) to apply a new format to a report. These formats are the same ones that you can select within the Report Wizard.
The AutoFormat feature works somewhat differently with reports than with forms. For example, you can’t update one of the built-in styles with your own custom style, as youdo with form styles. Although this option is available in the Customize AutoFormat dialog box, you’ll get an error message if you select it. However, you can create a new AutoFormat style based on the currently open report, as shown in Figure 7-50. You simply have to use a slightly different technique for report AutoStyles.
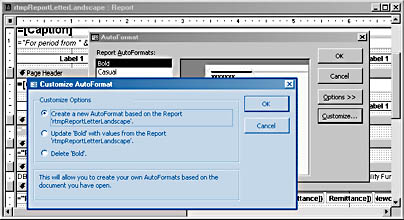
Figure 7-50. You can create a new AutoFormat style from a report.
Clicking OK in the Customize AutoFormat dialog box opens the New Style Name dialog box, shown in Figure 7-51, in which you can enter the name of the new style.
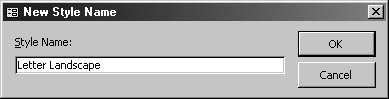
Figure 7-51. Give your new AutoFormat style a name that’s easy to remember.
After you save the new style, it will be available, along with the built-in styles, from the AutoFormat dialog box.
Saving Your Report Styles
Being able to create your own styles using the AutoFormat dialog box is not as useful a feature as it might seem because of the limitations on the formatting controlled by the AutoFormat style. Font sizes and styles used for different report elements are not included in saved styles; only a small portion of the original report template’s formatting is applied to the new report when you apply a style to it.
If you need to regularly create complex reports, with different fonts for text boxes and labels in different report sections, and perhaps design elements such as lines or rectangles, the best method I’ve found is the old-fashioned method of simply copying a report template.
To use this method, create a report template with all the controls formatted as you prefer and with the desired graphical elements. When you want to create a new report based on the template, simply copy the report in the Database window, using the standard Windows keyboard shortcuts Ctrl+C and Ctrl+V. (Alternatively, open the report template in Design view, and then choose File, Save As to save it under another name.) Low-tech though it is, this simple technique ensures that everything you put on the report template—text boxes, labels, lines, rectangles, images, and all—will appear on the new report made from the template.
EAN: 2147483647
Pages: 172