Setting Up User Packages in the Tree

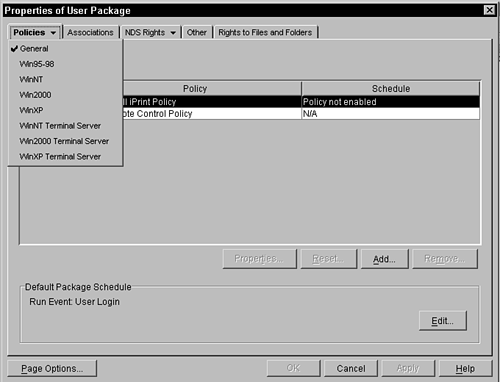
Once you have user objects in your tree and have the ZENworks management agents installed on your users' workstations, you can begin to manage your users in the tree.

The following sections describe at a high level some of the things that you can manage with the User Policy Package.

Creating User Policy Packages

You can quickly create a User Policy Package by using the following described steps. You'll learn about the details of each policy in later chapters.

  1. Launch ConsoleOne.

  2. Browse in ConsoleOne to the container where you want to create the policy package. Remember that you can set the package to reside in any container and still associate it with any other container in the tree; but be careful not to replicate large partitions all over your tree just to get to the policy packages.

  3. Select the Container object and then click the right mouse button and select the policy package object. This opens the Policy Package Create Wizard to walk you through the creation.

  4. Select User Package and follow the wizard to identify the container and the name of the object. Pick Define Additional Properties in the last wizard page so you can activate some policies. If you didn't do this, browse in ConsoleOne to the container that has your User Policy Package and select that object. You can double-click or right-click and choose properties from the menu.

  5. You are presented with the property page for the user package you have defined. The screen should look like the one in Figure 3.3.

    Figure 3.3. Properties of User Policy Package.

    graphics/03fig03.gif

  6. Under the general category, you can activate both the Remote Control and the Novell iPrint policies. Clicking the small triangle next to the Policies tab and then selecting the desired workstation type from the drop-down menu can access the workstation specific policies. Once you select the workstation type, the policies tab for that specific workstation is displayed.

  7. Mark the Remote Control policy check box.

  8. Go into Remote Control policy properties by either double-clicking to get to the properties or by selecting the details button.

  9. Once in the properties of the Remote Control policy, you can select various configuration options on the pages displayed to enable the user to see and run the Remote Control application. The Remote Control policy is described in detail in later chapters.

    Figure 3.4. Properties of the Remote Control policy in the User Policy Package.

    graphics/03fig04.gif

  10. Press OK to complete the changes. If you have not associated this policy package with a container, group, or user object, a notification is displayed (see Figure 3.5).

    Figure 3.5. Notification of unassociated User Policy Package.

    graphics/03fig05.jpg

  11. Click Yes to associate this User Policy Package with a container in the tree. This once again brings up the property pages of the User Policy Package and displays the Associations page (see Figure 3.6). You need to then press the Add button and browse to the container, group, or user you want to receive this policy package. Remember, every user below the identified container, within the specified group or the associated user, receives this policy package and all policies activated in this package.

    Figure 3.6. Associations page of the User Policy Package.

    graphics/03fig06.jpg

  12. Press OK to complete the change.

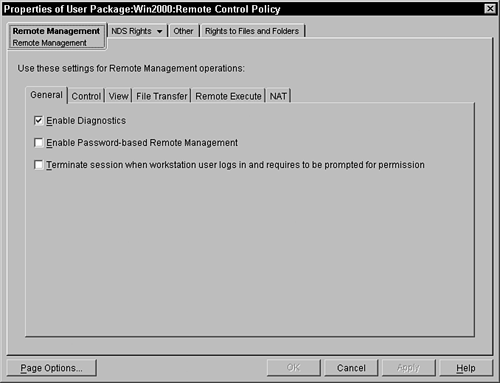
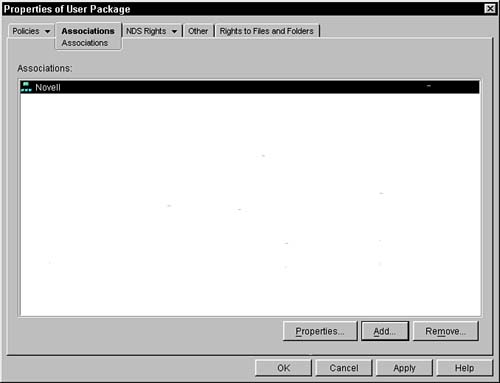
You have now created a simple User Policy Package and turned on the Remote Control policy for all of the users associated with this policy package. Now when the remote control agent reads this policy, it will enforce the configurations specified.


Novell's ZENworks for Desktops 4. Administrator's Handbook
Novell ZENworks for Desktops 4 Administrators Handbook
ISBN: 0789729857
EAN: 2147483647
Year: 2003
Pages: 198
Authors: Brad Dayley

flylib.com © 2008-2017.
If you may any questions please contact us: flylib@qtcs.net