Compiling Your Levels
Compiling a Reality Factory level consists of several phases, each necessary to create a ready-to-go level file that you can share with friends and others.
| Note | Before you compile your level, you need to make sure that all entities are within the level itself, in particular the camera. Even though the camera isn’t used in the game, it is used by the editor to determine how the editor should compile your level. Just remember to fly the camera inside your level prior to compile and you should be fine. |
Go to Build, Compile to open the Compile window (there is a Toolbar button for this as well, mouse over them for ToolTips). The path at the top of the window is where the editor is saving the compiling BSP file. Make sure that this makes sense for your RF installation. If you copy RF files from one place to another, you will need to edit this. You can use .map or .preBSP for the extension of the map file listed. These are temporary files that are used for the different stages of the compilation process.
You should save all your RF levels in the \media\Levels directory, so for the default RF installation this would work out to be C:\RealityFactory\media\Levels. The settings above are the default, and for most situations they will be fine, with one exception: the default light level.
If you have the default light level checked, you will end up with a very bland look for your levels; everything seems washed out, the depth and perspective aren’t as defined as they might be, and so on. Each Reality Factory level must be sealed for the BSP compiler to be successful. You can refer back to the section on leaks if you need to refresh your memory about this.
So, with the default settings left enabled, let’s compile the level. Check the Preview in Reality Factory box, which will prompt the editor to automatically run the level in the game engine to test.
Here is the output from the test map:
** BSP Compile Version: 15 ** Build Date/Time: Dec 9 2001,09:28:05 --- Load Brush File --- Num Solid Brushes : 6 Num Cut Brushes : 0 Num Hollow Cut Brushes : 0 Num Detail Brushes : 0 Num Total Brushes : 6 --- Remove Hidden Leafs --- --- Remove Hidden Leafs --- --- Weld Model Verts --- --- Fix Model TJunctions --- --- CreateLeafClusters --- --- Save Portal File --- --- Create Area Leafs --- --- Save GBSP File --- Num Models : 1, 80 Num Nodes : 6, 264 Num Solid Leafs : 6, 360 Num Total Leafs : 7, 420 Num Clusters : 1, 4 Num Areas : 1, 8 Num Area Portals : 0, 0 Num Leafs Sides : 36, 288 Num Planes : 24, 480 Num Faces : 16, 576 Num Leaf Faces : 16, 64 Num Vert Index : 65, 260 Num Verts : 19, 228 Num FaceInfo : 9, 576 Num Textures : 3, 156 Motion Data Size : 40 Tex Data Size : 391680 --- Vis GBSP File --- NumPortals : 0 Total visible areas : 1 Average visible from each area: 1 FileName C:\RealityFactory068\media\levels\basic_tutorial.BSP --- Radiosity GBSP File --- Num Faces : 16 Num Normal Lights : 0 Num RGB only Lights : 0 Num RGB Always Visible Lights : 0 Num Suns with fallofftype 0 : 0 Skipping RWM Gouraud coloring 65 RGB faces (Full Vis only) Light Data Size : 4690 Num Light Maps : 16 Compile successfully completed
When you preview your level, you can test the game engine in a number of different viewpoints, each available for your games. Also, you can choose to have only one of the views, or you can let the player select what view he wants to use. It’s completely up to you.
Figures 28.12 through 28.14 provide a preview in three different views.
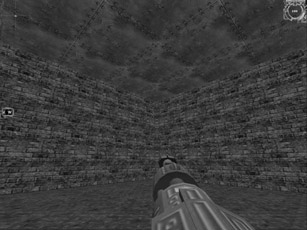
Figure 28.12: First-person view.
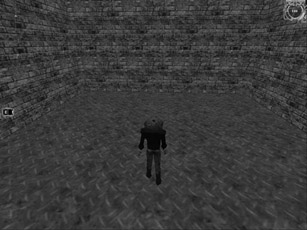
Figure 28.13: Third-person view.
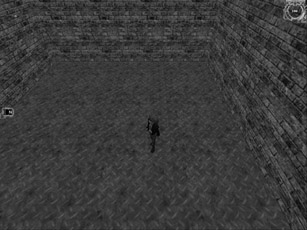
Figure 28.14: Diablo-style view.
First-Person: Press F1 to Activate
The first view is the venerable first-person shooter game. Since the development of games such as Wolfenstein 3D, Doom, Quake, and Onwards, the world has been addicted to first-person shooters.
Note the default HUD setup that we get: health and mana meters in the upper right, a radar in the upper left, and a working compass in the middle left. These are basic examples of the types of custom HUD elements you can create with the engine by modifying the HUD.ini file (in the Installs directory of your RF directory).
Third-Person Floating Camera View: Press F2 to Activate
Games like Alice in Wonderland and Heavy Metal :: Fakk 2 used this viewpoint very well. The controls are essentially the same as a first-person shooter. However, you get a floating view of the player you are controlling. This is an excellent view because you get to watch the player run and jump around, do flips, and so on.
Third-Person Diablo-Style Camera: Press F3 to Activate
Diablo-style hack-n-slash games are extremely popular, and you can use the Reality Factory engine to create your own Diablo-style role playing games. With this view, the camera stays at a certain angle from the player instead of floating behind.
EAN: 2147483647
Pages: 168