53. Burn Files on a CD or DVD
| < Day Day Up > |
| You can burn folders and files to a CD or DVD (depending on the drive types installed on your computer) using the K3b burning software. You can create data CDs (or DVDs), create music CDs, or copy a CD. Now here's the bad news: Linux systems are set up to protect direct access to devices by users other than the root account. So, you can log on as root, burn your CDs or DVDs, and then log off; no questions asked. If you want to configure your system so that a "regular" user can access the burn drives and configure K3b so that it works correctly (and its core executables such as cdrecord have proper access), you are talking about several tweaks and changes to file attributes and configuration files. Commands such as chown and chmod are involved, and you have to do a fair amount of work at the command line as the root user to get things working properly. Going through all the possibilities is certainly beyond the scope of this book, and applying the "fixes" incorrectly can have dire consequences for your system. If you really have NLD administration in mind, you might want to consult NLD and Linux administration books such as Emmett Dulaney's Novell Linux Desktop 9 Administrator's Handbook (as well as some of his other publications).
Note When you use insert a burnable CD or DVD in the burner drive, a hardware detection window opens. Click Yes to start K3b. This allows you to forgo starting K3b from the menu.
Note All the project types available in K3b are similar in terms of operation; you select the project and then select the files that will be burned to the writable media (CD or DVD). In the case of music CDs, you can burn a number of audio file types including wav and MP3 files. When you select to copy a CD, the process is really just a matter of identifying the source CD and then the drive that will be used to burn the copy onto the destination CD. 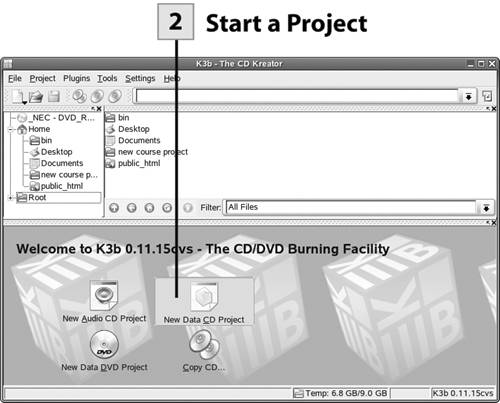 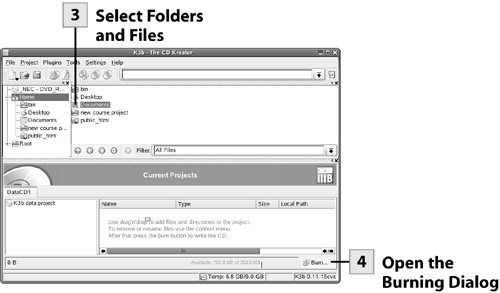 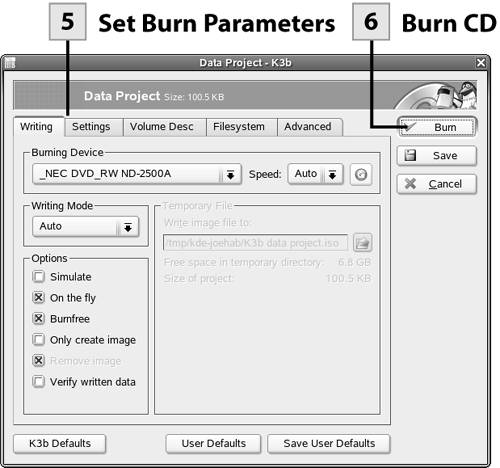
Note A space counter in the lower panel tells you the amount of space still available on the CD or DVD as you drag items onto it.
Tip Burning CDs and DVDs can sometimes be more of an art than a science. You many want to simulate the burn process to test your settings (select the Simulate option on the Writing tab). In some cases, you may also have to burn through a couple of CDs or DVDs just to determine the best settings for your particular CD burning device (fortunately, CDs are relatively cheap and CD-RWs can be erased). Sometimes you are just dealing with trial and error to determine your own best settings. After you establish the settings that work best for you, save them by selecting Save User Defaults.
Tip There is also a quick but less elegant way to burn CDs directly from the Nautilus window. Select Go and then CD Creator. Drag folders and files that you want to place on the CD onto the CD Creator window that appears. Then select File, Write to CD. Tip When you use removable media such as CDs, right-click on the device's icon and select Eject before removing the media. This allows the Linux system to "unmount" the media before removal. Do the same for floppies; right-click on the icon and remove them from the file system before ejecting the disk. |
 Before You Begin
| < Day Day Up > |
EAN: 2147483647
Pages: 244