Putting Your Photos Up on the Web
| Elements has a built-in feature that not only automatically optimizes your photos for the Web, it actually builds a real HTML document for you, with small thumbnail images; links to large, full-size proofs; your email contact information; and more. All you have to do is upload it to the Web and give your friends (or clients) the Web address for your new site. Here's how to make your own: Step One
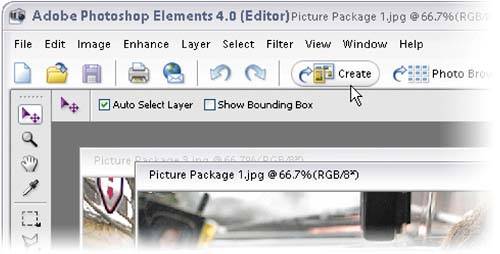
In the Elements Editor, open all the photos that you want to appear on your webpage. (Note: You can also Control-click to select images within the Elements Organizer.) Then, go to the task bar above the Options Bar and click on the Create button.
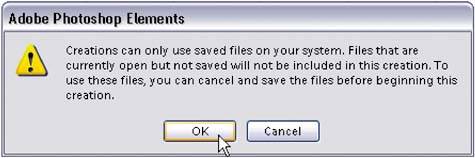
TIP When you click this, you may get an annoying dialog letting you know that only saved photos will be included in your creation (which in this case is a webpage). If your photos have been saved (if they're named, then they're saved), click OK. If not, click Cancel, then go under the File menu and choose Save. Give them a name and click the Save button. Then click the Create button again. Step Two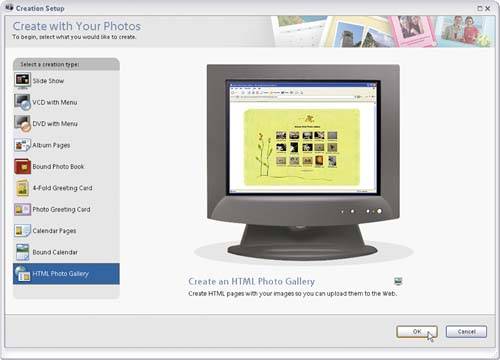 When the Creation Setup dialog appears, you'll see a list of projects you can create on the left side of the dialog. Click on the bottom option, HTML Photo Gallery, and then click the OK button at the bottom-right corner of the dialog. Step Three©SCOTT KELBY 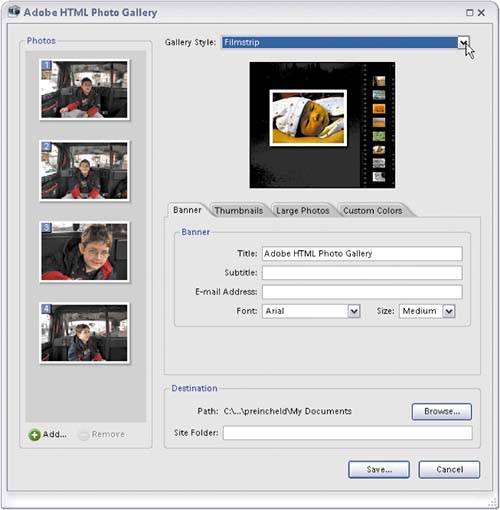 When you click OK, the Adobe HTML Photo Gallery dialog appears, and all your open photos will be in a column on the left side of the dialog. This dialog is where you make your choices for how your webpage will look. At the top is a pop-up menu of preset webpage layouts (called Gallery Styles). As you choose the different styles in the pop-up menu, a thumbnail preview of each layout appears near the top of the dialog. Choose a style that looks good to you. In the next steps, you'll decide what text will appear on the page, how big the thumbnails and photos will appear on your webpage, and what quality they'll be. Step Four The first choice you should probably make is determining where your finished webpage will be saved (officially called its "destination"), so click on the Browse button near the bottom-right corner of the dialog to bring up the Browse For Folder dialog. Navigate to the folder in which you want your finished webpage saved, and then click OK. Now you can start customizing your webpage. Step Five
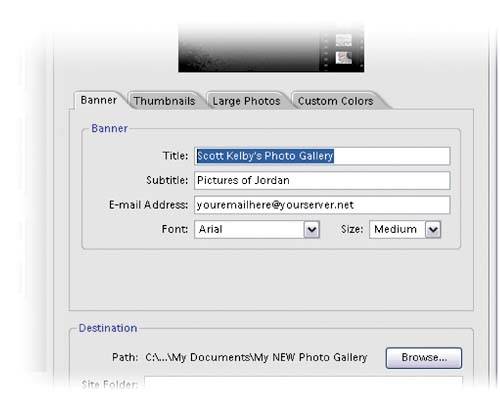
Look in the Banner tab in the center section of the dialog. This is where you enter the title and subtitle of your webpage and where you add your email address (if you want people who visit your site to be able to email you). If you're creating this to show your work to clients, you certainly want to include a link for them to email you. Step Six
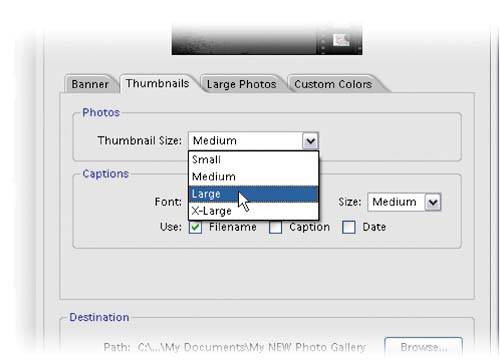
Click on the Thumbnails tab. This is where you choose the size of the small thumbnail images that the people viewing your site will click on to see the full-sized photos. Choose your desired size from the Thumbnail Size pop-up menu. You can also choose captionssuch as Filename, Caption (that is, if you already created captions for the images in the Organizer), or Dateto appear under each thumbnail by clicking on the respective checkboxes in the Captions section. Step Seven
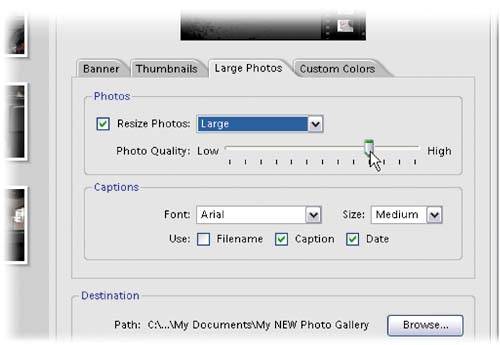
Click on the Large Photos tab. This is where you choose the final size and quality of the full-size photos displayed on your webpage. Choose your desired size from the Resize Photos pop-up menu, then use the Photo Quality slider to determine their quality. (Note: The higher the quality, the longer the photos may take to appear onscreen.) You can again choose titles to appear under each photo in the Captions section by clicking the checkboxes. Step Eight
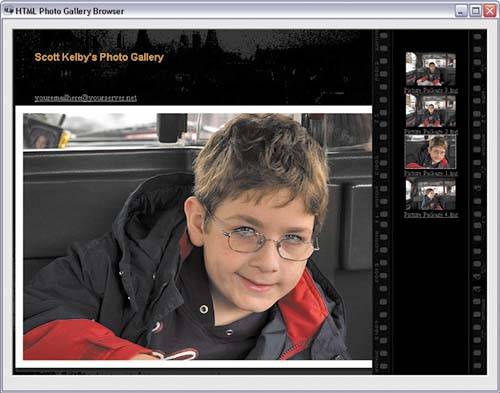
Enter a name in the Site Folder field in the Destination section and click Save (at the bottom of the dialog). Elements 4.0 will do its thingresizing the photos, adding your text, making thumbnails, etc.and a preview of your webpage (complete with live navigation) will appear onscreen. But your page isn't on the Webit's just a preview within Elements 4.0. To get your photos actually on the Web, you'll have to upload them to a Web server, but before you can do that, you have to find the files to upload. Step Nine
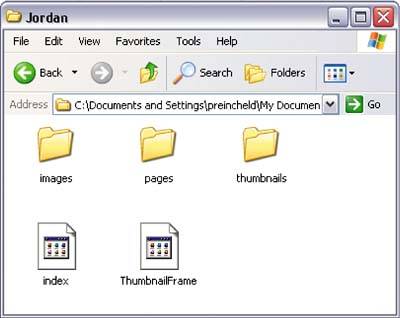
Elements automatically creates all the files and folders you'll need to upload your gallery to the Web and saves them in the location you chose earlier in the Destination section of the Adobe HTML Photo Gallery dialog. These are the files and folders you need to put your photo gallery up live on the Web, including your HTML home page (index.html). Now all you have to do is upload them to a Web server and you're live! |
EAN: 2147483647
Pages: 201