|  When integrating pictures, charts , tables, or other graphics with your text, you need to wrap the text around the object regardless of where it is placed on the page. Rather than having to constantly reset margins and make other tedious adjustments, Word simplifies this task with the text wrapping feature. Unless your object or table is large enough to span the entire page, your layout will look more professional if you wrap your text around it instead of leaving excessive white space. Wrap Text Around an Object or Picture -
 | If the picture or object is located on a drawing canvas, click to select that canvas. If the picture or object is not located on a canvas, select the picture or object. | -
 | Right-click the object, and then click Format Picture or Format AutoShape. | -
 | Click the Layout tab. | -
 | Click the wrapping style you want to use, and the horizontal alignment of your choice for the picture (Left, Right, Center, or Other). | -
 | Click OK. | 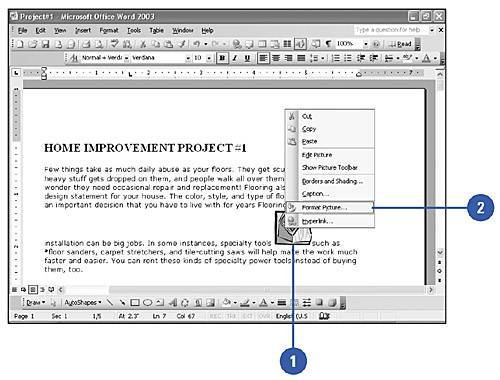 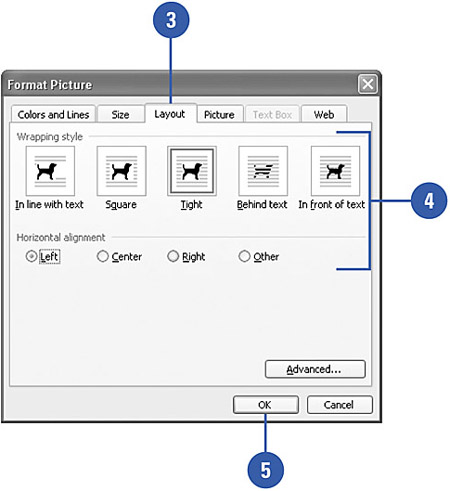 Did You Know? You can line up objects . To align the drawing canvas quickly, select the drawing canvas, click the Text Wrapping button on the Drawing Canvas toolbar, and then select a text wrapping option. |
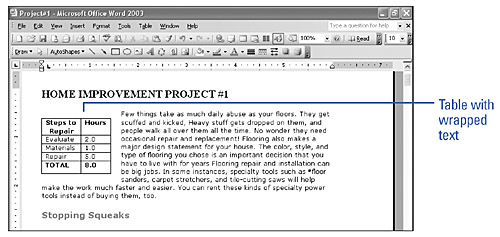
Wrap Text Around a Table -
| | Select the table you want to wrap text around. | -
| | Click the Table menu ' and then click Table Properties. | -
| | Click the Table tab. D | -
| | If necessary, adjust the Size. | -
| | Click the Alignment option you want. | -
 | Click the Text Wrapping option you want to apply. | -
 | Click Positioning. | -
 | Select the Horizontal and Vertical positions , set the Distance From Surrounding Text, and then if necessary, choose the Move With Text or the Allow Overlap option. | -
 | Click OK. | -
 | If necessary, click the Borders And Shading button to apply a border or shading. | -
 | Click OK. | 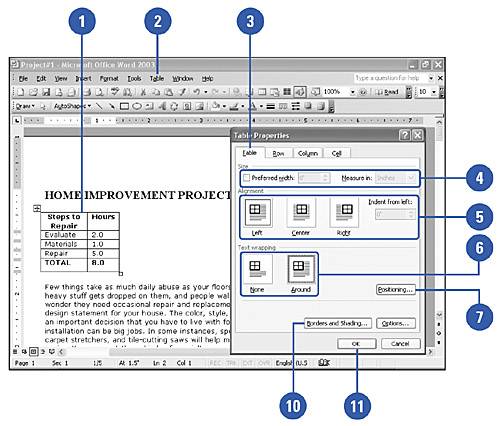 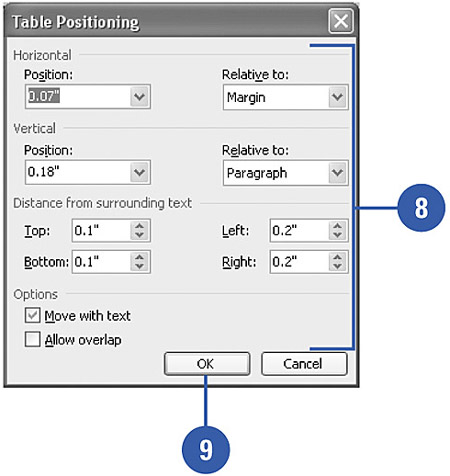 Did You Know? You can reposition a table . Select the table, and then drag it to a new location. You might need to readjust the table positioning and spacing. |
 |