Project: T-shirt Back
| This section works with the T-shirt back, which you create in four steps: STEPS
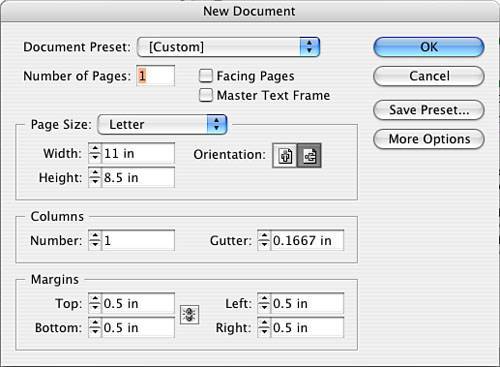
Step 1: Setting Up Your Document FormatLaunch InDesign; go to the File pull-down menu; and select New, Document (use Figure 4.49 to fill out your document window). Figure 4.49. Because this transfer will be placed across the back of the t-shirt, a horizontal orientation is appropriate. Step 2: Placing a Graphic ElementGo to the File pull-down menu and select the Place command. Navigate to the Chapter04\04Project_Files folder and select DMLOGOtag.eps. Click the paintbrush on your layout. Position the logo in the upper-left corner of the layout where the margins meet, and change the scale to 250%. The logo should fit to the left and right margins. Move the logo down so that is centered visually on the layout (see Figure 4.50). Figure 4.50. The back of the t-shirt should display the company logo prominently. Step 3: Saving Your WorkLet's save our work. Go to the File pull-down menu, select Save As, and navigate to the folder in Chapter04\04Finished_Projects. Call this T-shirt Back. Step 4: Printing a Flipped ImageLet's print a content proof to plain paper first. Go to the File pull-down menu and select Print. Choose the appropriate settings for the inkjet. Then go to the File pull-down menu and select Print. Again choose the appropriate settings for the printer available to you; if possible, print a color composite output for your work. Additionally, on the Setup tab, set the page position to Centered. On the Output tab, select Flip Horizontal. It is important that you flip your work when it's printed; otherwise, your image will come out backward after you iron it. Note
Test print this to paper and hold the image up in a mirror to make sure it will iron on correctly. Review your proof, make any necessary adjustments, and save your changes. Print it again, this time to your iron-on transfer substrate. You will place this image on the back center of your t-shirt and follow the manufacturer's directions for ironing (see Figure 4.51). Figure 4.51. Creating mirrored output.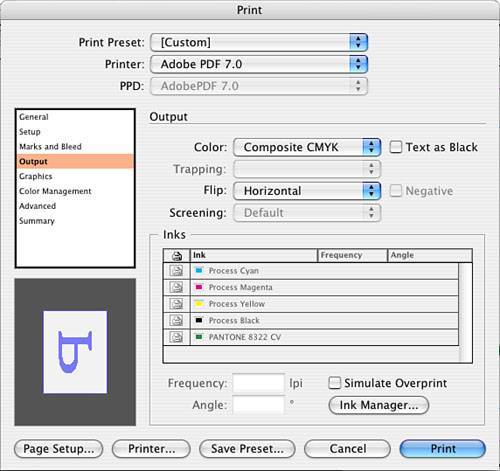 Close your file. |

EAN: 2147483647
Pages: 148