JSP Elements
|
|
You will see four types of JSP tags or elements enclosed in the opening (<%) and closing (%>) JSP tags—expressions, scriptlets, declarations, and directives.
Expressions
An expression's single purpose is to evalute and return a string value. An expression begins with <%= and ends with %>. The = immediately after the opening JSP tag marks the following information as an expression to evaluate. Listing 12.1 shows a JSP page that returns the date of the server and displays it in the web browser. Figure 12.1 shows the result once the page is requested through a web browser.
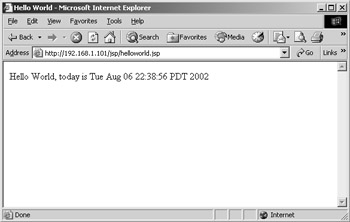
Figure 12.1: Viewing the output from helloWorld .jsp in Internet Explorer
On the CD Rom We strongly encourage you to key in all the code to create the example files yourself. To check your work, compare your files with the example files on the CD accompanying this book.
Listing 12.1: HELLOWORLD.JSP
<%@ page contentType="text/html; charset=iso-8859-1" language="java" import="java.sql.*" errorPage="" %> <html> <head> <title>Hello World</title> <meta http-equiv="Content-Type" content="text/html; charset=iso-8859-1"> </head> <body> Hello World, today is <%= new java.util.Date() %> </body> </html>
Scriptlets
Scriptlets are the simplest type of JSP element. A scriptlet is simply Java code enclosed in the opening and closing JSP tags. Scriptlets can contain any amount of valid Java code, including functions, declarations, and expressions. However, keep in mind that scriptlets cannot span multiple web pages— they are born and die with the beginning and end of a web page request. Listing 12.2 shows a simple example of a scriptlet containing a For/Next loop to output a series of numbers to a web browser window. Figure 12.2 shows the result in the browser window.
Listing 12.2: SCRIPTLET EXAMPLE
<%@ page contentType="text/html; charset=iso-8859-1" language="java" import="java.sql.*" errorPage="" %> <html> <head><title>Scriptlet Example</title> <meta http-equiv="Content-Type" content="text/html; charset=iso-8859-1"> </head> <body> <% for (int listNumber = 0; listNumber < 5; listNumber++) { %> List # <%= listNumber %><br> <% } %> </body> </html> 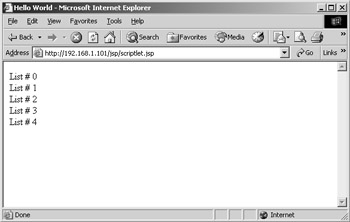
Figure 12.2: Viewing the output from scriptlet.jsp in Internet Explorer
Declarations
Declarations initialize variables and methods. Declarations begin with the <%! and end with %>. The declaration element must be vaild Java code. Therefore, you must end a declaration with a semicolon. Variables and methods declared in a JSP page can be used by scriptlets and expressions within the same JSP page. Listing 12.3 adds a declaration element to our previous code example. You can see the results in Figure 12.3.
Listing 12.3: DECLARATION EXAMPLE
<%@ page contentType="text/html; charset=iso-8859-1" language="java" import="java.sql.*" errorPage="" %> <html> <head> <title>Declaration Example</title> <meta http-equiv="Content-Type" content="text/html; charset=iso-8859-1"> </head> <%! String listName = "My List"; %> <body> <% for (int listNumber = 0; listNumber < 5; listNumber++) { %> <%= listName %> # <%= listNumber %> <br> <% } %> </body> </html> 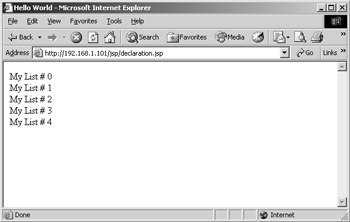
Figure 12.3: Viewing the output from declaration.jsp in Internet Explorer
Directives
As we mentioned, when a JSP page is requested, the web server passes the JSP page to the servlet container. The servlet container manages all facets of the life of the servlet (JSP page). The servlet container makes many of its servlet management decisions through information passed to it through directives. Directives begin with <%@ and end with %>. The three types of directives are page, include, and TagLib.
The page Directive
The page directive defines attributes such as language, extends, import, session, buffer, autoFlush, isThreadSafe, info, errorPage, contentType, and isErrorPage. Typically, although not required, you place the page directive at the top of your JSP page. Listing 12.4 shows an example of the page directive. Table 12.2 defines each attribute.
Listing 12.4: PAGE DIRECTIVE EXAMPLE
<%@ page contentType="text/html; charset=iso-8859-1" language="java" import="java.sql.*" errorPage="" %> <html> <head> <title> Page Directive Example</title> <meta http-equiv="Content-Type" content="text/html; charset=iso-8859-1"> </head> <%! String listName = "My List"; %> <body> Page Directive Example </body> </html>
| Attribute | Meaning |
|---|---|
| autoFlush | Used in conjunction with the buffer attribute, the autoFlush attribute flushes the buffer content automatically. The default value is True. |
| buffer | Controls the size of the buffer that holds page content written by the JSP page before sending the content to the web browser. The default is 8KB. |
| contentType | Defines the contentType of the generated content by the JSP page. The contentType attribute can be HTML, text, PDF, and so on. The default is text/html;charset- IS0=8859-1. |
| errorPage | Defines a custom error page to handle an error exception thrown from the current page. |
| extends | The name of the Java class you want to use as a subclass for the current JSP page. |
| import | Specifies Java packages or classes to import into your JSP page. By default, the java.lang.*, javax.servlet.*, javax.servlet.jsp.*, and javax.servlet .http.* are imported into your JSP page. |
| info | This value can be any string and can be accessed by the current JSP page through the getServletInfo() function. |
| isErrorPage | Specifies whether the current page is designed to handle errors. The default value is False. If set to True, the JSP can access the Exception object containing the exception thrown by the page that declared the current page as an error page. |
| isThreadSafe | Specifies whether the JSP page can handle multiple requests simultaneously. The default value is True. If the value is set to False, the servlet handles one HTTP request at a time.language The default value for this attribute is java. At this time, Java is the only accepted language.session Specifies whether the current JSP page is to participate in sessions. The default value is True. |
The include Directive
The include directive allows one JSP page to be included and processed with the current JSP file. The include directive allows a developer to structure a certain level of modularity into their website architecture. For example, when you use Dreamweaver MX to connect to a database (covered in Chapter 10), Dreamweaver MX creates and saves the connection information in a separate JSP page. That JSP page holds the information to connect to a database. When Dreamweaver MX needs that connection information, Dreamweaver MX inserts an include directive to that database connection JSP page into every JSP page that will connect to a database. An example of the include directive is shown in Listing 12.5
Listing 12.5: INCLUDEDIRECTIVE.JSP
<%@ page contentType="text/html; charset=iso-8859-1" language="java" import="java.sql.*" errorPage="" %> <%@ include file="Connections/db_connection.jsp" %> <html> <head> <title>Include Directive Example</title> < meta http-equiv="Content-Type" content="text/html; charset=iso-8859-1"> </head> <body> This example includes the database connection JSP file (db_connection.jsp) in the directory Connections. </body> </html>
You can include a file in a JSP page using two methods—the include directive and the jsp:include element. Although both methods function similarly, the timing and result is different.
<%@ include file="Connections/db_connection.jsp" %>
The include directive takes in the target file when the server begins to translate the JSP code. Once the calling JSP script page is compiled into a scriptlet, modifying the include file will have no effect on the compiled scriptlet until you force a recompile. Methods of forced recompile vary from server to server, but one sure- fire method is to restart the web server. This include method is useful for dynamic content, such as JSP code.
<jsp:include page="dsp_header.html" flush="true" />
The jsp:include element includes the target file at page request time. Since the included page is taken in each time the calling page is requested, any change you apply to the include file is immediately seen in the calling file. This method is useful for static information such as headers, footers, graphics, and so on.
As you can see in Listing 12.5, the include element references a db_connection.jsp file. This file is generated by Dreamweaver MX and contains code to connect your servlets to a database. We'll cover database connections more in Chapter 10.
The TagLib Directive
We've already mentioned that JSP provides a standard set of tags to help you develop web applications. JSP also let you create your own set of tags. To use custom tags in your JSP page, you must load your custom tag library into a JSP page. The TagLib directive specifies the tag library to load. The TagLib directive accomplishes three things:
-
Specifies that the current JSP page uses an extended tag library
-
References a special JAR file that defines the tags and the operations of the new tag library. A JAR file is a collection of files that compose a Java application.
-
Defines a special tag prefix to uniquely identify the new tagsThere are two TagLib attributes and both are required—URI (Uniform Resource Identifier) and PREFIX. The URI attribute sets the path to the Tag Library Descriptor, which defines the tag library. The PREFIX attribute sets the prefix to uniquely identify the new library tags. Listing 12.6 shows an example of the TagLib directive and calls to tags defined in the custom tag library shipped with Macromedia JRun. Figure 12.4 shows the result.
Listing 12.6: TAGLIB.JSP

<%@ taglib uri="jruntags" prefix="jrun" %> <html> <head> <title>TagLib Example</title> <meta http-equiv="Content-Type" content="text/html; charset=iso-8859-1"> </head> <body> This example includes the my_taglib tag library (my_taglib.jar) in the directory taglib. <jrun:form name="category" action="category.jsp"> Enter a new category: <jrun:input name="Category" type="category"/> <input type="submit" value="Submit"/> </body> </html>
To properly use custom tags in Dreamweaver MX, you must import your JSP custom tag library into Dreamweaver MX. To do so, follow these steps:
-
Open a JSP script page.
-
Choose Edit ® Tag Libraries to open the Tag Library Editor.
-
From the menu, choose JSP, and then select Import From File (*.tld, *.jar, *.zip), Import Jrun Server Tags From Folder, or Import From Server (web.xml).
-
Dreamweaver MX asks you to supply a URI and a PREFIX for the imported custom tags.
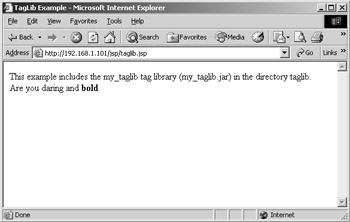
Figure 12.4: Viewing the output from taglib.jsp in Internet Explorer -
|
|
EAN: 2147483647
Pages: 214