About the Layers Palette
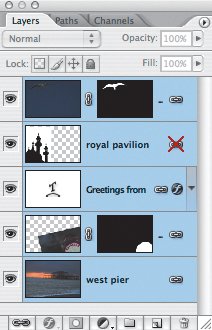
| Mission Control is the Layers palette, where you can show and hide layers, create new layers, and work with groups of layers. The Layers palette menu contains additional commands and options. Choose Palette Options to change the size of the layer thumbnail as well as how that thumbnail is displayed. If you have lots of layers, you might consider turning off thumbnails to improve performance and save monitor space, relying on the layer names to identify each layer. Entire Document displays the contents of the entire document; Layer Bounds shows only the thumbnail to the object's pixels on the layer. Figure 3.02. A layered composition (example A), and its associated Layers palette (example B).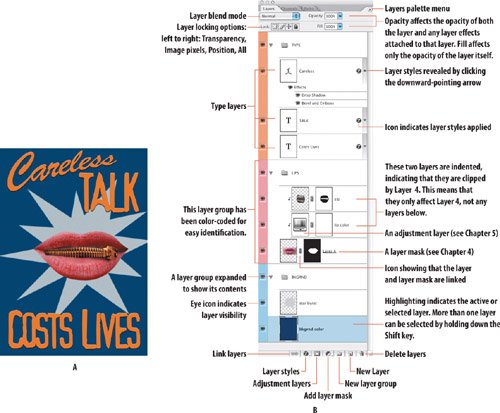 Figure 3.03. The Layer palette menu (example A) and Palette options (example B). Note the layer groups can be color-coded to roughly correspond with the color of the layer content (example C).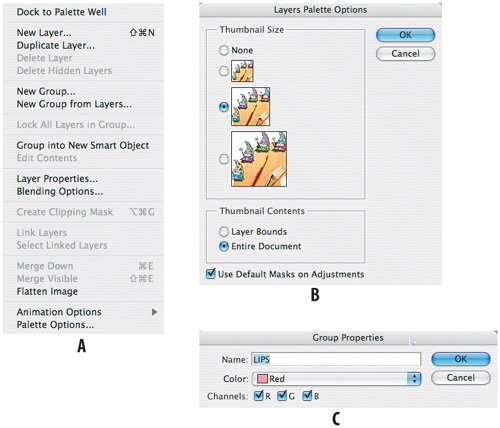 Selecting and Moving LayersTo select a layer, click on its thumbnail. This highlights its name and causes it to appear in the title bar of the document window. The more layers you have the more you need to be mindful of managing those layers, which is not a big deal, but it's common to get confused about which layer you have selected. So if you're not getting the results you expect, take a step back and check the Layers palette to make sure you're on the correct layer. To change the layer order, drag the layer thumbnail up or down in the Layers palette. Alternatively, use the Arrange options under the Layer menu to bring a layer to the top or send it to the bottom of a layer stack, or move it one level up or down, or reverse the layer stacking order. Figure 3.04. Temporarily unlinking a layer by Shift-clicking its linking icon. Some tasks, like painting or applying filters, can only be applied to one layer at a time. However, transformations like moving, rotating, scaling, or applying styles from the Styles palette, can be applied to multiple layers at once. To select multiple layers, select the bottommost layer and then Shift-click to select the topmost layer; or to select noncontiguous layers, Command/Ctrl-click their thumbnails. As well as being able to select multiple layers, you can also link layers by selecting multiple layers and then clicking the link icon at the bottom of the Layers palette. The difference is that linked layers stay linked when you change the selection in the Layers palette. Linking layers maintains the relationship between the layers so that if you transform one layer the other layers that are linked to it are similarly transformed. Because you can Shift-click to select multiple layers in CS2, linking is less necessary than before. To temporarily unlink one layer from the rest, Shift-click its link icon to the right of the layer thumbnail and a red X appears on top of layer's link icon. To relink the layer to the others, Shift-click on the red X and it disappears, leaving the link icon intact. In a multilayered document it's often convenient to select layers with the Move tool, rather than hunting and pecking on the Layers palette. If you have selected Auto Select Layer (or Auto Select Group) in the Options bar, you can click in the document on the layer content you want to select and the layer containing pixels under the cursor is selected. Because it's easy to forget you have Auto Select checked and mistakenly move layers around, I prefer to leave this unchecked and instead Command/Ctrl-click with the Move tool on the image to get the same result. When using the Move tool you can also Ctrl/Right-click on your image to access a contextual menu of all the layers below the position of your cursor. Figure 3.05. The Auto Select layer option for the Move tool. Figure 3.06. Ctrl-clicking or right-clicking on the image brings up a menu of layers beneath the pointer.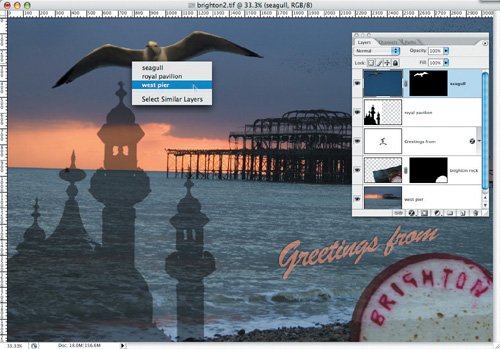 To select everything on a particular layer, Command/Ctrl-click on the layer thumbnail. As you Command/Ctrl-click, hold down the Shift key to add to an active selection or the Option/Alt key to subtract from an active selection. If the layer has a layer mask attached to it, Command/Ctrl-click the layer mask thumbnail instead. Figure 3.07. Load a layer's pixels as a selection by Command/Ctrl-clicking the layer thumbnail, or if there is a layer mask attached to the layer, by Command/Ctrl-clicking the layer mask thumbnail.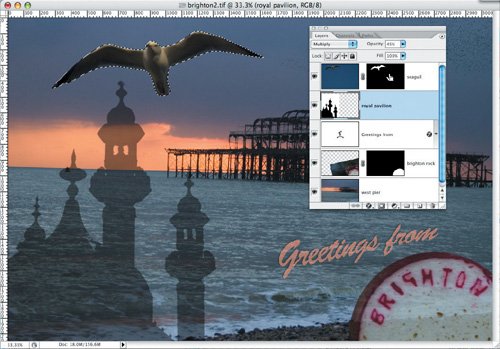 Use the Move tool to reposition selected layers in the composition. For incremental moves use the arrow keys to nudge the objects by 1 pixel, or by 10 pixels if you hold down the Shift key. Note that if you have a selection active, only that part will move. Showing and Hiding LayersYou can turn layers on and off to find out what content is on what layer and also to evaluate how a particular composition looks with or without a given layer. Click the Eye icon next to a layer, the layer group, or layer effect to show or hide its content. If you want to display just that layer or group, Option/Alt-click the Eye icon. Or you can drag through the Eye column to change the visibility of multiple items in the Layers palette. A layer prints only if it is visible. If a layer is within a group, click the triangle to the left of the Folder icon to expand the group. Option/Alt-click the triangle to open or close a group and the groups nested within it. Adding Layers to Your DocumentThere are a variety of ways to create layers:
Figure 3.08. Making new layers from an active selection (examples A and B). Layer Via Copy copies your active selection to a new layer (example C). Layer Via Cut makes a new layer of your selection, leaving a hole on the original layer filled with transparency or the background color if the layer you are cutting from is a Background layer (example D).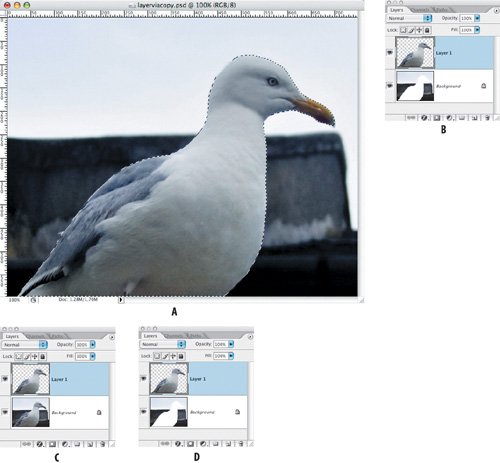 |
EAN: 2147483647
Pages: 93
