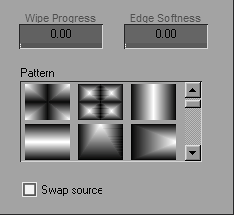
| To help you visualize what the Transition Editor can do and how cool keyframes are, the following sections show you how the basic concepts in the chapter actually work with a Realtime transition and a Classic transition. RT 2D transition The 2D and 3D transitions and their cousins, the 2D/3D filters, are probably the most used effects in NLE. Their effectiveness and lack of subtely is open to question and at the mercy of what happens to be in vogue at any one time, but there is no denying that they are great fun to play with. The video clips used in the following example can be downloaded from www.peachpit.com/ liquid6vqp but you can also use your own clips to complete this task. First you need to create sufficient handles on these clips to prepare them to be inserted, then you can begin working with the editor. To prepare the clips 1. | Send the first clip (Entering car; if you have downloaded the sample clips) to the Source Viewer, and place a mark-out point just after the door slams shut, about two seconds before the end (Figure 8.53). This creates a handle at the end of this clip one second in duration.
Figure 8.53. Creating a handle by inserting a mark-out point in the Source Viewer. 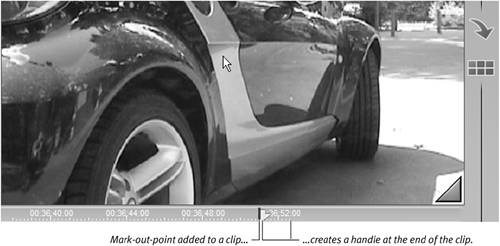
| 2. | Send the clip to the Timeline using the Insert Source into Master button  . .
| 3. | Send the second clip (Retreat) to the Source Viewer and add a mark-in point a few seconds from the start of the clip (Figure 8.54). This creates a handle at the start of this clip a few seconds in duration.
Figure 8.54. Creating a handle by adding a mark-in point in the Source Viewer. 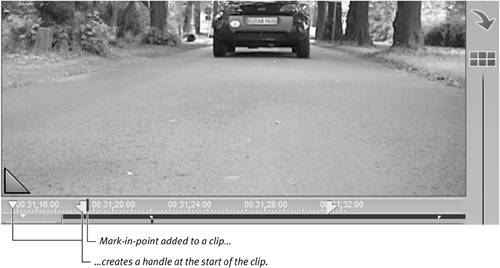
| 4. | Send this clip to the Timeline so that it adjoins the first clip (Figure 8.55).
Figure 8.55. Both clips on the Timeline. They overlap each other using the handles created in steps 1, 2, and 3 but these handles can't be seen on a single-track edit system. 
|
 Tip Tip
To add the 2D transition 1. | Select the Lib tab from the Project Browser.
| 2. | Open the Realtime Transitions FX folder by clicking on it once. Locate the Editors rack and click on this so the Editors are displayed in the right pane of the Project Browser.
| 3. | Drag and drop the 2D Editor GPU to the point where the two clips meet.
|
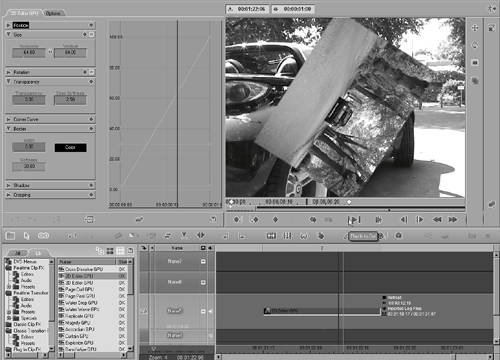
To edit the transition 1. | Open the 2D Editor GPU by double-clicking the actual transition that should now be sitting on the line between the two clips (Figure 8.56).
Figure 8.56. The default effect for the 2D editor GPU. 
The 2D Transition Editor comes with a built-in preset that brings in the incoming clip with a zoom and a rotation effect. Although you like the zoom effect, suppose you decide you don't want the rotation.
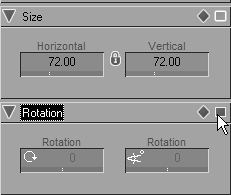
| 2. | Turn rotation off by clicking the Activate button in the Rotation text area (Figure 8.57).
Figure 8.57. You toggle rotation off by clicking the Activate/Deactivate toggle. 
Now the clip plays just the zoom effect. But what you really want is for the clip to stop at about 50 percent of its actual size around a third of the way through the transition.
| 3. | To do this, scrub the Timeline until the cursor is about a third of the way through the transition.
| 4. | Then type the numerical value "50" into the horizontal size box (Figure 8.58).
Figure 8.58. Directly entering a numerical value. 
| 5. | Press the Tab key.
Once you do, this value is applied to both the horizontal and vertical boxes (because they are locked together with the padlock in the middle) and then a keyframe is created that holds this value.
Now the clip zooms in much faster, but you decide that want it to hold the zoom at 50 percent of its total size and stay that way until the transition is two thirds of the way through.
| 6. | Using the Next Keyframe button, you advance the timeline cursor until it reaches the keyframe you created in steps 4 and 5. This should be the second keyframe on the edit window Timeline. The first is the start keyframe at the very beginning. The third is the end keyframe at the very end.
| 7. | Click the Copy Keyframe button  . .
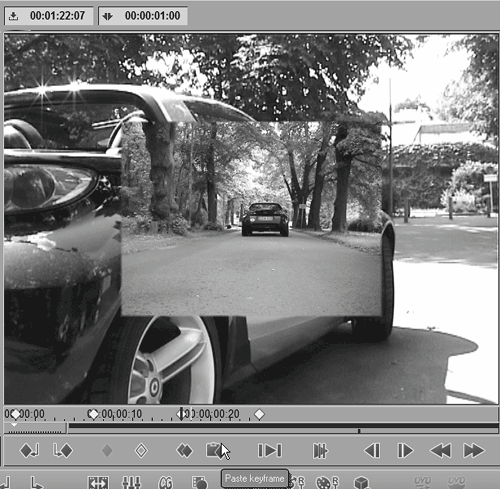
| 8. | Move the timeline cursor to about two thirds of the way through the transition, and click the Paste Keyframe  button to create a copy of the keyframe at this point (Figure 8.59). button to create a copy of the keyframe at this point (Figure 8.59).
Figure 8.59. Adding another keyframe via copy and paste. 
This now creates a transition that zooms in quickly to 50 percent of its total size, stays like that for a second, and then zooms to 100 percent of its total size when it reaches the original keyframe at the end of the Timeline.
In this example, I've set it up so the first zoom finishes with the sound of the door closing to make it feel more dramatic. Combining effects with the natural audio on a video clip is always more effective.
This transition still seems a little flat and you decide you want to add a border to make it look a little livelier.
|
To add a border 1. | Using the Next Keyframe button, move the timeline cursor until it reaches the last frame in the transition.
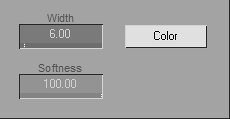
| 2. | Open the Border Parameter settings and create a yellow border with a width of 6 and an edge softness of 100 (Figure 8.60).
Figure 8.60. Adjusting the border color and parameters. 
| 3. | Because you want this yellow border to be present throughout the entire transition, drag the Keyframe symbol from the Border Text area into the preview window so that these values are applied throughout the transition (Figure 8.61).
Figure 8.61. Applying the border to the whole transition. 
You're almost happy, but you decide you really want this to be a little more subtle at the beginning. You can create this effect by adding a fade to the incoming clip as it zooms toward its first keyframe.
|
To add a fade using the transparency setting 1. | Using the Previous Keyframe button, move the cursor to the first keyframe on the Timeline.
| 2. | Open the Transparency parameter settings and set the Transparency to 100.
This makes the clip almost entirely see-through (Figure 8.62).
Figure 8.62. Setting the transparency to 100 makes it see-through. 
| 3. | Move the cursor to the second keyframe and enter the numerical value "0" into the Transparency Parameter box.
The incoming clip gradually becomes more solid during the first zoom, and then it is 100-percent solid for the rest of the transition (Figure 8.63).
Figure 8.63. The finished result. Each picture here represents the keyframes 1 to 4 from left to right. 
|
If you play back the transition now, it looks promising, although you're probably going to have to do a little more tweaking to make it look a whole lot better. Perhaps you can do so by using the position parameters to make the incoming clip float around the screen before it zooms to 100 percent. Or perhaps you can add a shadow to accentuate the border. As I've said before, you must experiment with Liquid Edition if you ever want to get the best from it. Classic 2D transition The tasks in this section show the same two clips used in the "RT 2D transition" section: Entering car and Retreat. But with the Classic 2D, you also have the option of using Keyframe Interpolation to alter the rate at which your keyframes occur. First you need to create sufficient handles on your clips to prepare them for insertion. Then you can begin working with the editor. You prepare these the same way I described in the "To prepare the clips" task in the "RT 2D transition" section. If you have not read this, do so now and then return here once you've prepared your clips. To apply the Classic 2D Editor 1. | After you place the two prepared clips on the Timeline, select the Lib tab from the Project Browser.
| 2. | Open the Classic Transitions FX folder and then click once on the Editors Rack to display the list of editors in the right pane.
| 3. | Drag and drop the 2D Editor to the point where the two clips meet.
|
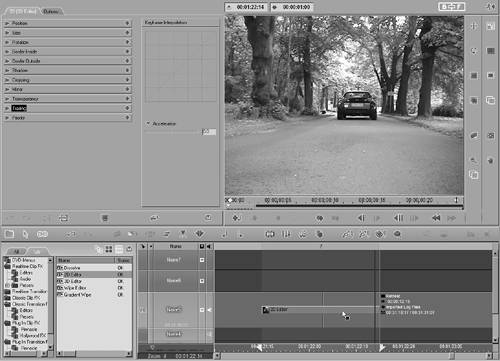
To open the 2D editor Open the 2D editor by double-clicking the actual transition that should now be sitting on the line between the two clips (Figure 8.64). Figure 8.64. The 2D Classic Editora non-Realtime transition. 
Unlike its RT cousin, the 2D Classic Transition Editor has no preset effect built in, so you must build your transitions from scratch.
To create a 2D transition 1. | Using the mouse, move the cursor to the first frame of the Timeline and open the Size Parameter box. Alter the size in one of the following ways:
- Enter the numerical value in one of the boxes and press the Tab key to apply it.
- Drag the sliders to the size you require (Figure 8.65).
Figure 8.65. Dragging the sliders. 
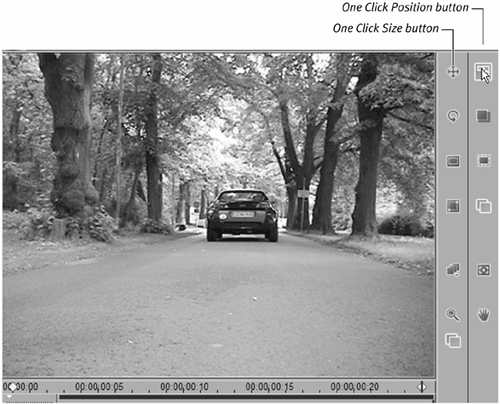
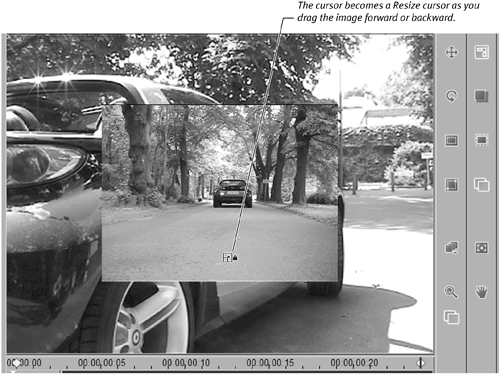
- Use the One Click Size button found to the right of the preview window (Figure 8.66). To use this One Click Size button, select it, then with the mouse cursor inside the preview area, click and hold the left mouse button while pushing the mouse forward to expand the image and pulling it back to reduce the image (Figure 8.67).
Figure 8.66. The one click adjust buttons provide a helpful shortcut. 
Figure 8.67. The One Click Size button in action. 
| 2. | To make the Retreat clip zoom from nothing, drag the mouse back until the size is 0.
Now the clip plays the zoom effect from start to finish. But what you really want is the clip to stop at about 50 percent of its actual size at around a third of the way through the transition.
| 3. | To do this, scrub the Timeline until the cursor is at about a third of the way through the transition, and then type a numerical value of "50" into the width size box.
| 4. | Press the Tab key and this value is applied to both the width and height boxes because they are locked together using the padlock in the middle.
Now the clip looks like the first stages of the example you created in the RT section of this chapter. You can go on to finish building your effect so that it resembles the RT version in every detail, but before you do that, you decide you want to alter the speed at which the zooms occurs between the first and second keyframe. This is done using the middle graph area labeled "Keyframe Interpolation."
|
To use Keyframe Interpolation 1. | Do one of the following:
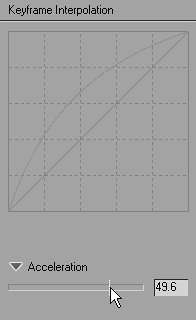
- Return the cursor to the first keyframe and drag the acceleration line in the Keyframe Interpolation over until the number box reads 50 (Figure 8.68).
Figure 8.68. Adjusting the Keyframe Interpolation to 50. 
- Double-click inside this box and enter the number "50" with the keyboard.
Adding this interpolation causes the zoom to rush in much more dramatically, which causes it to stutter slightly as it reaches the next keyframe.
| 2. | To soften this stutter, add a second Keyframe Interpolation to the next keyframe and reduce the acceleration to 10.
This cushions the slowdown of the interpolation so that it doesn't when it returns to normal speed.
| 3. | Because this is a Classic effect, you must exit the editor and wait for it to finish rendering before you can see the final results.
|
To view the transition after rendering 1. | Once it has finished rendering, set a mark-in and mark-out point on the Timeline on either side of the transition.
| 2. | Then play back the transition by clicking the Play from Mark-In to Mark-Out button  . .
|
The result should be an incoming clip that zooms quickly into view until it reaches the first keyframe. At this point, it slows down, then gradually speeds up until it reaches the default speed at the last keyframe. If you wish, you can now continue to build this effect using the instruction found in the "RT 2D transition" section of this chapter.  Tips Tips
Remember that the parameters of the Transition Editor always affect the incoming clip unless the transition is reversed using the Revert button. If you add an acceleration of 100 to the first keyframe, the effect happens immediately. The One Click Size button used in step 1 of the "To create a 2D transition" task is available in both Realtime and Classic effects. Using this as a shortcut can contribute greatly to a smooth workflow. Experimentation is the key for this effect because you can customize many simple transitions to look highly original just by using this underused parameter.
Pan and Scan Panning and scanning oversized clips is another action only a Classic effect can perform. Although it is possible to do this in a transition, the effect can be limited; this type of FX is usually used with the 2D Classic filter. For more details on this, see Chapter 9. |
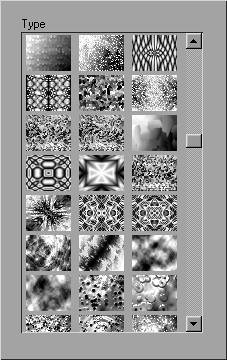
Gradient Wipe The gradient wipe transitions are something a little special in Liquid Edition and they deserve a special mention. Previously known as the Spice Rack, they're a collection of organic transitions you can use in special effects and introduction sequences. Version 6 offers both Realtime and Classic versions. Although the Realtime version (Figure 8.69) has the practicality of nonrendering on its side, the Classic version (Figure 8.70) has a much better range of presets. Figure 8.69. The limited range of Realtime gradient wipes. 
Figure 8.70. Just a small selection of the more organic range of non-Realtime gradient wipes. 
Once more, experimentation is the key to realizing the full potential of this range of truly unique transitions. |
|


 Tip
Tip