| In Chapter 2, you saw how to copy selected files or folders between the local and remote sites in the Files panel using the Get file or Put file buttons . Get and Put works fine when you are the only person working on a site, but you don't want to use them when you are working on a site with other members of a team. In that case, you would like to prevent one person from accidentally undoing or overwriting changes made by another member of the team when the page is transferred back to the remote site. When you are working with other people on a Web site, you will come to rely on Dreamweaver's ability to keep track of and manage who is working on a file. Known as Check In/Check Out, this feature prevents more than one team member from working on a particular file at a time. The feature also lets all members of the team know who is currently working on what file. Check In/Check Out replaces the use of Get and Put for sites that have Check In/Check Out enabled. When you want to work on a file, you check it out, and when you are done working on the file and want to send it back to the remote server, you check it in. Dreamweaver shows the status of files in the Files panel. Files that are checked out to you appear with a green checkmark next to them, and files that are checked out by others appear with a red checkmark next to them. Files that are read-only (because they are files that Dreamweaver can't edit, or because the last time Dreamweaver connected to the remote server and checked their status they were checked out) appear with a padlock icon ( Figure 16.12 ). 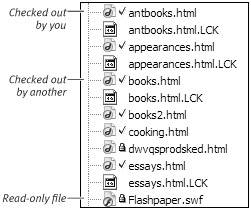
In order to get the Check In/Check Out system to work properly, there are two cardinal rules all members of the Web team must follow: -
All members of the team must enable Check In/Check Out and Design Notes in their site definitions. -
All members of the team must always use Dreamweaver or Contribute (and no other tools, such as an FTP program) to transfer files to and from the remote Web server.  Tips Tips -
If Check In/Check Out is enabled for your site and you use the Get file or Put file button in the Files panel, rather than the Check In or Check Out button, Dreamweaver will transfer read-only versions of the file to and from the remote server. -
When any team member checks out a file, Dreamweaver places a small text file on the remote site with the name of the checked out file plus the extension .LCK . You can see some of these files in Figure 16.12. Dreamweaver uses this file to store the Check Out name and e-mail address of the person who is using the file. When the file is checked back in, Dreamweaver automatically deletes the .LCK file.
To enable Check In/Check Out for your site: | 1. | Choose Site > Manage Sites. The Manage Sites dialog appears ( Figure 16.13 ). 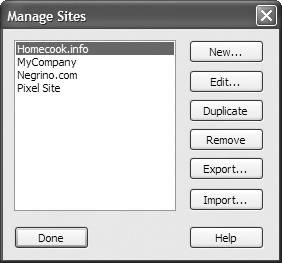 | | 2. | In the list of sites, click to select the site for which you want to enable Check In/Check Out and click Edit.
The Site Definition dialog appears, set to the Advanced tab.
| | 3. | In the Category list on the left side of the dialog, click the Remote Info category. The dialog changes to show the Remote Info pane ( Figure 16.14 ). 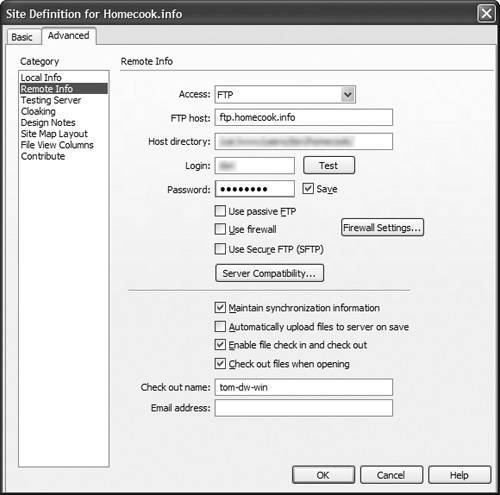 | | 4. | Select the check box next to "Enable file check in and check out."
| | 5. | Select the check box next to "Check out files when opening."
| | 6. | Enter a check out name.
Because you may be working on a page using different programs or different systems, it's a good idea to use a name that describes the program and/or system you're working on. For example, in Figure 16.14, the check out name indicates "Tom, using Dreamweaver, on Windows." The check out name tom-ct-mac would indicate "Tom, using Contribute on Macintosh."
| | 7. | (Optional but recommended) Enter your email address in the Email address text box.
This allows coworkers to easily send you email if they need to communicate with you about the status of a file.
| | 8. | Click OK.
The Manage Sites dialog reappears.
| | 9. | Click Done.
| Tip -
If you make a mistake and check out the wrong file, you can revert to the version of the file on the remote server, even if you have modified and saved the checked out version on your machine. Just right-click on the checked out file in the Files panel, then choose Undo Check Out from the resulting shortcut menu. Dreamweaver removes your check out lock from the remote server, and the local copy of the file becomes read-only.
 |