Layering Graphics

 < Day Day Up > 

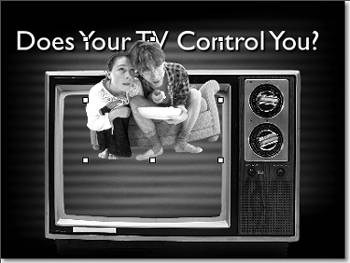
When you place objects on slides, you can think of each object as being in its own layer on the slide. For example, if you have five objects on a slide, you have six layers: one layer for each object, plus the slide background, which is defined in the master slide. You can move each of these layers forward and back. The exception is the slide background, the layer furthest back, which can't be brought forward. The only way that you can layer slide objects with the background is if you select the "Allow objects on slide to layer with master" check box for the slide's master slide in the Master Slide Inspector (see Chapter 13 for more details); then you can move slide objects behind a layer on the background. This is how Keynote's photo cutouts work.

Any text boxes that are part of the master slide, such as the title box and the body box (with or without bulleted text), are part of the background layer, but you can still layer other objects behind these text boxes, whether or not the "Allow objects on slide to layer with master" option is set for that master slide. Free text boxes that you create on presentation slides can be layered like any other object. Free text boxes placed on master slides are treated like graphic objects and can't be layered with objects on presentation slides.

To layer slide objects

1.
Select a slide object that you want to move forward or backward in the slide layers ( Figure 5.27 ).

Figure 5.27. The picture of the hapless couple is in front of the title text and the image of the television.


2.
To move the object back in the layers, choose Arrange > Send Backward, or press . This moves the object one layer back.

or

To move the object forward in the layers, choose Arrange > Bring Forward, or press . This moves the object one layer forward.

or

To send the object to the back of the layers, choose Arrange > Send to Back, or press , or click the Back button on the toolbar.

or

To bring the object to the front, choose Arrange > Bring to Front, or press , or click the Front button on the toolbar.

The object moves as you command.

3.
Drag the still-selected object to position it as you want with the other layers ( Figure 5.28 ).

Figure 5.28. After sending the image backward, the benighted couch potatoes appear to be trapped inside the television.


You can also resize the object to get a more pleasing effect.

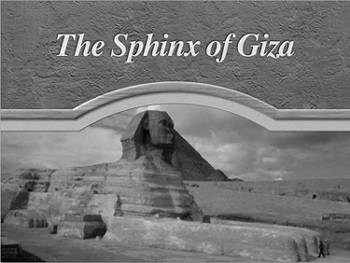
To place photos on slides with photo cutouts

1.
Click New in the toolbar to create a new slide.

2.
From the Masters pop-up menu in the toolbar, choose a master with a photo cutout .

The master slide is applied to the presentation slide ( Figure 5.29 ).

Figure 5.29. This slide contains only a title and a large photo cutout.


3.
If the photo is in your iPhoto library, click the Media button on the toolbar to open the Media browser, then drag the image you want from the browser into the photo cutout on the slide.

or

If the photo is a file on your hard disk, display it in the Finder, then drag it into the photo cutout on the slide.

4.
If necessary, resize the picture so that it will fit the photo cutout better ( Figure 5.30 ).

Figure 5.30. The picture appears on the slide, but you'll probably have to resize it and reposition it, as this picture needed.


5.
If necessary, drag the image so that it appears in a pleasing fashion behind the photo cutout.

Tip

  • You don't have to use photo cutouts just for photos. Try placing diagrams, charts , or even free text boxes in the cutout for greater emphasis.


 < Day Day Up > 


Keynote 2 for Mac OS X. Visual QuickStart Guide
ISBN: 321197755
EAN: N/A
Year: 2005
Pages: 179

flylib.com © 2008-2017.
If you may any questions please contact us: flylib@qtcs.net