In order to precisely place objects on the Slide Canvas, Keynote provides two tools: rulers and alignment guides. Rulers appear at the top and left edges of the Slide Canvas, and you can put guides anywhere on the slide.
Unlike the alignment guides on master slides, which appear only when the center or edge of an object you are moving aligns with the center or edge of another object, alignment guides that you place on a presentation slide are always visible (though they do not appear when you play the presentation).
| 1. | Choose View > Show Rulers, or press.  . The rulers appear in the Slide Canvas ( Figure 5.22 ).  |
| 2. | Press again to hide the rulers. |
| 1. | Choose Keynote > Preferences.
The Preferences window appears.
|
| 2. | Click the Rulers tab.
The Rulers Preferences appear.
|
| 3. | In the Ruler Units section of the window ( Figure 5.23 ), choose a unit from the pop-up menu. 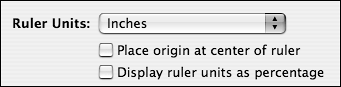 |
| 4. | (Optional) Check "Place origin at center of ruler" if you want the zero point at the ruler's center, rather than at the upper-left corner of the slide ( Figure 5.24 ). 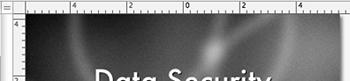 This can make it easier to place objects equal distances from the horizontal or vertical centers of the slide, especially in conjunction with alignment guides. |
| 5. | (Optional) Check "Display ruler units as percentage" if you want the units to show as a percentage of the slide's dimensions. This overrides the Ruler Units setting.
|
| 1. | Choose View > Show Rulers, or press . The rulers appear in the Slide Canvas. |
| 2. | In the Slide Navigator, select the slide for which you want to set alignment guides.
|
| 3. | To create a horizontal alignment guide, click in the ruler at the top of the Slide Canvas. The pointer turns into the alignment guide cursor ( Figure 5.25 ).  |
| 4. | Drag down into the Slide Canvas.
A yellow alignment guide, the width of the slide, appears.
|
| 5. | Continue dragging, and drag the guide to where you want it on the Slide Canvas. As you drag, a position tag appears with the guide to help you precisely place the guide ( Figure 5.26 ).  |
| 6. | To create a vertical alignment guide, click in the ruler at the left side of the Slide Canvas.
The pointer turns into the alignment guide cursor.
|
| 7. | Drag to the right, into the Slide Canvas.
A yellow alignment guide, the height of the slide, appears.
|
| 8. | Drag the guide to where you want it on the Slide Canvas.
The position tag will appear as you drag the guide.
|
 Tip
Tip