Creating Sliders
Creating Sliders
At this point, we could move on to the next chapter, but you probably need more practice with everything we've learned so far before I start bombarding you with new material. As a result, I've developed a second game in this chapter to reinforce everything we've learned up to this point. The game type is similar to Match 'Em Up , but the rules and implementation are different. The thing that both games have in common is that we're going to be using arrays to contain the data. Our second game in this chapter is called Sliders .
The Idea
You might have seen little plastic tile games in which a set of tiles is in a block with a big picture drawn on the tiles. One tile is missing, which allows you to slide the tiles around one at a time to mix them up. After the tiles are fully mixed up, the object is to move them back and complete the picture.
The idea behind Sliders is to make a sliding tile game like the little plastic ones I've seen. I want it to have a Reset button to scramble the tiles, a Solve button to temporarily show the user a solved version of the tiles so that he can see the picture he's trying to make, and a score area so that the user can see how many moves he's made.
The game should shuffle the tiles when it begins. When the user clicks on a tile adjacent to the missing one, the tile should move from its current position into the blank spot. That obviously puts the blank spot where the active tile just moved from.
The game seems simple enough, and I'm sure we can develop it with the tools we have so far. It's time to start organizing the movie for scripting.
Creating the Library Assets
Now that I know what I'm looking for, I can send another e-mail to Rachel and ask for a piece of art. I wanted something simple that the player could easily identify even when the tiles were scrambled. Figure 5.26 shows the piece she responded with. As usual, you can find all the art assets as well as two .fla files on the CD. The file with the fully developed script is called sliders.fla and the one with no script but all the library elements is called sliders unfinished .fla.
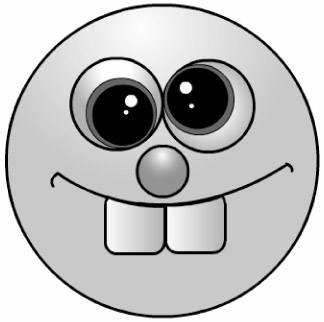
Figure 5.26: Rachel created a goofy yellow face for the sliding tile game so that it could be easily identified even when scrambled.
Creating the Tiles
It's time for me to take Rachel's art and break it into tiles. I can do this in several ways, including the use of ActionScript. But rather than muck up our code with a bunch of logic that deals with breaking our art into tiles, I would prefer to break it apart before importing it into Flash. Then we can simply refer to our tiles individually without doing any work to make them in Flash.
By using a raster art-editing program such as Adobe Photoshop, I break the art into 16 different pieces, one for each tile. Sixteen tiles should be enough to keep someone challenged without making the game too hard. Each tile I create I name , assigning a number indicating row (1 “4) followed by a number indicating column (1 “4). Each tile is saved in bitmap format and imported into Flash.
For each tile, I first create a movie clip to import it into. I name each clip identically to the bitmap image that is going to go into it. I put all the bitmaps into one folder and all my tile movie clips into another.
Creating the Buttons
In Chapter 4 when we did our buttons, I said we would be reusing them, and I wasn't kidding. If you open more than one .fla file in Flash at the same time, you can open multiple libraries and have them all be available to each movie. While the sliders .fla is open, open the finishedbutton.fla from Chapter 4 on the CD. Open its library and then use the Window pull-down menu to change back to the sliders movie.
You should see the button symbol in your finishedbutton library, which is now attached to your sliders library as in Figure 5.27.
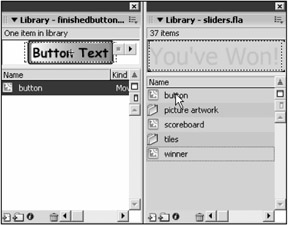
Figure 5.27: With multiple movies open, you can drag symbols between libraries to make copies of old symbols in your new movie's library.
| Tip | Another way to open a file's library to use its symbols is to select File, Open External Library from the Import submenu. That way, you don't have to switch movies, open the library, and switch back again. |
If you drag the button symbol from the finishedbutton library into your sliders library, it will be copied for you. You can then use it in Sliders and change it to match the rest of the art in that game, without affecting the original button symbol from the finishedbutton file.
At this point, I go in and change the colors of the button states to better match Sliders . I'm not going to be using the up state or the active state. This button will be like one of the old ones. To allow Flash to do state changing for me, because it's an option using only the up , over , and down states, I remove the active and firstup states, change the remaining labels from up to _up, down to _down, and over to _over. Now Flash can do our button state changing automatically as soon as we define at least one button handler. You can see this new button's timeline in Figure 5.28.
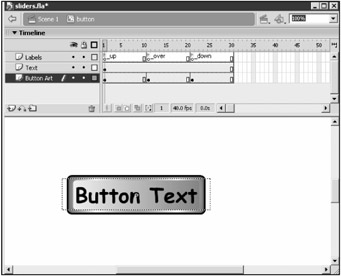
Figure 5.28: The Chapter 5 button has been stripped down to be used in sliders.
Creating the Scoreboard
I want to be able to count the number of moves the player makes. To do this, I create a symbol called scoreboard and inside it, I put two text fields. The first, a static one, I put the string "Moves" inside, giving me a label for my second text field. This one is dynamic and I fill in the Var field with _root.score . I export this symbol for ActionScript, and that's all there is to it. Later I'll use the variable score to count the number of moves, which will be displayed in my dynamic text field. Figure 5.29 shows what my scoreboard looked like while I was creating it.
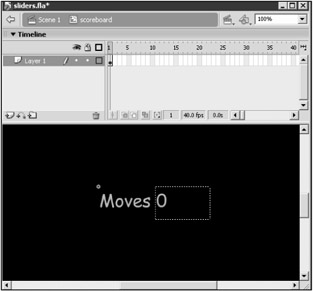
Figure 5.29: A scoreboard is easy to implement. Just create the text fields and tie the dynamic one's Var field to the variable of your choice.
That's really all there is to it. I now have all my art assets ready to go and I can go about considering my script organization.
Implementation
With Sliders , I decided to go with dynamic instantiation of everything again. That means we're going to have a blank stage and create everything with script. We need to create several stage objects right off the bat, including both buttons, the scoreboard, and all 16 tiles. The algorithm for the game is trivial and flows like this:
-
Create the buttons, scoreboard, and 16 tiles.
-
Shuffle the tiles and set the score to 0.
-
If the player clicks a tile adjacent to the empty tile, swap the two, check for a solved puzzle, and increment the score.
-
If the player clicks the Reset button, go to step 2.
-
If the player clicks the Solve button, temporarily move all tiles to their solution location. When the player releases the Solve button, return the tiles to their previous position.
Now that we have an outline of our algorithm, we can begin the implementation.
Setting Up the Tiles
One of the most difficult things to decide is how to organize the tile data. We're obviously planning to keep the tiles in a 2D array, but we need to record both their current position and their indented position. That way, we can compare the two to test for a solved puzzle.
I've decided to place each tile in the array according to the position it will be in when the puzzle is solved. Then I will attach a pair of variables to each tile that will record the position of the tile. That way, when the variables that indicate the tile's position match its position in the array, the tile is in the correct location. If all tiles are in their correct locations, the game has been solved.
Before we create objects, I want to organize the depths at which our movie clips will occur. Because we have a finite number of instances on the stage, we can simply give each object a preset depth at which it will be created. The following script sets up depth variables for when we attach things. It goes at the top of the main timeline script:
scoreboard_depth=2; resetbutton_depth=3; solutionbutton_depth=4; tile_depth=1000; winner_depth=999999;
Notice that my buttons and scoreboard will occupy depths 2 “4. I set the tile depth to be 1,000, and because I'll be incrementing this variable each time I create a new tile, my tiles will be at depths 1,000 “1,015. Finally, winner_depth will be used to place a small message on the screen when the player solves the puzzle. We want that message to be on top of anything we add to our game, so it gets a large depth of 999,999.
I'm going to need a couple of spacing variables that I can use to stagger the tiles when I'm trying to place them about the stage. In the previous game, we did the same thing, and I'll use identical variable names this time. This script goes up at the top with the depth script:
h_space = (445/4)+1 v_space = (400/4)+1;
I got these numbers from playing around with the spacing to get the tiles to look right. The division by 4 occurs because the space is generated from the total size of the board divided by the number of rows and columns , which in this game is 4.
Now we're ready to get started with our tiles. First we need the arrays to hold them. The following script does that:
tile_array = new Array(); for(i=0;i<4;++i) tile_array[i]=new Array();
Now we can create a nested for loop to create and initialize each of our tiles:
for(i=0;i<4;++i){ for(j=0;j<4;++j){ //more code here } } Before we add the code inside that double loop, we need to think about something. We are actually only going to place 15 tiles on the stage. The blank tile will be missing. That's the one that allows the other tiles to move around. We're going to have to handle that in our script. I've decided to omit the final tile that would be in the lower-right corner and record the currently blank position with a pair of variables. These two variables will be initialized at the top of the main script with the following depth variables:
blankx = 3; blanky = 3;
The values are 3 and 3 because our array will index from 0 “3 for our four rows and columns. Therefore, the tile in the lower-right corner would have an index of [3][3]. Now we're ready to add the code that goes inside our double for loop. Consider the following:
if(i!=3 j!=3){ //more code here } This tiny bit of confusing logic makes our loop skip the final iteration ”the blank tile. We can do this in other ways, including something like if(i==3 && j==3);else{/*more code*/} . I figured the preceding script would be easier to read.
Now that we have our loops working for all but the last tile, let's add the code inside the if that will create and set up each tile. Before we create the tile, we have one problem. Our loops are indexing from 0 “3, but the names of our tiles that we'll want to attach are going form 1 “4. We need a second set of indexes that is 1 greater than the loop indexes. We'll use i and j for our array index, but we'll use the new variables to create our tile with the attachMovie function. This will make sense when you see the following script:
r = i+1; c = j+1; attachMovie("tile "+r+c, "tile "+r+c, tile_depth++); tile_array[i][j]=this["tile "+r+c]; We're using the variables r and c as substitutes for i and j . Then we attach the movie and place it in its proper position in the array.
Now that we have our tile created, we need to move it:
tile_array[i][j]._y = i*v_space; tile_array[i][j]._x = j*h_space;
Notice that I'm using the v_space and h_space variables to stagger the clip positions . I would like it if the clips were a bit wider and not so tall, so the following code is used to scale them a bit:
tile_array[i][j]._height = 98; tile_array[i][j]._width = 110;
Now we need to record the current position of each tile. Remember that the array position does not change when tiles are moved; only the current position variables change. That ensures that we keep track of where the tile is with the variables and where the tile should be with the array position. The following script records the current position of each tile:
tile_array[i][j].currentx = j; tile_array[i][j].currenty = i;
If you test your movie at this point, you should see something like Figure 5.30. The tiles should be created and placed, but they are not mixed up yet.
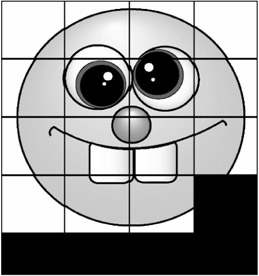
Figure 5.30: All the tiles are placed on the stage and positioned. Soon we'll scramble them.
We need to do one final thing to each tile. We want to handle the user clicking the tiles, right? Why not attach an event handler now and define it later? That's simple enough because we've been doing that for a long time. I just dream up a function name that I will define later and attach it to the event handler reference on the tile clip with the following script:
tile_array[i][j].onRelease= tile_onRelease_method;
I've named the event handler function tile_onRelease_method . We'll define that function soon. For now, that concludes the nested for loop code that creates all the tiles. At this point, we're ready to create some of the other components .
Setting Up the Buttons and Scoreboard
We've already created the scoreboard symbol, and the dynamic text field already has its Var field tied to the _root.score variable. All we need to do is create an instance and position it. The following script does just that; it should be placed under the nested for loop:
attachMovie("scoreboard"," scoreboard",scoreboard_depth); scoreboard._x=300; scoreboard._y=425; That's simple enough, so let's move on to the buttons.
The Reset Button
For this object, we need to create the instance with the following script:
attachMovie("button"," resetbutton",resetbutton_depth); The process is self-explanatory at this point, I hope. Now we need to position and size the button with the following script:
resetbutton._x=65; resetbutton._y=450; resetbutton._xscale = 50; resetbutton._yscale = 50;
Again, that's nothing we haven't done a million times already. Don't forget that we also need to stop the button from playing through all its states. That's accomplished easily with the following script:
resetbutton.stop();
Now we can set the text for the button so that it says Reset instead of Button Text like it does in the library. We've seen the code for that before, too:
resetbutton.mytext.text = "Reset";
Finally, we need to deal with any event handlers that our button needs to trap. Because the button uses only the simple states, Flash is going to do the state changes for us. All we need to do is build in any unique functionality for this particular button. In other words, we need to reset the game when this button is pressed. That calls for an onRelease handler, of course, and the following script gives it to us. Because this is the only button to get this functionality, I don't need to define the function and assign it to a reference. Instead, I'll just directly define the function under the clip's handler with the following script:
resetbutton.onRelease = function(){ shuffleTiles(); winner.removeMovieClip(); } All we need to do right now in this function is shuffle the tiles and remove the winning message. We'll handle resetting the score inside the shuffleTiles function. The winner clip will be created when the user solves the game, and it will be removed here when the user resets it. That's it for the Reset button. We're ready to move on the other button: Solve.
| Note | Even though the winner clip won't be attached the first time the onRelease function is called, Flash does the right thing. When you try to remove a clip that doesn't exist, Flash fails gracefully with no error or interruption. |
The Solve Button
First we're going to do all the same things we did the last time. We create the tile, position, scale, stop, and add text to it with the following script:
attachMovie("button"," solutionbutton",solutionbutton_depth); solutionbutton._x=200; solutionbutton._y=450; solutionbutton._xscale = 50; solutionbutton._yscale = 50; solutionbutton.stop(); solutionbutton.mytext.text = "Solve"; At this point, the button is finished other than its handlers. For the Solve button, we need functionality on both the press and release events. When the user clicks the button, each tile moves from its current location to its solution location until the user releases the button. When he does release, the tile jumps back to its presolved position. Let's do these handlers one at a time.
The Solve Button's onPress Handler
What exactly happens when the user clicks the Solve button? Well, we need to loop through all the tiles, and for each one, we change its stage position to match its place in the array. Because the tile's position in the tile array is its solved position, we will have a view of all the tiles in a solved position. The following script implements the entire handler:
solutionbutton.onPress = function(){ for(i=0;i<4;++i){ for(j=0;j<4;++j){ tile_array[i][j]._y = i * v_space; tile_array[i][j]._x = j * h_space; } } } As you can see, we have a nested for loop in the handler, and inside, each tile has its position moved to the current loop index. Of course, the v_space and h_space variables are used to spread them out based on their indexes.
Notice that we are not changing the currentx and currenty variables of the tile. When we move the tiles for real, these values will change. But because this is only a temporary change that will revert when the user releases the button, we don't want the current index position of the tile to change; we only want its stage position to change.
The Solve Button's onRelease Handler
Now that the tiles are in a solved position, we're ready to move them back. Because the tiles' currentx and currenty variables were not altered in the onPress handler, they can be used to revert the tiles. The following script implements this entire handler:
solutionbutton.onRelease = function(){ for(i=0;i<4;++i){ for(j=0;j<4;++j){ tile_array[i][j]._y = tile_array[i][j].currenty*v_space; tile_array[i][j]._x = tile_array[i][j].currentx*h_space; } } } That's simple enough; we're just iterating through the tiles and moving them back. At this point, the only other thing left to set up is the mixed-up tile positions. Let's make a call now to a function that we'll define in just a second. This line is the last piece of setup code in your main timeline:
shuffleTiles();
If you tested your movie now, you would see the scoreboard and buttons as in Figure 5.31. The Reset button wouldn't do anything because our tile shuffler routine isn't implemented yet. The Solve button would work, but because the tiles are not shuffled, it doesn't.
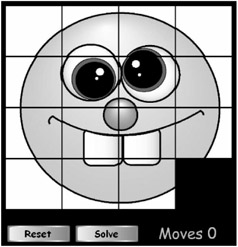
Figure 5.31: The buttons and scoreboard are in, but because we can't scramble the tiles yet, neither button does anything when clicked.
That leaves us only a few more functions to implement and we'll be ready to play our game for the first time. Let's get busy with those remaining points.
The shuffleTiles Function
We can't test our Solve button yet because our tiles are not scrambled. We're going to need to mix up the tiles, and another shuffleTiles function is just what we need. As before, we're not really concerned about efficiency in something like this because the task only happens once in a while, not every few frames . We just need an easy fix. The one problem we do have is that we can't just pick random placements for each tile. The way this game works, if you just move tiles about randomly , you can produce an unsolvable game. Instead, to shuffle the tiles, we must mix them up using only valid moves. In other words, our shuffle routine should only make moves that a player could make.
Let's get Flash to crank out about 150 random moves. If we just look where the blank tile is and randomly move an adjacent tile into it, we'll produce a random move. Do this a couple hundred times, and our tiles should be well scrambled. The following script gets us started:
function shuffleTiles(){ score=0; for(iterate=0;iterate<150;++iterate){ //more code here } } This gives us our shell. The for loop iterates 150 times, which should be more than enough. Now we need to drop the code inside that does one swap. First, we need to find a tile index adjacent to the blank one. Because the blank tile's coordinates are stored in the blankx and blanky variables, we can use the following script to find one adjacent:
changex=blankx; changey=blanky; rand_int = getRandom(-1,1); if(rand_int == 0) rand_int = -1; if(getRandom(0,1)) changex = blankx + rand_int; else changey = blanky + rand_int;
The first thing we do is grab some temporary variables, changex and changey , and assign them the values of the blank tile index. Then we create a random number between 0 and 1 and assign it to the variable rand_int . The next line has if(rand_int == 0) rand_int = -1; , which changes the value of rand_int from 0 to -1. That gives us a new rand_int variable that can be either -1 or 1.
Next is a conditional that uses getRandom(0,1) as its condition. That essentially gives us a 50 percent chance of going into the if block and a 50 percent chance of going into the else block.
If the if block is executed, the random number, rand_int , will be assigned to changex . (Note that rand_int can be -1, 0, or 1.) On the other hand, if the else block runs, it will be added to changey instead. That way one of the two will change, but not both.
This has the effect of choosing a tile adjacent to the blank tile. Of course, the random choice might be off the board. In other words, we might have just chosen a tile at index [0][4], which is not part of our array. We need a test to make sure that's not the case before we actually swap the blank space for the randomly chosen tile. The following script should take care of that:
if(changex >= 0 && changex<=3 && changey >= 0 && changey<=3){ //more code here } As you can see, this conditional checks to see whether the new random tile's index is inside the 0 “3 range of tiles on the stage. If so, we execute the block, which is given next.
To perform the swap, now that we know we have a valid swap to make, we need to change the blank position to be that of the random tile. Then we need to update the random tile to be in the blank position.
There is a big problem here, though. Consider this: If the tiles are half scrambled, then their currentx and currenty indexes (indicating their current position) will not be the same as their i and j indexes in the array. We just created some random indexes adjacent to the blank space, but if we access the array with those variables, we'll access a tile that might not be adjacent to the blank space. We must loop through the entire array looking for a tile whose currentx and currenty values match the changex and changey variables we just created randomly.
The following double loop accomplishes the task:
for(i=0;i<4;++i) for(j=0;j<4;++j) if(tile_array[i][j].currentx == changex &&  tile_array[i][j].currenty == changey) moveTile(tile_array[i][j]);
 As you can see, we're using a nested for loop to iterate through the array. Each tile we come to, we check its current position against our new random position. When we finally find the tile we're looking for, we call the moveTile function on it.
The moveTile Function
All this function has to do is swap one tile with the blank space. We don't need to check whether it's a valid move because the existing code does all that. After this method has been called, we're assuming it's going to be a valid move. That makes this implementation easy. The following script gets us started:
function moveTile(t){ //more code here } We define the function to take one argument: t . This single argument is the tile to move. You can go up to the shuffleTiles function and see that we are calling moveTile on a reference to a tile movie clip. When we're inside, we need to swap t with the blank space. First we create a temporary set of variables to hold the blank space's position:
tempx=blankx; tempy=blanky;
Then we move the blank space to the index of the tile we're moving ( t ):
blankx=t.currentx; blanky=t.currenty;
From here, we can move the tile to the temp indexes, where the blank used to be:
t.currentx=tempx; t.currenty=tempy;
Of course, everything we've done so far is just with the indexes. We need to move the tile on the screen with the following script:
t._x=t.currentx*h_space; t._y=t.currenty*v_space;
That completes the moveTile function. There is only one more function we've talked about that has not yet been implemented. Remember that when we created our tile clips, we attached an onRelease handler called tile_onRelease_method , but we never defined it. It's time to implement that function now.
What exactly do we need to do when a user clicks on a tile? First we need to determine whether the move is valid (tile is adjacent to the blank space). We can do that with an if statement using some logical operators to test our indexes against the position of the blank space. The following script defines the handler and adds this valid move check:
function tile_onRelease_method(){ if((Math.abs(this.currentx - blankx) == 1 && this.currenty==blanky) (Math.abs(this.currenty - blanky) == 1 && this.currentx==blankx)){ //more code here } } As you can see, that large conditional is doing several tests. This is how it works. The preceding conditional is broken up with parentheses into two main pieces and joined with an OR. The first conditional is Math.abs(this.currentx - blankx) == 1 && this.currenty==blanky . What does that do? Well, it checks to see if the absolute value of the difference of currentx and blankx is equal to 1. That happens only if the currently clicked tile is horizontally adjacent to the blank tile. If it is horizontally adjacent, we need to make sure that the vertical indexes are identical. In other words, if its x index differs by 1, its y index must not differ at all.
The second part of the conditional does the same for the vertical position. It reads Math.abs(this.currenty - blanky) == 1 && this.currentx==blankx . And this does the same thing with the y index. If the difference in y indexes is 1, the indexes are adjacent vertically. If at the same time the x index is equal, the indexes are truly adjacent.
These two compound AND statements are bound together with a logical OR. The effect of this statement is that the if block will execute only if the clicked tile is truly adjacent to the blank space.
Inside the if statement, we can go about the business of doing what we need to do when a tile is clicked. Namely, we can increment the score, move the tile, and test the game for a win. The following script does that:
score++; moveTile(this); testForWin();
As you can see, score is incremented in the first line. Then the moveTile function is called with the currently clicked tile as an argument. Finally, we call a function named testForWin , which has not been defined yet.
| Note | Remember that this function is attached to a clip instance. The use of the this keyword refers to the clip to which the function is attached. When we call moveTile(this); ,we end up calling moveTile on whichever tile the user actually clicked. |
That completes the onRelease handler for the tile clips. The only remaining task is implementing the testForWin function.
The testForWin Function
As you know, we're storing the tile's solved position as its index in the array, and we're storing its actual position in the currentx and currenty properties. That makes the test for a solved puzzle simple. We simply need to loop through all the tiles, and if they are currently in their solved positions, we have a winner. Let's start with another double for loop:
function testForWin(){ solved = true; for(i=0;i<4;++i){ for(j=0;j<4;++j){ //more code here } } //more code here } As you can see, we're using a double for loop like I said, but notice the variable declaration before the loops. I've created a variable named solved and I'm setting it to true . That will be used in our test for a solution. Now we have our double loops. Let's look at the code that goes inside it:
if(i!=blankxj!=blanky){ if(tile_array[i][j].currenty != i tile_array[i][j].currentx != j){ solved=false; } } We have a conditional that checks to see if the current iteration indexes are the same as the blank space. That's because we don't want to test if the blank spot is in the right location. The blank spot isn't actually a movie clip, and testing it would cause problems, so we skip that one array location.
For every array location other than the blank one, we do the test between the currentx and currenty indexes and the current indexes i and j . But we do these tests with a logical NOT operator. In other words, if that inside if statement is ever true , some tile is in the wrong location and the puzzle is not solved.
If we make it all the way through our double loop's 16 iterations without solved being set to false , we know the puzzle is solved. That leaves us with the following script that goes inside the testForWin function, but after the double for loop:
if(solved){ attachMovie("winner"," winner",winner_depth); winner._x+=50; winner._y+=50; } As you can see, if solved is still true , we run a small block of code that first attaches the winner clip that gives our user the message that he's won, and then we position the winner clip. That's all there is to it.
If you test your movie now, everything should work perfectly and look like Figure 5.32. I can't find any bugs , so I'm not going to write an empty testing section. Instead, I'll move right along to the code listing.

Figure 5.32: The game should be working perfectly now. Everything has been implemented.
Complete Code Listing
What follows is a complete listing of the code for Sliders . You can use this section to see the script in its full context and more easily follow it during the explanation sections.
//depth settings for dynamic clips scoreboard_depth=2; resetbutton_depth=3; solutionbutton_depth=4; tile_depth=1000; winner_depth=999999; //blank space starts at tile_array[3][3] blankx = 3; blanky = 3; //horizontal and vertical spacing variables h_space = (445/4)+1 v_space = (400/4)+1; //create our 2D array tile_array = new Array(); for(i=0;i<4;++i) tile_array[i]=new Array(); //create and set up all the tiles for(i=0;i<4;++i){ for(j=0;j<4;++j){ if(i!=3 j!=3){ //r and c are for row and column; must be 1 more than i,j r = i+1; c = j+1; //attach the proper tile attachMovie("tile "+r+c, "tile "+r+c, tile_depth++); //add tile to the array tile_array[i][j]=this["tile "+r+c]; //position tile tile_array[i][j]._y = i*v_space; tile_array[i][j]._x = j*h_space; //scale tile tile_array[i][j]._height = 98; tile_array[i][j]._width = 110; //assign current position indexes tile_array[i][j].currentx = j; tile_array[i][j].currenty = i; //assign button functionality tile_array[i][j].onRelease= tile_onRelease_method; } } } //create scoreboard attachMovie("scoreboard"," scoreboard",scoreboard_depth); //position scoreboard scoreboard._x=300; scoreboard._y=425; //create reset button attachMovie("button"," resetbutton",resetbutton_depth); //position button resetbutton._x=65; resetbutton._y=450; //scale button resetbutton._xscale = 50; resetbutton._yscale = 50; //stop button's playhead resetbutton.stop(); //assign button text resetbutton.mytext.text = "Reset"; //assign button functionality resetbutton.onRelease = function(){ shuffleTiles(); winner.removeMovieClip(); } //create solve button attachMovie("button"," solutionbutton",solutionbutton_depth); //position button solutionbutton._x=200; solutionbutton._y=450; //scale button solutionbutton._xscale = 50; solutionbutton._yscale = 50; //stop button playhead solutionbutton.stop(); //assign button text solutionbutton.mytext.text = "Solve"; //assign button functionality for pressing down solutionbutton.onPress = function(){ for(i=0;i<4;++i){ for(j=0;j<4;++j){ tile_array[i][j]._y = i * v_space; tile_array[i][j]._x = j * h_space; } } } //assign button functionality for releasing solutionbutton.onRelease = function(){ for(i=0;i<4;++i){ for(j=0;j<4;++j){ tile_array[i][j]._y = tile_array[i][j].currenty*v_space; tile_array[i][j]._x = tile_array[i][j].currentx*h_space; } } } //shuffle the tiles for the beginning of the game shuffleTiles(); //function to shuffle all the tiles randomly function shuffleTiles(){ //reset score score=0; //mix up by making 150 random moves for(iterate=0;iterate<150;++iterate){ //find adjacent random tile changex=blankx; changey=blanky; //get rand_int such that it is either -1 or 1 rand_int = getRandom(-1,1); if(getRandom(0,1)) changex = blankx + rand_int; else changey = blanky + rand_int; //if our random tile is on the board (in bounds) if(changex >= 0 && changex<=3 && changey >= 0 && changey<=3){ //find which tile we're actually looking at and move it for(i=0;i<4;++i) for(j=0;j<4;++j) if(tile_array[i][j].currentx == changex &&  tile_array[i][j].currenty == changey) moveTile(tile_array[i][j]); } } } //function to move one tile function moveTile(t){ //temp holder for blank tile indexes tempx=blankx; tempy=blanky; //move blank blankx=t.currentx; blanky=t.currenty; //move tile t.currentx=tempx; t.currenty=tempy; //position tile on stage t._x=t.currentx*h_space; t._y=t.currenty*v_space; } //functionality for the tile clips when they are clicked function tile_onRelease_method(){ //if the clicked tile is a valid move if(((Math.abs(this.currentx - blankx) == 1 && this.currenty==blanky)) ((Math.abs(this.currenty - blanky) == 1 && this.currentx==blankx))){ score++; moveTile(this); testForWin(); } } //function to test to see if the puzzle has been solved function testForWin(){ //assume a solution solved = true; for(i=0;i<4;++i){ for(j=0;j<4;++j){ if(i!=blankxj!=blanky){ //if one tile is out of place, solve = false if(tile_array[i][j].currenty != i
  tile_array[i][j].currentx != j){ solved=false; } } } } //if we actually have a solution, create winner clip if(solved){ attachMovie("winner"," winner",winner_depth); winner._x+=50; winner._y+=50; } } //function to generate a random integer between minimum and maximum inclusive function getRandom(minimum, maximum){ return Math.floor(Math.random() * (maximum - minimum +1) + minimum); }
 EAN: 2147483647
Pages: 161