Creating Mouse Chaser
At this point, we're ready to start putting all this stuff together. It's time for our first real project, Mouse Chaser . We're going to start at the beginning and work through the development of the entire game one step at a time. In the future, we will use the same strategy to develop the rest of our games . The following is a rough list of the steps involved in developing a game from the ground up:
-
Dream up a game idea.
-
Write a design document.
-
Obtain art.
-
Implement.
-
Test and debug.
-
E-mail your friends a URL.
Although this is a numbered list, the steps don't always occur in that order, and most often, you iterate over the list several times, going back and making changes to previous steps as the process moves along. For example, you might not get your art before implementation if you are working with an artist. If that's the case, you can use generic placeholder art during implementation and swap it out when your artist finally comes through with the goods.
Many times during both implementation and testing, you'll make changes to the design document. It's one thing to imagine the way the aliens will shoot the bouncing magnetic bullet mines, but it's another thing altogether to get through the testing phase saying, "Wow! Those bullet mines really worked out well." Sometimes the design isn't as fun to play as you had imagined and you have to make changes. You'll also find that step 6 will provide you with plenty of feedback that will send you back to make changes. Using this list as a rule of thumb, let's get started.
The Idea
What we want to do is create a game where the user's mouse is chased by a small creature. When the game starts, the creature will be placed at its home in one corner of the stage. It will immediately start moving toward the mouse. A target will be placed randomly on the stage, and the user must click it to return the creature to its home. When this happens, the target will move randomly , and the creature will begin to chase the mouse again. Each time the target is clicked, the creature will move faster until the user's mouse is finally reached, at which time the game will end. The number of targets clicked will be kept as a score.
I've drawn a basic layout of what I think the game will look like (see Figure 3.17).
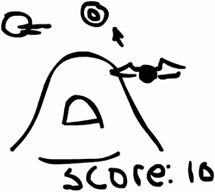
Figure 3.17: Here's a freehand drawing of what I think the Mouse Chaser game will look like.
Often, the final game won't look so much like my first drawing, but that doesn't really matter. The drawing is just a reference to help me make my idea tangible . I'll often show a drawing like this to my artist so she can get a feel for it as well.
At this point, I have a pretty good idea how the game is going to play, what game objects will exist, which objects will be actors, and so on. Now it's time to identify all the key pieces in the game and give some thought to how the code will be organized among them. For Mouse Chaser , we need the following:
-
The critter
-
The critter's home
-
The mouse pointer
-
The target
-
The score display
For the most part, this represents an exhaustive list of the items we'll need for our game. Now we have an idea of all the pieces, how they will work, and how the game will look. At this point, we're ready to begin the implementation and give a copy of all our current information to our artist so she can get busy making our game look good.
Creating the Library Assets
The first thing I generally do during implementation is create symbols for all known game assets. That means I'll have a library symbol created and named for each of the items in the list from the preceding section. After that, I can get busy deciding how to organize my script and begin typing into the Actions panel.
At this point, you are encouraged to get out the CD that accompanies this book and open the mouse chaser.fla file inside the Chapter 03 directory. Inside, you will find the complete implementation of the game. As I describe different portions of the development, it will help to refer to this .fla file to see the script and timelines firsthand.
Additionally, there is a second version of this game on the CD called mouse chaser unfinished .fla, which contains the game with all of its art assets intact, instantiated on the stage, but with the script removed. Use this copy if you want to follow along by adding script from the book to the .fla.
| Tip | Building the game along with me is a good idea if this is all new to you. By using my art and typing the script yourself, you will reinforce the things I'm teaching you in this book. You can also change constants and tweak equations to fine-tune the game play. Just play around and have fun as you following along with the development. |
The Critter
When I proposed this game to my artist, Rachel, she decided that the critter would be a cute purple bat, seen in Figure 3.18. As I requested , she created a two-frame animation of the bat flying. After I received Rachel's art, I couldn't stop myself from tweening it to give it a more fluid animation. The results of my tweening can be seen by editing the bat clip in the library. This animation is not relevant to the actual game, though; it's simply eye candy .
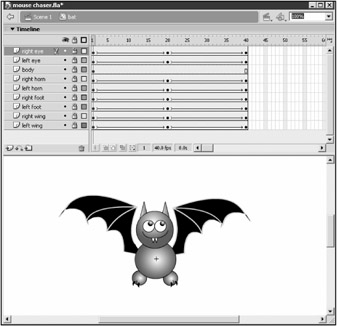
Figure 3.18: My artist, Rachel, decided that the critter would be a fat purple bat with flapping wings. I then created some tweened animation for it.
In any event, Rachel's process of art creation was to develop the art using a common vector art development software and then export it as an .swf file. I was then easily able to import that .swf file into the critter movie clip, which I renamed to bat. Once there, I instantiated the bat clip one time on the stage, named it bat , and placed it in its own layer, also named bat .
| Note | When I tweened the bat art, I was forced to break the single piece into multiple symbols. These individual pieces of the bat are graphic symbols and are kept in the bat art folder in the library. Consult the Flash Manual for more information on tweening animation. |
The Critter's Home
When I asked my artist for a home for the critter, she sent me the art you can see in Figure 3.19. Because the art was much bigger than I expected, I decided to make the home be a background for the entire movie. I changed the movie size to match the art at 350 — 470 pixels. The actual home for the bat will be the black cave area in the center of the picture.
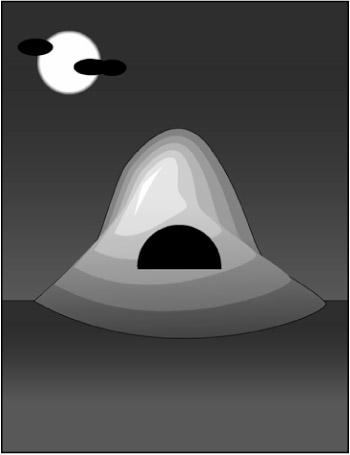
Figure 3.19: The critter's home makes the backdrop of the game.
| Tip | It doesn't really matter what program you use to create your art. Many different programs allow you to develop both vector and raster art that can be imported into Flash in any of several formats. You can, of course, create all the art in Flash. It boils down to what is most convenient for you. |
Rachel made a cave for the bat's home. The art was so big that I made it the entire background for the movie. Because the critter's home was now a bat cave, I decided to change this symbol name as well. I made the change in the library and was sure to make the same change on the design document's asset list. After finishing the bat cave symbol, I instantiated it one time on the stage in a layer named background . There is no need to name the instance, although doing so won't hurt.
| Tip | As you can see, during the development of the game, many changes were made to the original game design. The critter's home was moved to the center of the stage, and both the critter and his home were renamed to bat and bat cave, respectively. Don't be afraid to make changes like this; just keep your design documents updated when you make them. |
The Mouse Pointer
The mouse pointer is, of course, already a built-in part of Flash. I had originally thought of changing the mouse pointer from the default arrow into something more interesting, but that requires the use of a technique we won't discuss until several chapters from now. I decided to leave the mouse pointer as an arrow for now, and explain the process of changing it later. There was nothing else to do for this game asset.
The Target
For this asset, I simply drew some concentric rings using the toolbar and then set up a static text box to read Click me . By changing the color of the text at different keyframes, the final clip will appear to have flashing colored text. The target can be seen in Figure 3.20. After finishing the target clip, I instantiated it one time on the stage, named it target , and placed it in its own layer, also named target .
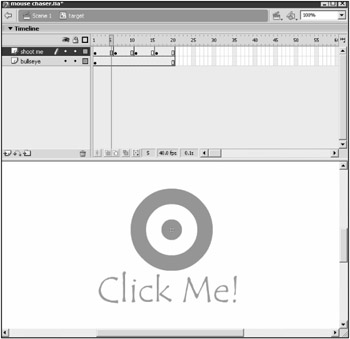
Figure 3.20: The target movie clip has flashing text and will be moved about the stage for the user to click on.
| Caution | When you open my .fla, you might get a Substitute Font dialog box. If you do, it's because you don't have the Tempus Sans ITC font installed on your system. Choose any substitute font, and it should work fine. When you publish movies, you have the option of embedding the font in your final .swf file so that the user can see your font choice even if that font is not installed on his system. |
| Note | The reason each instance is instantiated in its own layer is to make stacking the clips correctly easier. If all instances were in the same layer, they would be stacked according to instantiation order. I would prefer to be able to stack them more easily, so they are all placed in separate layers. Then the layers are moved up and down relative to each other until the correct stacking order is achieved. In this case, the layers are stacked from top to bottom in the following order: bat, scoreboard, target, background. |
The Score Display
As I indicated in Chapter 2, a text box can be tied to the value of some script variable to give the user some feedback. To accomplish this with the player's score, I created a symbol named scoreboard . Inside it, I placed two text boxes. The first was a static text box and simply contained the word Score . The second text box was dynamic, and in the Var field, I entered the value of _root.score . That's because I had already decided that the player's score would be kept on the main timeline (a good place to keep this data). No matter where in my hierarchy of movie clips I placed a scoreboard instance, the dynamic text box would refer to the score variable that existed on the main timeline. You can see the scoreboard in Figure 3.21. After creating the scoreboard clip, I instantiated it once in a layer called scoreboard . The instance doesn't need to be named, although it won't hurt to do so.
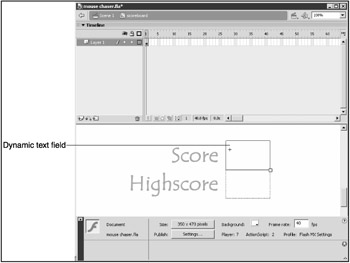
Figure 3.21: The scoreboard symbol contains two text boxes. The second one, a dynamic text field, is selected in this figure and its Var field is set to _root.score .
Now that the scoreboard has been created, I think it would be nice if the game maintained the highest score achieved during the current execution of the movie. That's simple enough, so let's go ahead and make an addition to the scoreboard clip in the library. Edit the scoreboard and add a second static text box that says Highscore . Now add a second dynamic text box and alter its Var field to be _root.highscore . The scoreboard is now ready for use. Notice that the instance on the stage has changed to reflect the changes you made to the clip in the library.
Script Organization
Now that we have all of our assets created, it's time to consider how we're going to put our script together. In Flash, there are usually dozens of ways to do any one particular thing, but some ways are vastly better than others. It's hard to fully qualify what differentiates a well-designed script from a poorly designed one, but in general, the script should be intuitive to maintain and alter.
Obviously, there will be some script on frame 1 of the main timeline that will control the game. There will also be script attached to some of the instances on the stage that will contain event handlers for mouse clicks and other user events. The difficulty comes in developing the lines of communication between these different pieces of script.
| Note | It's important to keep in mind when organizing scripts that you generally want as much of your script on frame 1 of the main timeline as possible. The more script you place inside movie clip timelines and on stage instances, the harder it is to make changes to your scripts. In Chapter 4, we'll discuss a powerful tool that allows us to place nearly all our script on frame 1 of the main timeline, but for now, we have to place some of it on the instances. |
It's important to give careful consideration to the functionality you want from your script before you start typing it in. If you start adding script before you have considered the over-all script design, you will often run into problems halfway through the implementation. Let's have a look at the main pieces of functionality we need in our game:
-
The bat must chase the user's mouse pointer around. If the bat reaches the pointer, it must reset the player's score to 0, decrease the bat's speed to its initial value, move the bat back to its home, and check to see if the player's score constitutes a new high score.
-
The target, when clicked, must move randomly, increment the player's score, increase the bat's speed, and move the bat back to its home.
That list represents the two logical sections in our game. Now that we've broken down the functionality a bit, it's easier to see where the script should go. When we're into the implementation, I might break these pieces up a bit more, but I prefer to get a start on the high-level implementation before I break things down too much.
| Tip | I can't stress enough how important it is to spend adequate time thinking about script organization. It will save you a great deal of time in the long run if you think things out before you start coding. On the other hand, it's not always bad to do one level of logical design and then implement it. As you implement each piece, you can break it down further if need be. This balance between design and implementation is important. |
Implementation
At this point, we've spent some time thinking about how things are going to be laid out. Now we're ready to actually implement the logical sections in ActionScript. As I stated earlier, we want to keep as much script on the main timeline as possible; that's our rule of thumb. The way this is done, in general, is to attach the necessary event handlers to the instances and have them call functions that are defined in _root (the main timeline). So with that as our battle plan, let's implement, shall we?
The moveBat Function
We need to move the bat at least a little bit every frame. An enterFrame handler will do this, so we should attach one to the bat instance. In each frame, the handler will make a call to a function called moveBat , which is defined in _root . The following is the event handler attached to the bat instance:
onClipEvent(enterFrame){ _root.moveBat(); } The use of _root on the moveBat call is required; without it, Flash looks for a function defined in the same scope as the event handler.
The implementation of moveBat has a few steps, so we should discuss a general plan of attack. The algorithm for the moveBat function is going to be something like this:
-
Move the bat instance.
-
Test to see whether the bat has caught the mouse.
-
If the mouse has been caught, then test for a high score, reset the score, reset the speed, and move the bat home.
Let's have a look at each of these items one at a time.
Move the Bat Instance
For step 1, moving the bat instance, we'll need to check where the mouse is and then adjust our bat's position accordingly , based on the current speed. The way it will work is this: The speed variable will actually indicate a step size for the bat. If the difference between the mouse and bat's x coordinate is bigger than the speed variable, the bat will be moved one step horizontally toward the mouse. The same rule will be applied in the vertical direction. First let's set up the moveBat function and set our initial speed to 1 with the following script:
speed = 1; function moveBat(){ } | Note | It would be nice if the bat were able to move in a straight line to the mouse instead of the stepping effect this routine creates. But to get the proper behavior, we need to use either trigonometry or the distance formula, both of which will be discussed in detail in Chapter 8, "Advanced Timing and Trigonometry: Blow 'Em Up ." |
The code for handling the horizontal case is as follows . This script goes inside the moveBat method described earlier:
if(bat._x < _root._xmouse - speed) bat._x += speed; else if(bat._x > _root._xmouse + speed) bat._x -= speed;
The if statement checks to see whether the bat can be moved to the right without going past the mouse. If it can, the bat is moved right. If it can't, there is another if statement to test whether there is room to move the bat left. The same code is used again for the vertical direction with the x positions swapped with y positions , as in the following script, which goes immediately after the previous script inside the moveBat function:
if(bat._y < _root._ymouse - speed) bat._y += speed; else if(bat._y > _root._ymouse + speed) bat._y -= speed;
If you are following along and building your own version, test the movie now. You'll see the bat chasing your mouse pointer, as in Figure 3.22.
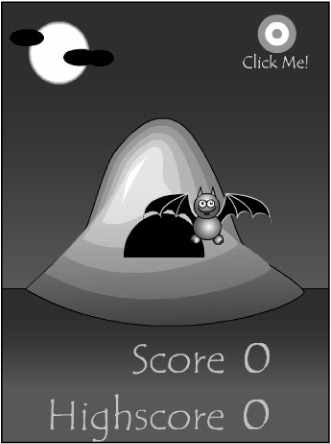
Figure 3.22: After you implement the first half of the moveBat function, you can test the move and watch the bat fly after the mouse pointer.
Test to See Whether the Bat Has Caught the Mouse
At this point, we've got the bat flying around after the mouse, and we're ready to move on to step 2. There are several ways we test to see whether the bat is close enough to the mouse. Any of the following are valid ways of doing this, and some depend on personal preference:
-
Use the built-in function MovieClip.hitTest() .
-
Use the distance formula.
-
Create our own hit testing function using the _width and _height properties.
-
Adapt the existing script that moves the mouse to test for proximity in both directions.
Over the course of this book, we'll be using all of these methods to test for what are called object collisions. In this case, I prefer the last method, which is to adapt the existing script. Because our existing script already tests for proximity, altering it to test to see whether we are close enough to catch the mouse should be relatively simple.
The changes, in fact, are extremely simple; we just test to see if all four if statements in the bat movement code fail. If they do, the bat does not need to move this frame, implying a collision with the mouse. The new moveBat function has a small addition to both the horizontal and vertical movement tests, as seen in the following code. It serves as a replacement for the move code discussed earlier. First we look at the new horizontal case:
caughtMouse = false; if(bat._x < _root._xmouse - speed) bat._x += speed; else if(bat._x > _root._xmouse + speed) bat._x -= speed; else caughtMouse = true;
The first thing to notice is that we've added a line up front that initializes a boolean named caughtMouse to false . Then a second change is made by adding a final else statement, which sets caughtMouse to true . You can see that caughtMouse will be true only if the bat moves neither left nor right. We make a similar change to the vertical movement, as follows:
if(bat._y < _root._ymouse - speed) bat._y += speed; else if(bat._y > _root._ymouse + speed) bat._y -= speed; else if(caughtMouse == true) trace("we caught the mouse"); The only change here is a final else if statement, which tests to see whether the caughtMouse is true . If it is, the mouse didn't move horizontally, and the fact that we are in the final else of the vertical block means we didn't move vertically either. The result is that we trace a message to the Output window. You can test the movie at this point to ensure this is happening. The bat should be chasing the mouse, and when it gets there, the Output window should be flooded with we caught the mouse messages every frame until you move the mouse. A sample of what this should look like is given in Figure 3.23.
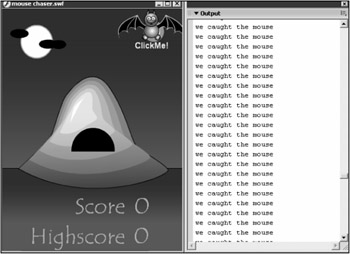
Figure 3.23: The new moveBat function traces a message when the bat collides with the mouse pointer. We'll now need to swap this trace call for a function call to one of our own functions.
Test for a Highscore, Reset the Score, Reset the Speed, and Move the Bat Home
Because tracing a message is not the desired output when the bat catches the mouse, we need to make a few changes. At this point, we have a decision to make. Should we place the code for resetting the game inside the last else if statement? That would work, but perhaps there is another option. We could define another function called resetGame that would do all the work involved in setting the game back to its initial state. The advantage of putting this functionality in a function instead of inside the else if statement is that if in the future we wanted to expand this game with more features, we might need to reset the game in another piece of script. By encapsulating the reset code in a function, we give ourselves the option of later implementing a Reset button or similar device without copying code.
The resetGame script is simple to implement. But before we do that, we need to decide exactly where the bat's home will be in stage coordinates. I simply placed the bat instance where I wanted its home to be and looked at the Info panel to see its exact coordinates. I entered these coordinates into the beginning of my root script, where I initialized all my variables that needed to be initialized at the beginning of the game. I created two variables called home_x and home_y and set them with initial values from the Info panel as follows:
home_x = 176; home_y = 260;
Then I swapped out the trace function with the caught the mouse message for a call to our new resetGame function. To actually implement this function, we have a simple set of tasks to perform. We must check to see whether there is a new highscore, and if so, we must set it. We must then reset the score, speed, and bat position. These tasks lead to an implementation as follows:
function resetGame(){ if(score > highscore) highscore = score; //set highscore score = 0; //reset score speed = 1; //reset speed bat._x = home_x; //reset bat position bat._y = home_y; } If you test this movie now, you should see the bat following the mouse and then returning to the home coordinate when it reaches it. That completes the implementation of the bat and leaves us only one small part: control of the target.
The testTarget Function
The control of the target instance will be set up in a similar way to the control of the bat. We will use an event handler on the target instance, which executes after a mouse click. The handler will simply call a function defined in _root that does the necessary work. The function is named testTarget , and the script attached to the target instance is as follows:
onClipEvent(mouseDown){ _root.testTarget(); } | Note | We didn't have to place the mouseDown event on the target instance; it could have gone on any instance. But because the target is the object we're trying to click on, it makes the most sense to place it there. |
As you can see, this is similar to the handler on the bat instance except that it traps mouseDown instead of enterFrame . Now it's time to implement the testTarget function.
Let's take a moment to consider the algorithm for testTarget . The following list shows the necessary steps:
-
Hit test to see whether the user has clicked on the target.
-
If he has, handle the target-clicked situation by increasing the score, increasing the speed, moving the bat to home, and moving the target.
Let's implement these two steps one at a time.
Hit Testing with the hitTest Function
We need to do another collision detection of some kind. In this case, we want the test to tell us when the user clicks on the exact area of the target. The easiest way to get this functionality is to use a built-in function called hitTest , the general form of which is as follows:
boolean MovieClip.hitTest(x, y, shapeFlag);
| Note | When you're using the hitTest function, it's always best to make shapeFlag false if you can. It is much more efficient to allow Flash to use a bounding box around the movie clip to hit test against. In many cases, this approach is adequate, but sometimes you will want to test the point exactly against the shape of the movie clip. In that case, you need to set shapeFlag to true . |
This function returns a boolean value indicating either a collision ( true ) or a miss ( false ). The function is defined on a movie clip instance, which is the target of the hit test. The function takes three arguments: x , y , and shapeFlag . The x and y arguments indicate the point to hit test the clip against, meaning the point that is either inside the clip's shape or outside of it. The shapeFlag argument is a boolean that indicates whether to use the exact shape of the clip when testing ( true ) or whether to use a bounding box ( false ).
With this new hit-testing function in hand, let's implement the first part of the testTarget function as follows:
function testTarget(){ if(target.hitTest(_root._xmouse, _root._ymouse, true){ trace("user clicked the target"); } } | Tip | The bounding box that hitText checks against is created using the extreme edges of the movie clip. If you rotate the clip, the original bounding box is not rotated ; instead, a new bounding box is constructed each time the rotation changes. |
As you can see, we are calling the hitTest function with the mouse coordinates and a shapeFlag value of true . This tests the mouse's position against the target instance, using the exact shape of the target. Try it, and you should see something similar to Figure 3.24.
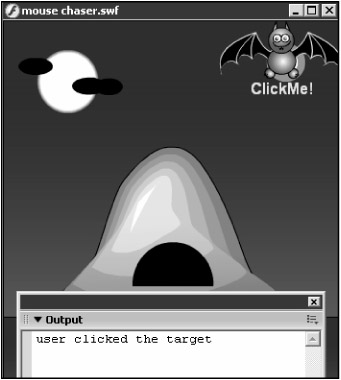
Figure 3.24: The hitTest function will return true only if the coordinates we supply are within the area of the movie clip that the function is called on.
At this point, you can test your movie and see output similar to that in Figure 3.24 when the target is clicked. From here, all we need to do is swap out the trace call with the script for handling the target-clicked situation.
Handling the Target-Clicked Situation
We need to swap out the trace command with some script that will handle the target-clicked situation. The following steps are necessary for doing that:
-
Increase the score.
-
Increase the speed.
-
Move the bat home.
-
Move the target randomly.
Increase the Score
Step 1, increasing the score, is as simple as deciding how many points each click is worth. I've decided to award 10 points for each successful click, although you could do something more clever, such as increasing the score as the bat moves more quickly. Remember: This script goes inside the testTarget function:
score += 10;
That's simple enough. Now let's handle step 2: increasing the speed.
Increase the Speed
I've decided to increase the speed by 1 each time, although you can play with this number. To make modification of the speed change easy, I've added a variable to the beginning of the _root script called speedChange . Its value is set to 1, but by altering it, you can increase the rate at which the game becomes harder. Try playing around with this value to get something you like, and don't be afraid to use a decimal value such as 1.25 or .5. From there, when I increase the speed in the testTarget function, I can add speedChange to the speed value. The benefit of using a variable to control the speed change is that when it comes time to tweak this variable during testing, the initialization of the variable happens at the top of the root script, which is easy to find. The following code increases the speed:
speed += speedChange;
Move the Bat Home
We also need to move the bat back home, which is step 3. That's easy enough, and we've already seen the code to do so. The code is as follows:
bat._x = home_x; bat._y = home_y;
Move the Target Randomly
That leaves us with the final task: step 4. We need to move the target randomly, but we don't yet know how to generate a random number in Flash. Fortunately, Flash gives us a built-in function to do just that. Its name is random , and it can be found in the Math object. The general form of the Math.random function is as follows:
number Math.random();
| Note | There is another function for generating random numbers . It is a global function called random , but it has been depreciated. Depreciated in this case means that there is a new function that is preferred, and the older version might not always exist in future versions of Flash. As a result, make sure to prefix your call to the random function with the Math object. |
As you can see, the function returns a number, it is located in the Math object, and it takes no arguments. The return value will always be a random number that is greater than or equal to 0 and less than 1. In other words, the return value will be >= 0 and < 1 in all cases. The only trick is getting a number that is between 0 and 1 turned into an integer between any two given values. I have placed the actual implementation inside a function called getRandom . This function is one I have defined, and its general form is this:
number getRandom(minimum, maximum);
The return value will be a random integer between minimum and maximum inclusively. That means that the return value will be greater than or equal to minimum and less than or equal to maximum. The actual implementation of this function is as follows:
function getRandom(minimum, maximum){ var myNumber = Math.random(); //get myNumber: 0<= number < 1 var scale = maximum - minimum + 1; //determine scale amount myNumber *= scale; //scale the number myNumber += minimum; //shift the number myNumber = Math.floor(myNumber); //truncate the number return myNumber; //return the number } Although it's not imperative that you understand this code, we should go through it anyway. First, we get a new random number from the existing generator. As stated previously, this number is greater than or equal to 0 and less than 1. We need to scale this number into the range contained between minimum and maximum . We do this by first taking the difference between the two and adding 1. We need this extra 1 added in for reasons that will be clear soon. We then scale the random number up by multiplying it by the scale factor. Then we need to shift the scaled number into the correct range by adding minimum to it. From there, we do one final operation before returning the value: We use the floor function, which has the following general form:
number Math.floor(number);
This function is contained in the Math object, as you can see. It takes one argument: a number. Its behavior is to return the closest integer that is less than or equal to the given argument. This essentially truncates the number ( drops off any decimal portion).
It's important to note at this point that the preceding script can be written more concisely. That would give us better performance and would probably be more readable, so let's consolidate it now. The following is a new implementation of getRandom that does the same thing in a more concise way:
function getRandom(minimum, maximum){ return Math.floor(Math.random() * (maximum - minimum +1) + minimum); } Because the extra variables are omitted, the script runs more quickly. In the future, it will be important for us to do things as efficiently as possible because Flash suffers from some severe performance problems even on the fastest of computers. There's good reason to get into the habit of making our code efficient.
With our new getRandom function defined, we can finish out implementation by gathering a couple random numbers to indicate a random position on the stage. To do this, we need to know the size of the stage in our script. There are a couple ways to do this ”one of which is by using the Stage object. This particular object's description will come in a later chapter, so for now, I've opted to simply define two variables at the top of the _root script that indicate the stage size. If at some point we want to change the stage size, all we need to do is change these two variables, and our script will work properly. The following code demonstrates these two new variables:
stageWidth = 350; stageHeight = 350;
Notice that I set the stageHeight to be 350 and not 470, the actual stage size. That's to prevent the target from appearing on top of the scoreboard.
Now we're ready to add the final lines to our testTarget function. The following code should move the target somewhere on the stage randomly:
target._x = getRandom(0, stageWidth); target._y = getRandom(0, stageHeight);
These two lines of script simply create numbers in the proper range and assign them to the target's position properties.
That's it! That's all the script required to run the game. You should now be able to test your movie and see something like Figure 3.25.
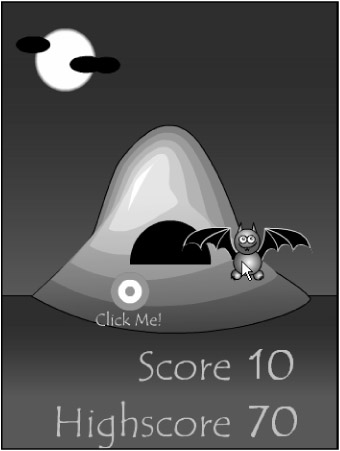
Figure 3.25: With the testTarget function complete, we are fully implemented and ready to test our game.
Testing
Yes, we're fully implemented, but our task is not quite complete. The game will inevitably contain bugs, and only testing the game will uncover them. Additionally, some things might need to be tweaked, such as different constants that represent things like step size or the scoring system. By testing our games thoroughly, we'll reduce the number of e- mails we get from our friends complaining about all the bugs in our games. And they will complain.
When you're testing Mouse Chaser , you might find something strange happening with the scoreboard. If you have initially set the text in your score text field to , then the first time you click on a target it will read 010 . This is due to a string conversion and concatenation, and is clearly not the intended behavior. To fix this problem, I simply initialized the score and highscore variables at the top of the _root script with the following code:
score = 0; highscore = 0;
Problem solved .
At this point, it's time to reflect on the script as a whole. It's important to take inventory of everything you've learned, so take a few moments to look over this code listing and recall how everything was put together.
Complete Code Listing
The following is a complete listing of all the code in Mouse Chaser . The following script is attached to the bat instance:
onClipEvent(enterFrame){ _root.moveBat(); } The following code is attached to the target instance:
onClipEvent(mouseDown){ _root.testTarget(); } And finally, the following script is attached to frame 1 of the main movie timeline:
//initialize variables score = 0; highscore = 0; speed = 1; home_x = 176; home_y = 260; speedChange = 1; stageWidth = 350; stageHeight = 350; function moveBat(){ caughtMouse = false; //move bat horizontally if(bat._x < _root._xmouse - speed) bat._x += speed; else if(bat._x > _root._xmouse + speed) bat._x -= speed; else caughtMouse = true; //move back vertically if(bat._y < _root._ymouse - speed) bat._y += speed; else if(bat._y > _root._ymouse + speed) bat._y -= speed; else if(caughtMouse == true) resetGame(); } function resetGame(){ if(score > highscore) highscore = score; //set highscore score = 0; //reset score speed = 1; //reset speed bat._x = home_x; //reset bat position bat._y = home_y; } function testTarget(){ if(target.hitTest(_root._xmouse, _root._ymouse, true)){ score += 10; //increase score speed += speedChange; //increase speed bat._x = home_x; //move bat home bat._y = home_y; target._x = getRandom(0, stageWidth); //move target target._y = getRandom(0, stageHeight); } } //function to generate a random integer //between minimum and maximum, inclusively function getRandom(minimum, maximum){ return Math.floor(Math.random() * (maximum - minimum +1) + minimum); } EAN: 2147483647
Pages: 161